Small Garden Bridges That Create Depth in Compact Landscapes
- Small Garden Bridges That Create Depth in Compact Landscapes
- Key Takeaways
- How to Choose a Small Garden Bridge
- Pick the Right Bridge Size
- Best Bridge Shapes for Small Spaces
- Compact Arched Designs
- Minimal Rope Bridges
- Low-Profile Stone Crossings
- Why Arched Bridges Add Depth
- When to Use a Straight Bridge
- Narrow Span Transitions
- Clean Modern Lines
- Small Garden Bridges Over Dry Creeks
- Add Water Features for More Depth
- Pair Small Bridges With River Rocks
- Add Lighting for Evening Drama
- Match Bridge Style to Your Garden
- Japanese Garden Bridge Ideas
- Arched Zen Bridge Forms
- Koi Pond Pairings
- Compact Garden Placement
- Stone Bridges With a Fairytale Feel
- Rustic Wood Bridges for Cozy Yards
- Tropical Rope Bridges for Small Spaces
- Place Your Bridge for Better Flow
- Plant Around the Bridge for Layers
- Choose a Bridge Color That Stands Out
- Bold Color Choices
- Blend With Landscape
- Use a Bridge in an Urban Garden
- Best Materials for Outdoor Bridges
- How a Small Bridge Transforms a Tiny Yard
- Creating Visual Depth
- Defining Garden Movement
For a compact scene, choose a small bridge with a 4–6 foot span, and keep it simple! A gentle arch makes the yard feel deeper, while cedar or weathered stone keeps things light and natural. Place it on a main sightline over a dry creek, gravel path, or tiny dip, then add low plants and a soft finish. It’s an easy DIY win, and the best depth trick might surprise you just ahead.
Key Takeaways
- Choose a 4–6 foot bridge in compact yards to keep proportions balanced and avoid crowding the landscape.
- Use a gentle arch or low-profile shape to lift the eye and create a stronger sense of depth.
- Place the bridge along the main sightline so it guides movement and makes the garden feel larger.
- Match materials and style to the setting, such as cedar for warmth or stone for a calm, modern look.
- Layer plantings and rocks around the crossing to frame it naturally and extend visual interest.
How to Choose a Small Garden Bridge
Where do you start when you want a small garden bridge that actually fits your yard? You start with scale, then style, and wow, it gets fun!
For tight spaces, a 4–6 ft bridge feels cozy; for most yards, 8–10 ft is the sweet spot.
Pick arched curves if you want extra depth, or straight lines for crisp visual contrast and a friendlier price.
Next, choose white cedar for strong material longevity, because it resists rot and insects and turns silver-gray over time.
Add a semi-transparent stain if you want color, then place it along your sightline for that welcoming crossing moment.
Pick the Right Bridge Size
Start with the bridge’s length, because size decides whether your garden feels cozy and inviting or crowded and awkward.
In a compact yard, a 4–6 ft bridge often nails scale to space harmony, giving you a tiny wow-factor without hogging room.
If you want a bit more presence, 8–10 ft usually feels just right, especially for linking beds or crossing a swale.
Keep your crossing need in mind, too.
The best size supports the path you’re guiding, and it keeps focal depth balance strong.
Go too big too fast, and the middle view loses breathing room—oops!
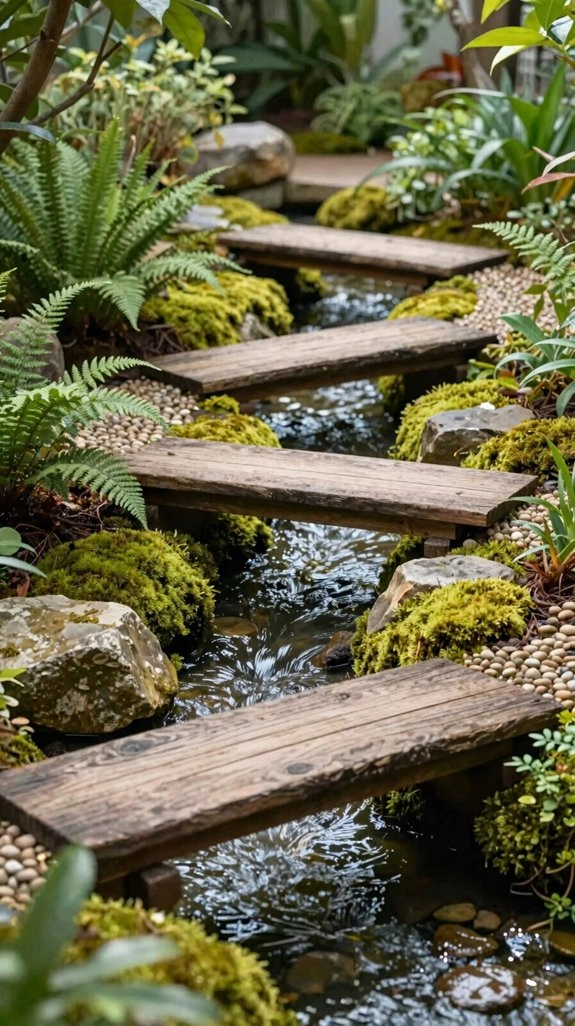
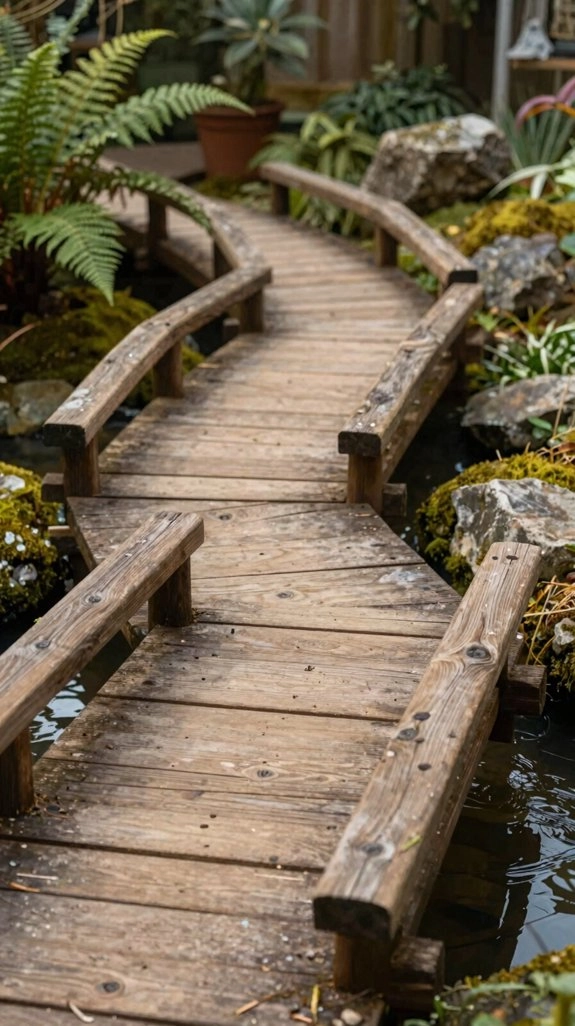
Best Bridge Shapes for Small Spaces
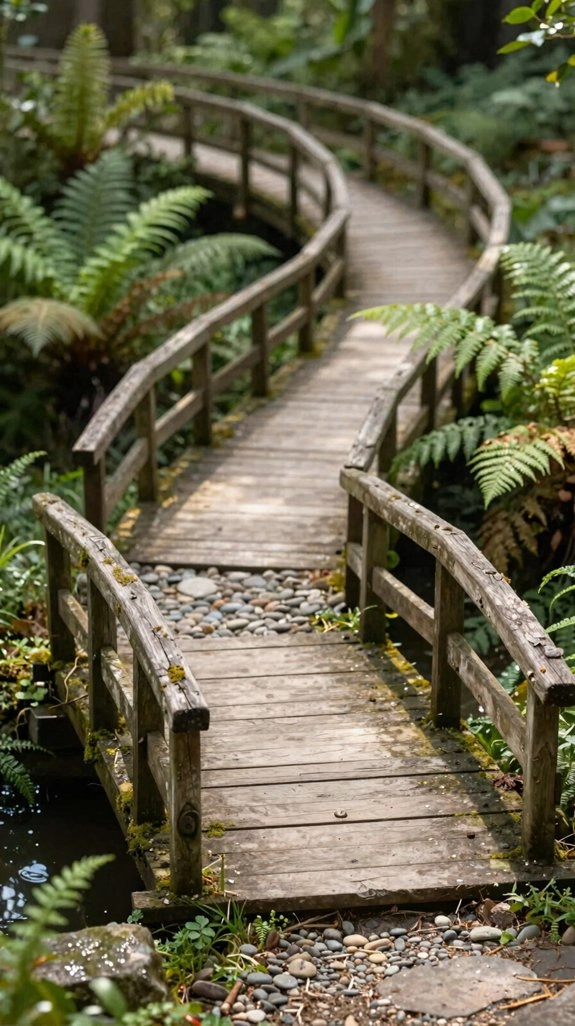
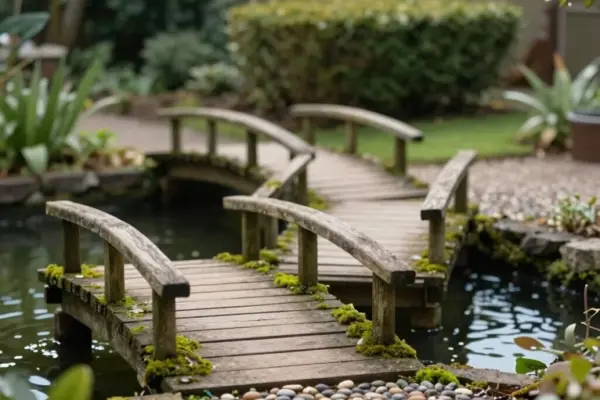
In a tight garden, you can make a big impact with a compact arched bridge, a low-profile stone crossing, or a minimal rope style, and each one adds a different kind of charm.
An arched shape lifts the eye and adds depth, while a stone crossing feels calm and sturdy, and rope bridges keep things light and a little playful—like your garden just put on sneakers!
If you want the most surprising effect, try a zigzag or clean, no-fuss design, because it can make your space feel bigger without hogging the spotlight.
Compact Arched Designs
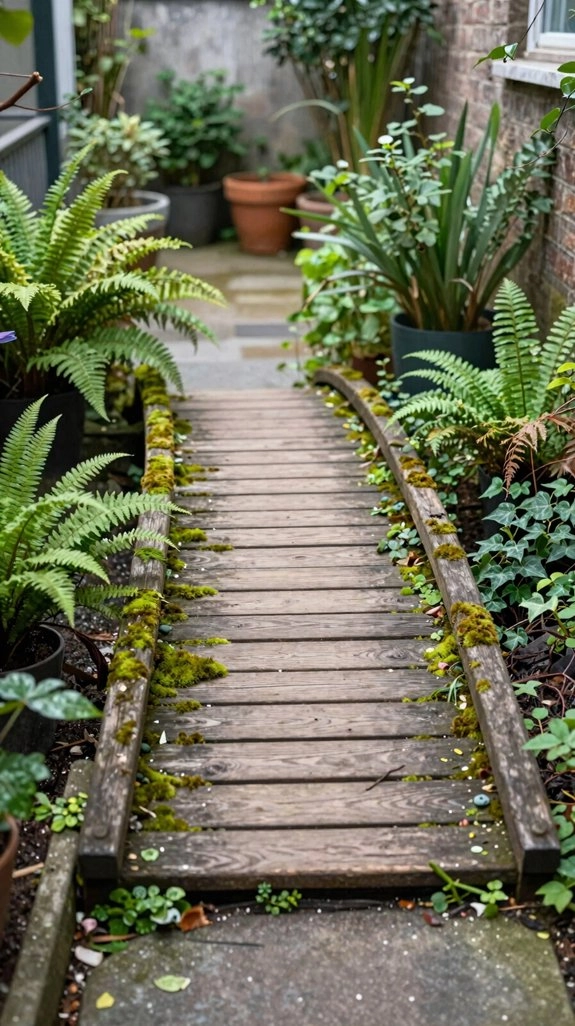
A compact arched bridge can work wonders in a small garden scene, because that gentle upward curve adds a little drama without gobbling up space. You get maximal contrast with flat paths, while warm material tones and restrained ornament keep things friendly, not fussy.
Choose a 4–6 ft span, and let it cross a dry creek bed or shallow dip, so the arch feels like a tiny viewpoint.
For low profile balance, line it with your main sightline, not off to the side.
Nice! That placement frames garden zones, adds depth, and makes your little garden scene feel welcoming, polished, and a bit magical.
Minimal Rope Bridges
If an arched bridge gives your garden a little lift, a minimal rope bridge brings a whole different kind of magic—light, airy, and just a bit playful! You’ll love how it opens the space below and keeps tight plantings feeling friendly, not crowded.
For bridge placement tips, set it where a short crossing adds curiosity, not clutter.
- Pick a straight deck with two anchor points
- Keep the span cozy, not wide
- Use rope and simple wood planks
- Let grasses and shrubs frame it
- Try lighting drama ideas at dusk
In lush backdrops, it feels extra dreamy, like your garden joined the club.
Low-Profile Stone Crossings
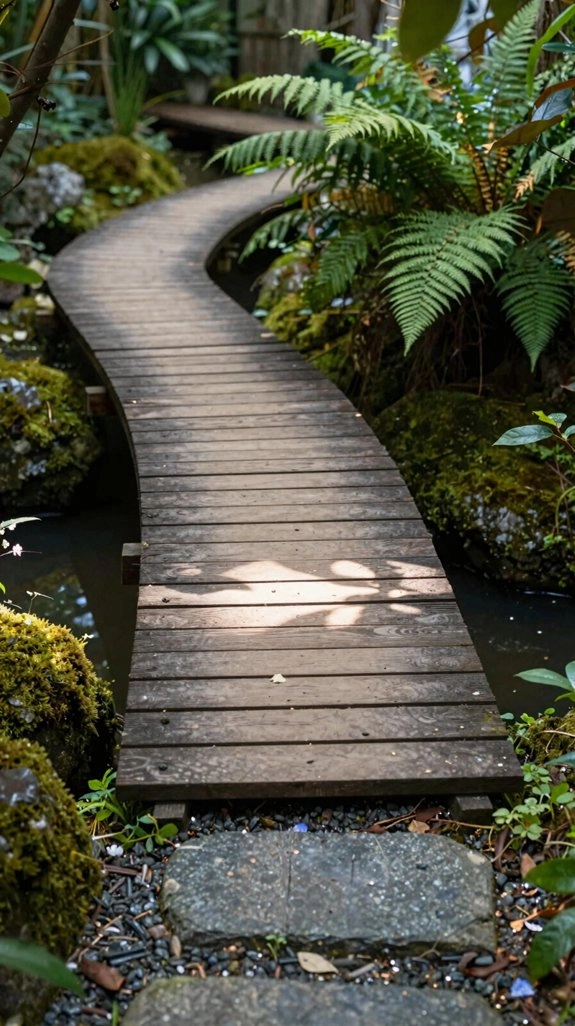
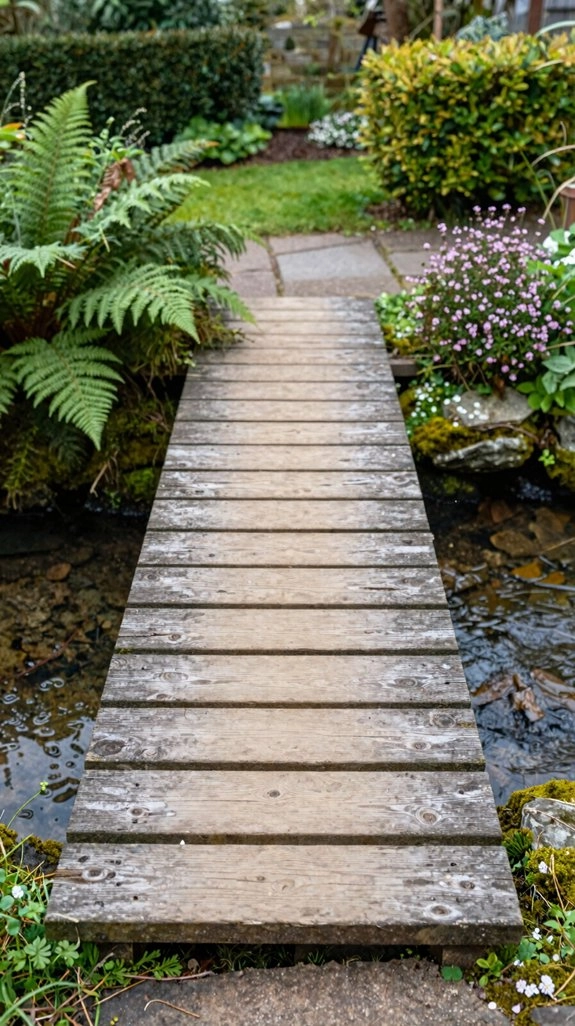
Stone underfoot can do big things in a small garden! You can choose a low-profile stone crossing that keeps your sightlines open and still adds that lovely layered depth. Pick a simple slab or gentle arch, then set it over mulch, gravel, or a shallow dry creek.
Use weathered gray stone, mossy edging, and river rocks to make the crossing feel real, like a tiny stream just went missing. At about 4 to 6 feet long, it stays neat, not bossy.
Add seasonal plantings, and if you install deck railings nearby, match the tone for a cozy, welcoming look!
Why Arched Bridges Add Depth
Because an arched bridge lifts the path instead of keeping it flat, it instantly gives a compact garden more “real” depth, and that little rise can make the whole space feel bigger.
You’ll notice the eye keeps moving, which helps Garden path layering feel natural and welcoming, like your yard’s inviting you onward!
- Place it over a dry creek bed for instant drama.
- Use simple wood or metal for easy DIY charm.
- Add focal point lighting to emphasize the curve.
- Keep the span small, around 4–6 feet.
- Frame two garden zones, and the crossing suddenly feels grand.
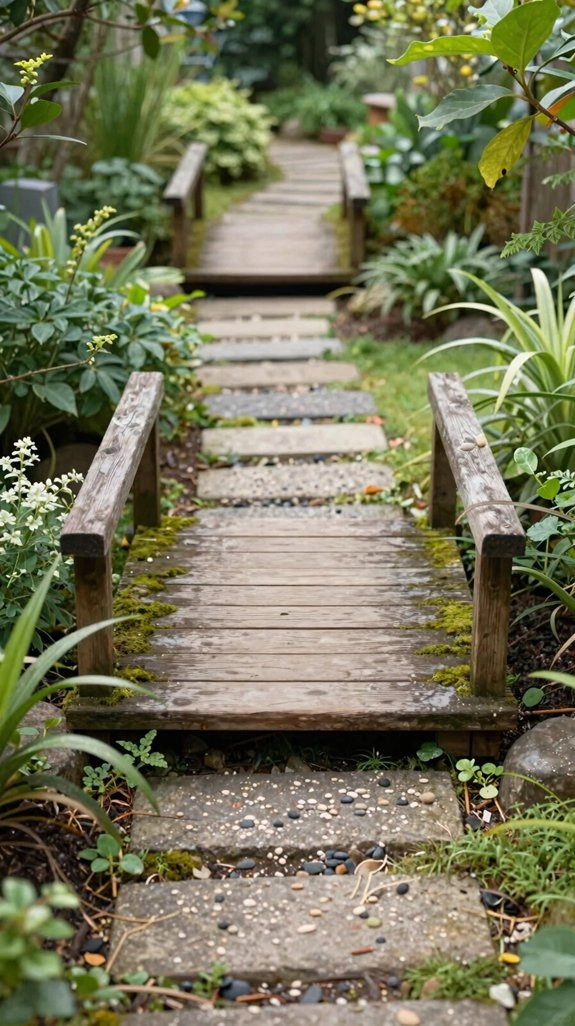
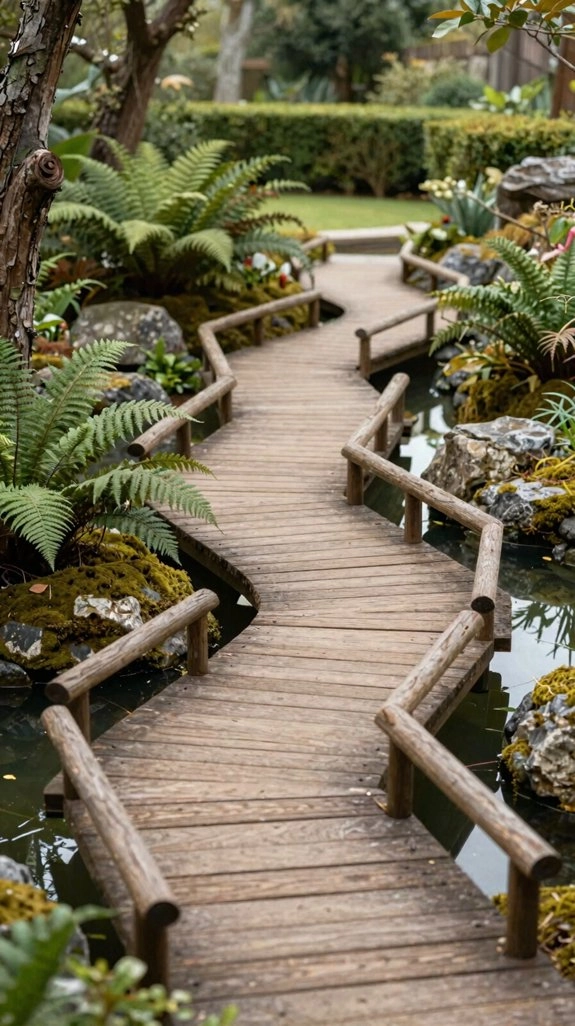
When to Use a Straight Bridge
You’ll love a straight bridge when you want clean modern lines, especially in a narrow side yard or over a tight dry creek bed where a big arch would hog the spotlight!
It gives you a neat, practical crossing that feels calm and simple, and it often costs less too—nice for your budget and your sanity.
Pair it with soft plantings or a gentle slope, and that straight span can still guide the eye and add depth like a well-placed hallway in the garden.
Narrow Span Transitions
When your garden only needs a narrow little hop, a straight bridge can be the smartest move! You get a tidy crossing, not a giant showoff, and your space still feels like one happy team.
- Use it for spans around 4–6 feet.
- Keep it on level or gently sloped ground.
- Choose simple boards, screws, and a sturdy frame.
- Add it for pathway contrast beside soft plants.
- Try modern placement in a clean line for a fresh look.
It’s often kinder to your budget, too, and gives you maximum width without crowding the scene. Nice little win!
Clean Modern Lines
A straight bridge can feel like the clean little line your garden’s been waiting for, especially if your yard leans modern and you want those crisp horizontal lines to play nicely with soft planting beds.
In compact spaces, it keeps the crossing open, not bulky, and that’s a win!
Use Bridge placement tips to line it up with a path or view, so your walkway positioning feels natural, not random.
Simple materials, hidden fasteners, and a plain finish keep the look sharp and budget-friendly.
Add low edging or sculptural plants, and you’ll get depth without clutter.
Nice, right?
Small Garden Bridges Over Dry Creeks
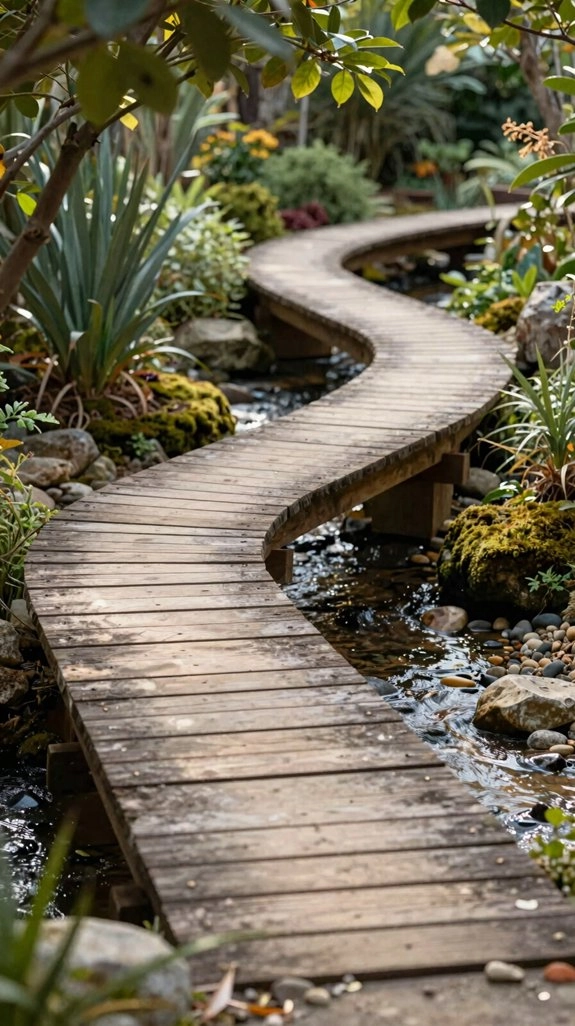
Small garden bridges over dry creek beds can make a compact yard feel like it goes somewhere, and that’s a pretty magical trick! You’ll create a crossing moment that invites you in, not just a pretty perch.
- Choose a 4–6 foot span
- Frame it on a clear sightline
- Add wayfinding cues with rock lines
- Give steps a safety grip
- Use cedar for weather-wise charm
Try mossy river rocks, layered gravel, and shallow slopes under the bridge.
It’ll look like the land formed itself, and your little retreat will feel friendly, grounded, and ready for wandering.
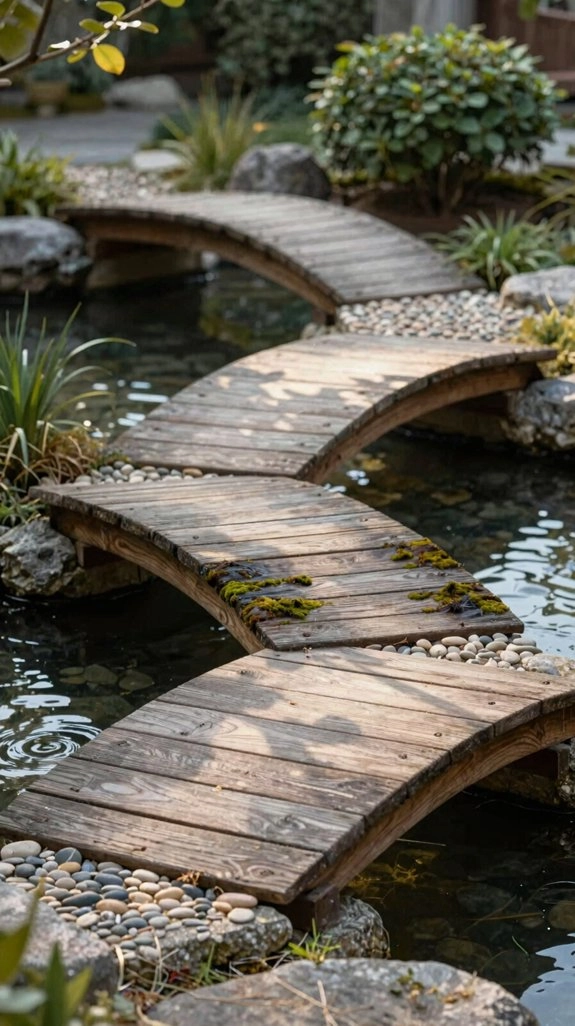
Add Water Features for More Depth
Even a tiny stream or pond under your bridge can add a big sense of depth, because your eye gets to travel from the walkway down to the water and the river rocks below—suddenly, your little garden feels like it has a whole extra room!
Try layered path planning with a small arched bridge, shallow water, and weather-friendly cedar, then let the arch reflect in the surface for a taller, longer look.
It’s simple, not pricey, and easy to pull off.
Bonus: sound masking water flow softens yard noise, and LED lights near the waterline make evening hangouts feel magical!
Pair Small Bridges With River Rocks
River rocks can make your little bridge look like it’s spanning a real creek, not just sitting on a patch of soil! You’ll love how they add depth fast, and they’re easy to use.
- Mix small filler stones with a few larger rocks.
- Pick muted gray, tan, and warm brown tones.
- Use color coordination with your bridge decking.
- Let contrast textures help the wood pop.
- Shape the rocky channel narrow, then taper it away.
Place heavier clusters near the front, then scatter smaller stones farther back. That little trick guides the eye, boosts belonging in your garden, and makes the whole scene feel自然? Wait—nature-made!
Add Lighting for Evening Drama
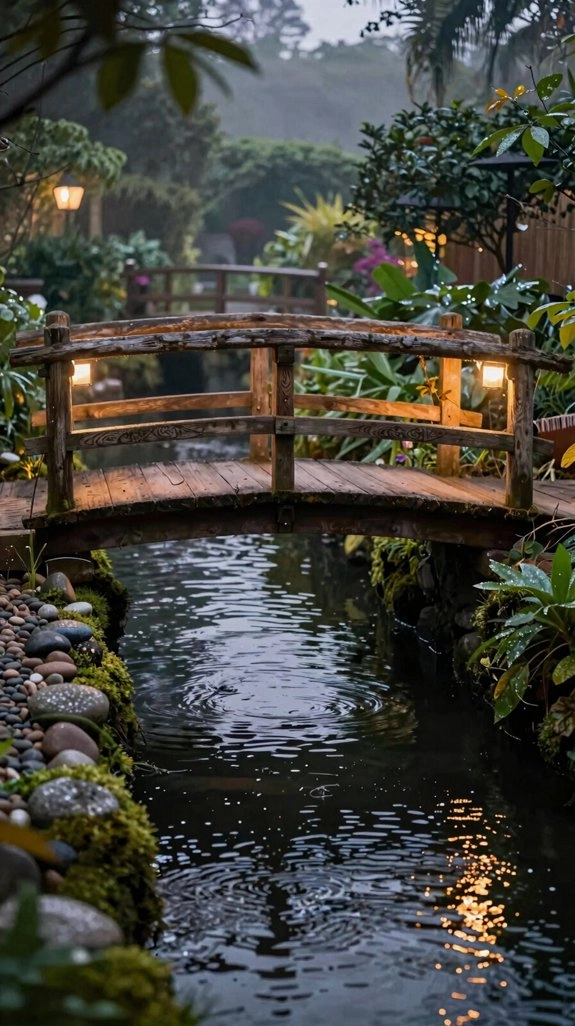
Want your bridge to keep showing off after sunset? Add low-voltage LED step lights or tiny recessed deck LEDs along the edges, and you’ll draw a clean line across your yard while the arch stays easy to read.
Use warm-white bulbs, around 2700K to 3000K, so your wood glows softly and the plants still feel like the stars, not the bridge boss.
For quick wins, tuck in Solar lighting options near the approaches.
If your bridge crosses gravel or river rocks, aim a few lights upward for sparkle.
In Bridge material selection, that gentle glow feels pricey, but it’s simple—and wow, it works!
Match Bridge Style to Your Garden
A bridge should feel like it belongs, not like it crash-landed in the middle of your garden! Choose a classic arch for depth, or a straight span for pathway contrast.
- Rustic wood warms cozy landscaping and suits coastal or traditional yards.
- Minimal stone keeps a modern look calm and clean.
- Match simple arches to strong horizontal lines in compact homes.
- Use soft plantings to let a bridge stand out, not fight.
- Keep small bridges around 4–6 feet, so the style and scale feel right.
When you pair materials, shape, and size, your garden starts to breathe.
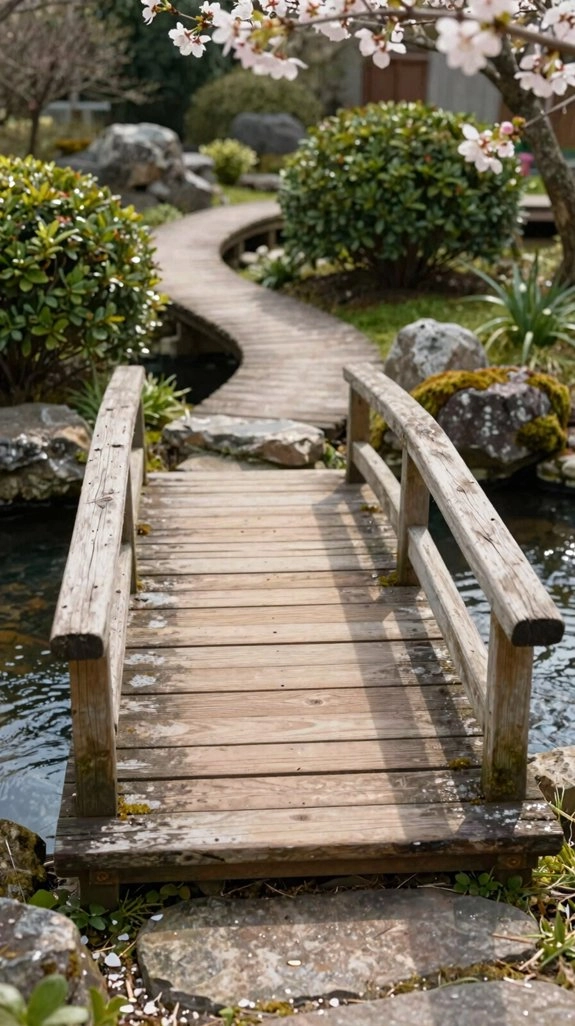
Japanese Garden Bridge Ideas
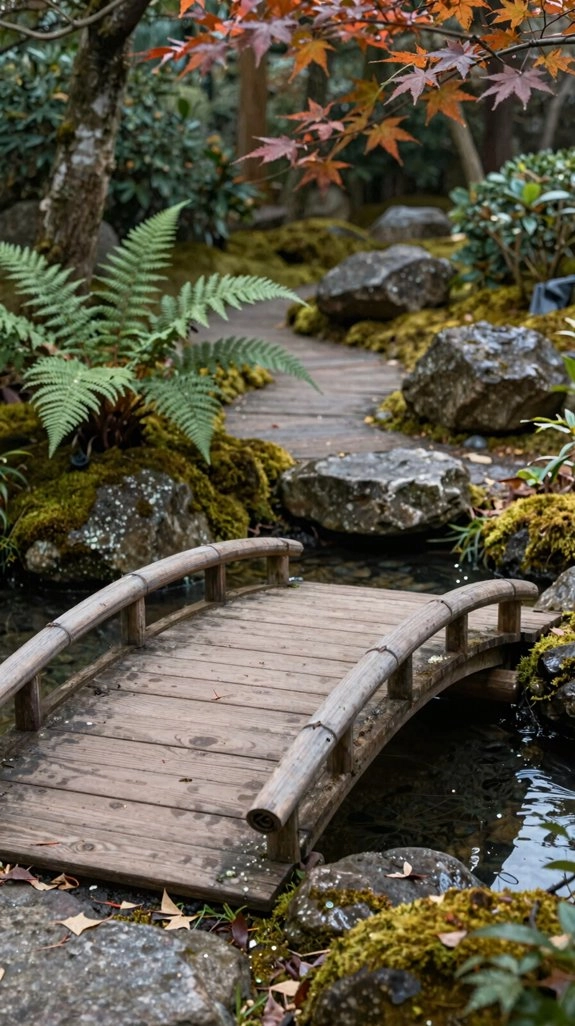
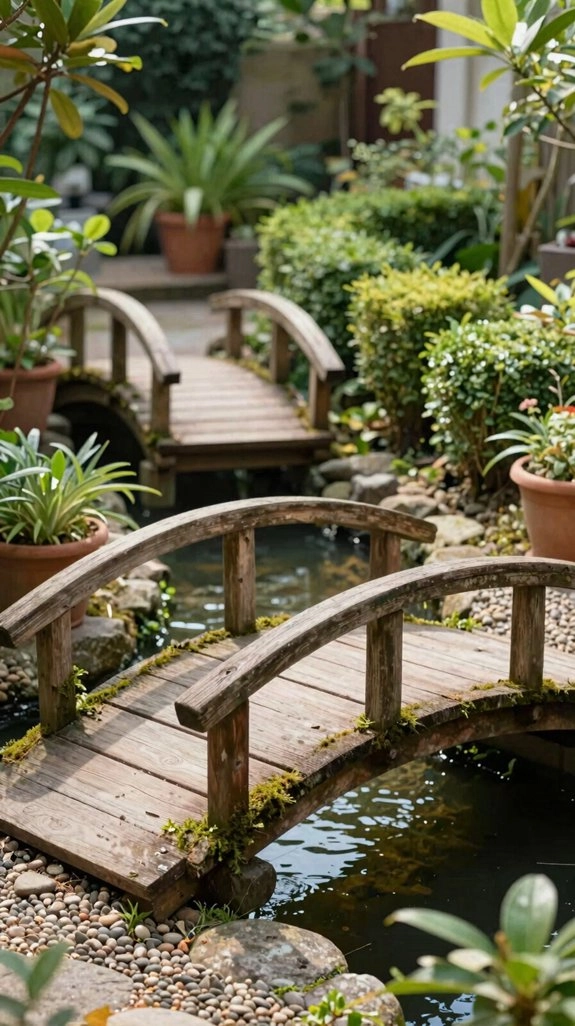
Japanese garden bridges can feel calm and magical when you choose a small arched form with a gentle rise, since that soft curve pulls the eye forward without shouting for attention.
Try placing one over a koi pond or a slim water feature, and use warm cedar or a touch of red for a friendly pop—yep, even a tiny bridge can steal the show!
Keep it compact and open, with minimal railings, so your garden feels deeper, lighter, and a whole lot more peaceful.
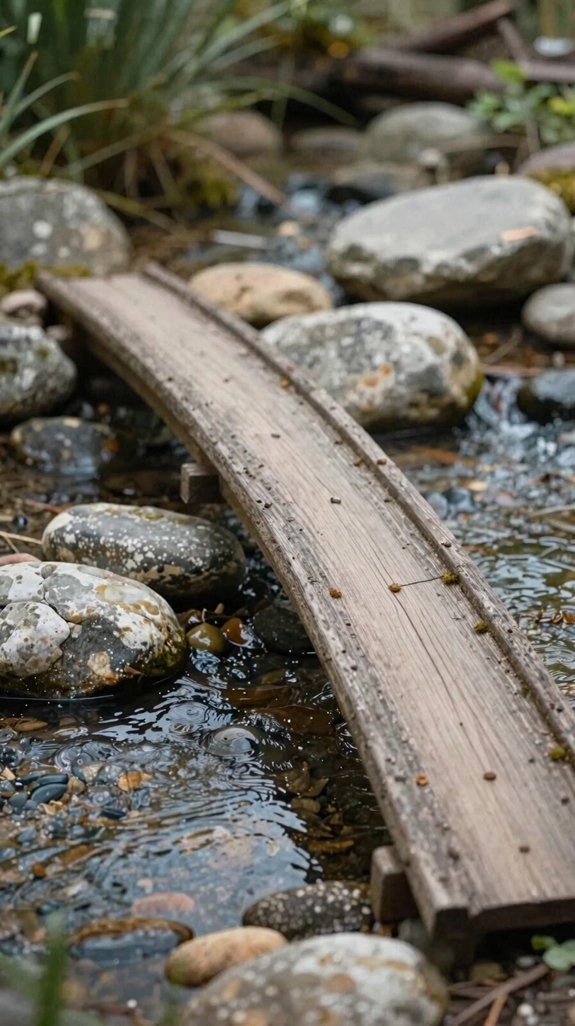
Arched Zen Bridge Forms
With just one graceful curve, an arched Zen bridge can make a tiny yard feel deeper, calmer, and a lot more intentional—pretty neat, right!
You’ll love how a short 4–6 ft span keeps things cozy while stretching the view upward.
- Use cedar for a warm, weather-soft look.
- Set it on a designed sightline for sightline framing.
- Keep rail details minimal, so the arch shines.
- Pair it with gravel meditation, not busy plantings.
- Let it read as a quiet passage over dry creek beds.
That’s it—simple, graceful, and very welcoming!
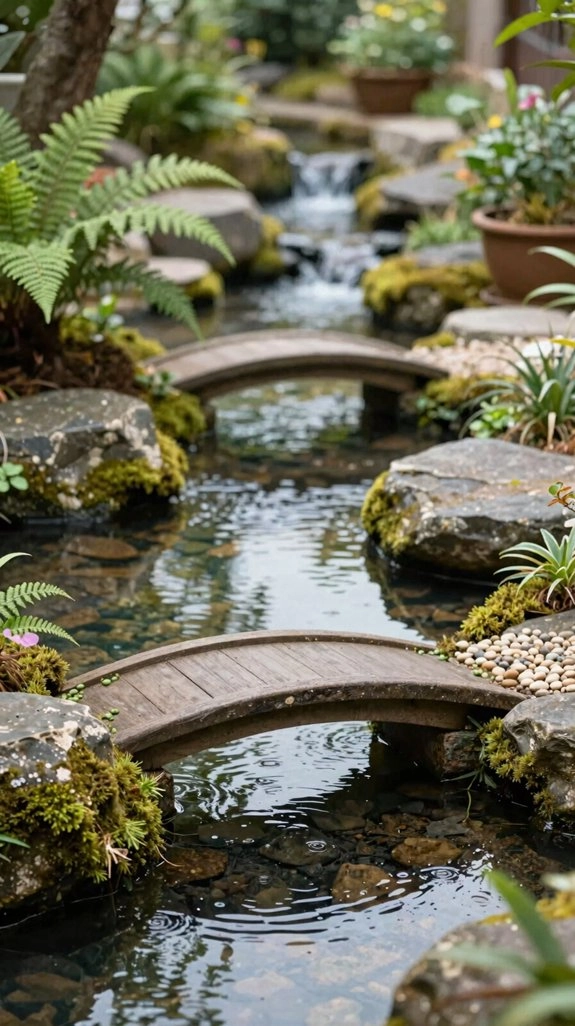
Koi Pond Pairings
Koi ponds and small arched bridges are a match made in garden heaven, because that little curve can make a compact yard feel deeper in a heartbeat!
You’ll love how a red wooden bridge pops against stone, gravel, and soft greenery, turning the crossing into a cheerful focal point.
Keep it about 4 to 6 feet wide, and you’ll get an easy, inviting pass without crowding the pond.
Set it with a main view, and the whole scene feels calm and meditative.
Add subtle lighting for lovely nighttime ambiance, then try a gentle dip under one end for extra wow!
Compact Garden Placement
In a compact garden, the smartest bridge placement is all about creating one clear “view moment” that feels calm and intentional, not crowded and busy.
Place your petite arch, about 4–6 ft wide, over a dry creek or slim rill, and let it guide your eyes to Zen focal points like a lantern or pruned shrub.
Use cedar or other warm wood, with subtle railings if you want them.
- Line it with sightlines.
- Bridge a gentle slope.
- Keep paths easy to walk.
- Add Seasonal framing.
- Choose a simple finish.
That little span can make your space feel longer, deeper, and wonderfully yours!
Stone Bridges With a Fairytale Feel

Across a tiny creek or a dry little rill, a stone bridge can feel straight out of a storybook!
For stone bridge placement, set it a bit above grade so the underside shows and the mossy rock textures catch the light on your viewing path.
Choose curved masonry lines, then tuck in low groundcovers and fern-like foliage to frame it with green, like the bridge just belongs there.
A weathered, soft-gray finish keeps it from looking too new, and in a small yard, it becomes a handy landmark that guides feet and saves muddy spots.
Pretty clever, right!
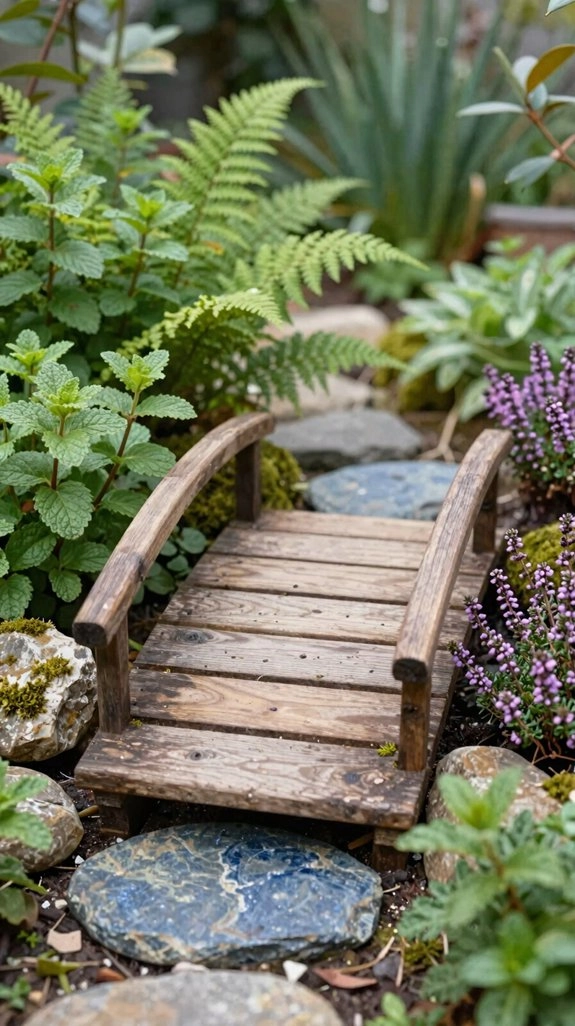
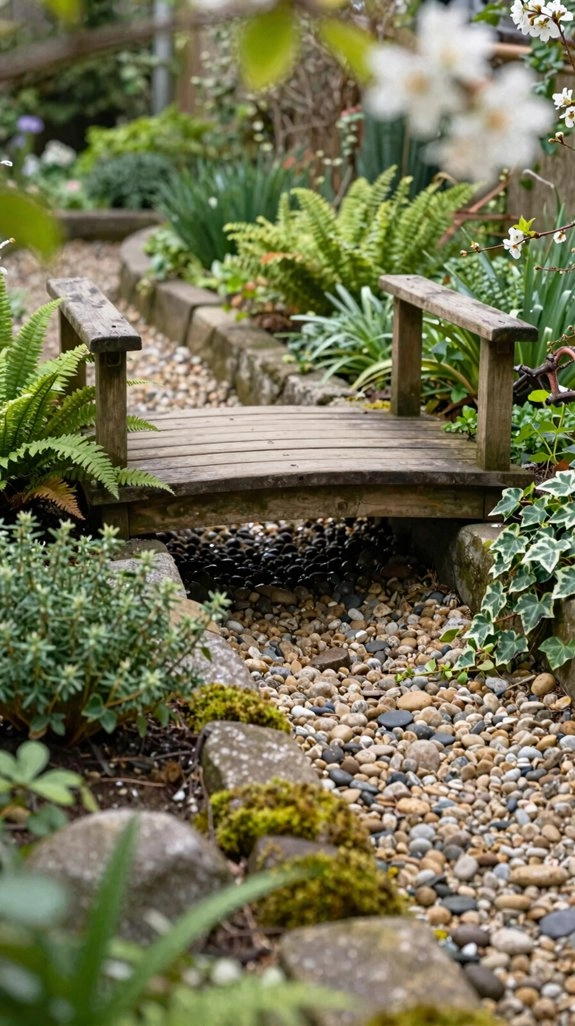
Rustic Wood Bridges for Cozy Yards
While stone can feel grand, a rustic wood bridge brings a yard down to earth in the coziest way! You’ll love how white cedar adds warm grain, natural depth, and a friendly feel.
It won’t crowd your path, and a 4–6 foot span keeps safe walkway clearance.
- Try white cedar for rot resistance
- Use western red cedar for rich color
- Add cedar staining for a deeper tone
- Follow Weatherproofing tips for longer life
- Choose pressure-treated lumber if you’re saving money
A soft arch layers your garden like a good story, and yep, it ages beautifully!
Tropical Rope Bridges for Small Spaces
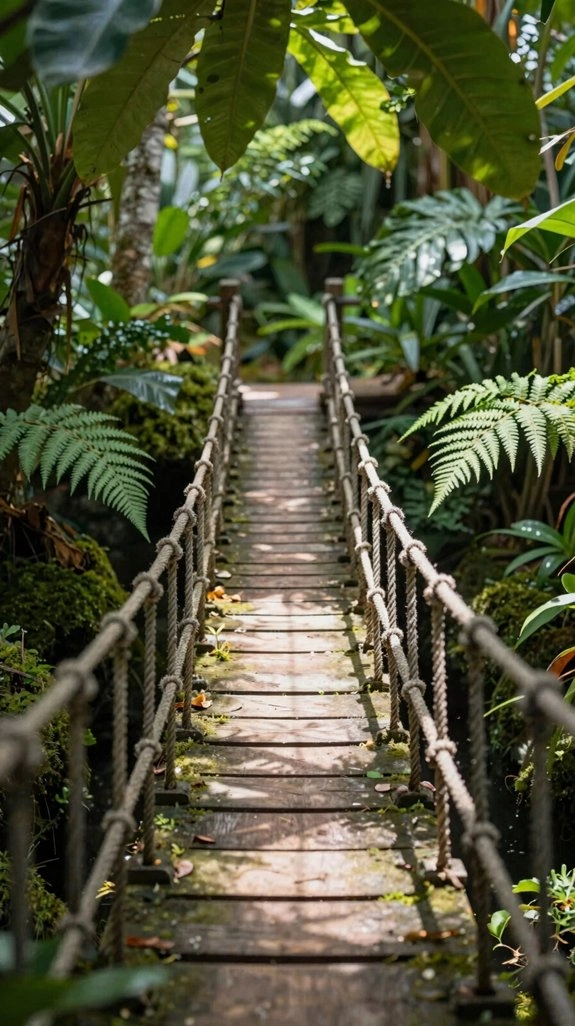
If your small garden needs a little magic, a tropical rope bridge can do the trick fast! You’ll get a light, airy crossing that feels right at home beside palms, vines, and even drought tolerant plantings.
Try a short 4–6 foot span over a tiny dry creek, narrow channel, or pond edge, and keep the deck slim so it doesn’t hog the view.
Pick simple posts, rope, and planks, then add contrasting railing styles for a fun island vibe.
At dusk, small LED lights near the ends make the whole bridge glow, adding depth and a touch of wow!
Place Your Bridge for Better Flow
- Aim the span at your best view.
- Keep feet on the bridge, not the mud.
- Connect two real garden zones.
- Let Layered plantings soften edges.
- Choose simple materials, then enjoy the wow!
Plant Around the Bridge for Layers
Around the bridge, think in layers, not in a flat line, because that’s what makes a tiny garden feel deeper and more inviting!
Start with Layered foundation planting: tuck low groundcovers along the edges, add mid-height shrubs, then place a few taller grasses or evergreens behind the arch.
Use Scale focused foliage selection so each plant fits the bridge’s size, not fights it.
Repeat similar textures and colors on both sides, and soften the landing spots with dense, low plants, so muddy corners disappear like magic.
If you love a Japanese-inspired feel, keep the greenery calm, balanced, and a little poetic!
Choose a Bridge Color That Stands Out
A bridge color can do a lot of heavy lifting, so you can keep it soft and let it blend in, or go bold and make it pop against your plants—nice and easy!
Try light greens or blues for a calm look, warm reds for a classic Japanese feel, or even white if you want your compact garden to feel brighter and airier.
And if you really want that “wow” moment, pick a contrasting shade that makes the bridge’s curve stand out from across the yard.
Bold Color Choices
Let your bridge pop, not pout! You can make your small arched bridge the star with a bold, friendly color that feels like your crew picked it just right. Think Japanese-garden red for a lively focal point, or soft light green and blue for Pathway color and seasonal contrast that still reads from the main path.
- Try white for crisp farmhouse charm.
- Use stain on the arch to keep shape front and center.
- Choose sun-safe paint for California days.
- Test a sample first, because lighting plays tricks.
- Pick a hue that ages gracefully, not grumpily.
Blend With Landscape
Color is your bridge’s secret handshake! You can let it blend in or pop, and both work beautifully. Try white cedar for a polished look that fades to silver-gray, or pick earthy green and blue tones so the bridge почти disappears into your plants and hardscape.
If you want more drama, go red, then keep the arch as the star—nice and bold, not bossy. White also feels right with farmhouse or traditional homes, creating a smooth indoor-to-outdoor flow.
With layered planting tips and light shadow play, your bridge adds depth, charm, and that welcome-home feeling!
Use a Bridge in an Urban Garden
Even in a tiny city yard, a small bridge can do big things!
You can turn tight paths into a little escape with Budget friendly upgrades and safe bridge access. Try these ideas:
- Set a 4–6 foot span to fit your walkway.
- Position it with your patio sightline, so guests follow the view.
- Add a narrow stream or pebble water garden below.
- Use soft LEDs nearby for evening glow.
- Pick an arched or straight shape that frames foot traffic.
Soon, your bridge feels like it belongs, not like a prop.
Nice, right?
Best Materials for Outdoor Bridges
When you’re choosing materials for a small garden bridge, cedar is hard to beat, because it naturally fights off rot, bugs, and moisture without a ton of fuss. White cedar usually gives you 15–25 years of steady service, and western red cedar brings warmer, reddish tones as it weathers—so pretty, right!
If you want to save money, pressure-treated lumber can work, but it’ll ask for more care.
For a sturdier build, pair hardwoods like redwood or cedar with powder-coated steel and rust resistant hardware.
Add low maintenance coatings, and your bridge can age into a lovely silver-gray with less work.
How a Small Bridge Transforms a Tiny Yard
A small bridge can do big things in a tiny yard—wow! It lifts your eye with a gentle arch, adds real depth, and makes the space feel longer, like your garden just got a sneaky little expansion.
Place it over gravel, rocks, or a narrow path, and you’ll guide foot traffic, define movement, and give muddy shoes a much smaller role in the story.
Creating Visual Depth
With the right little bridge, a tiny yard can suddenly feel like it keeps going, and that’s the magic of visual depth! You can use focal points, guide the eye, create layered plantings, and improve contrast all at once.
- Try a 4–6 ft arched bridge for a clear step in space.
- Place it on a path axis, so your scene opens up.
- Pick a curved arch to make the yard look longer.
- Aim the middle view at a pond or trellis.
- Cross a dry creek bed to turn a dip into wow!
It’s a small move, but it feels like your garden grew a secret room.
Defining Garden Movement
Along a narrow path or over a little dip, a small arched bridge can do more than just help you get across—it can quietly tell your yard how to move!
You can place it on a micro pathway, line it with a stepping path, or aim it along an existing axis, and suddenly your feet, and your eyes, know where to go.
That little up-and-over shift adds layered sightlines, slows the stroll, and makes even muddy spots feel planned, not messy.
Even without water, you get a tiny trip moment.
Pick an arched style for $100-ish charm and wow, your compact yard feels bigger and more welcoming!