
18 Outdoor Grill Area Ideas for a Stylish Backyard Setup
- 18 Outdoor Grill Area Ideas for a Stylish Backyard Setup
- Key Takeaways
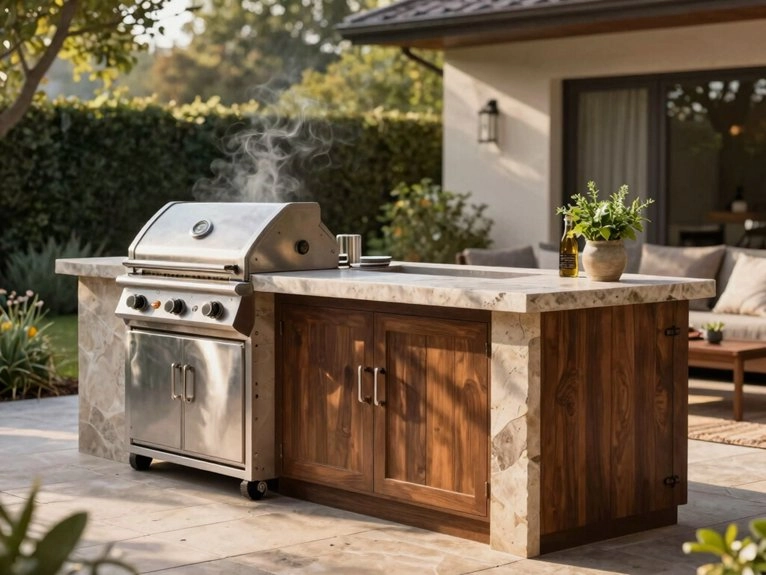
- Built-In Grill Station
- Permanent outdoor kitchen base
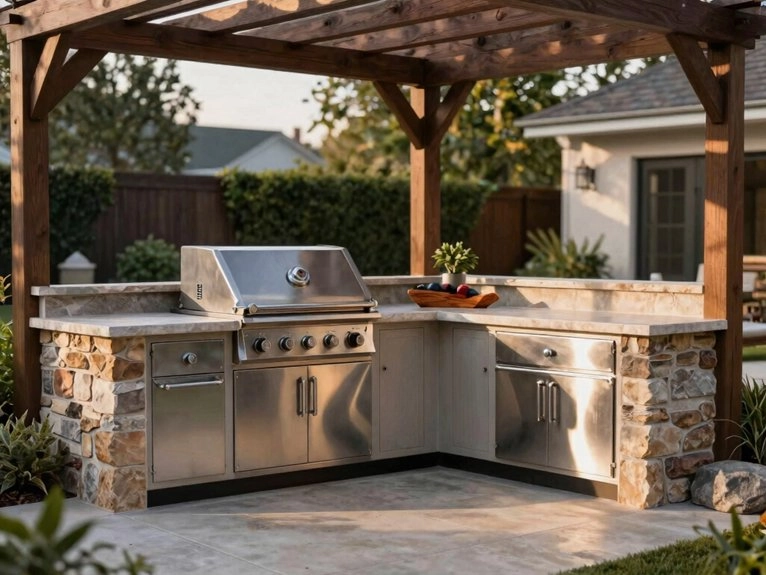
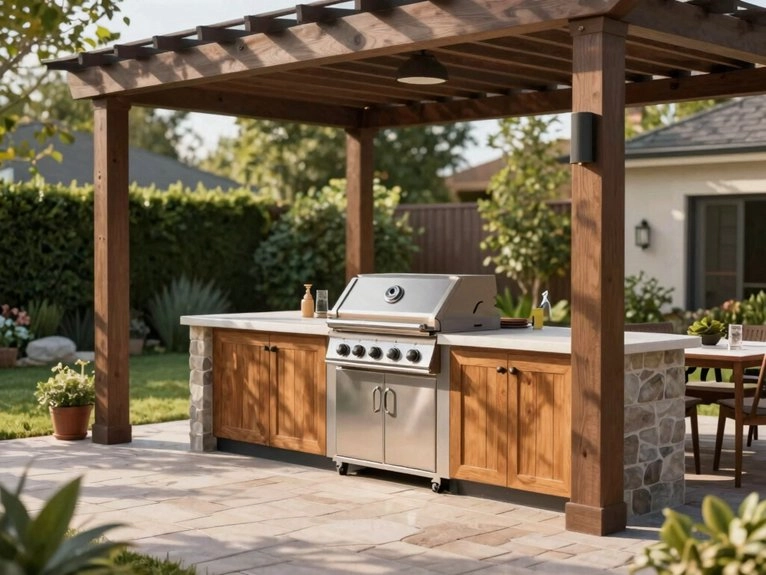
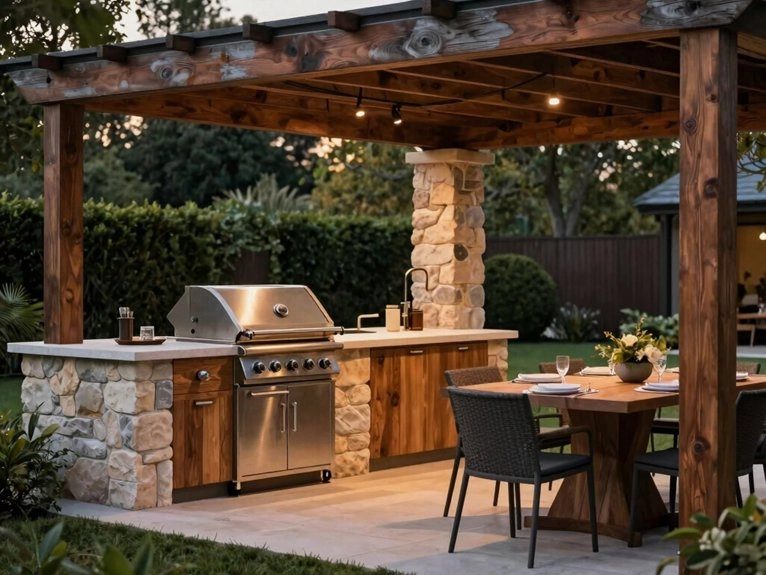
- Covered Pergola Setup
- Shade and weather protection
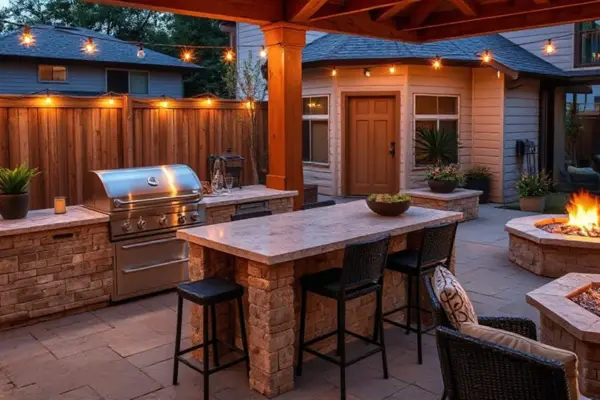
- Outdoor Bar Counter
- Social serving space
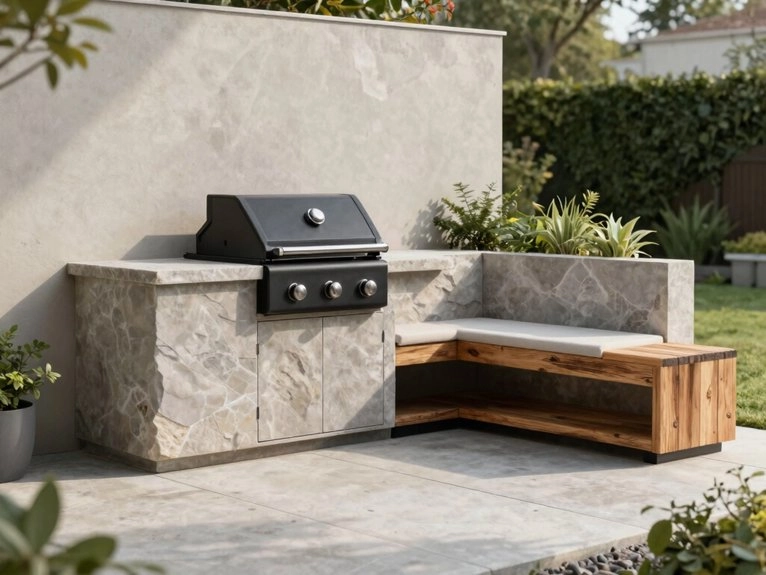
- Compact Grill Corner
- Small space solution
- Stone and Brick Surround
- Durable heat-safe materials
- Open-Air Dining Area
- Seamless eating flow
- Grill Island Design
- Central cooking zone
- Lighting Around Grill
- Safe evening use
- Storage Cabinets Outdoors
- Tools and accessories
- Sink and Prep Area
- Full kitchen function
- Concrete Countertops
- Modern durable surface
- Wood and Metal Combo
- Balanced material contrast
- Fire Pit Nearby
- Extended gathering zone
- Outdoor Fridge Setup
- Convenient beverage storage
- Minimalist Layout Plan
- Clean visual flow
- Greenery Around Grill
- Natural softening effect
- Flooring with Tiles or Deck
- Defined cooking zone
- Wind Protection Screens
- Better cooking control
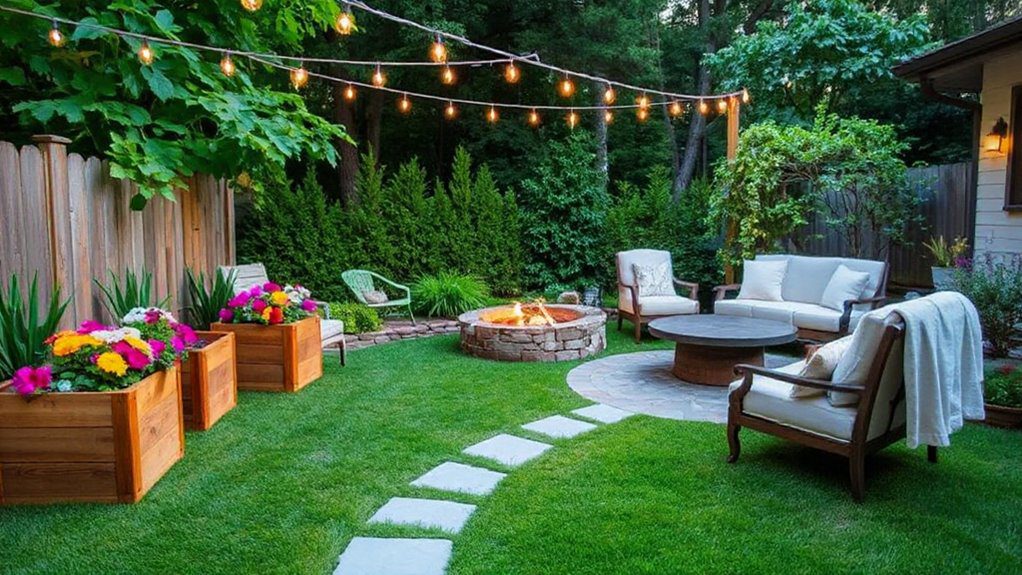
You can turn your grill zone into a real hangout with a built-in grill station, a shady pergola, and a slim drink fridge that keeps soda from hiding in the garage. I like L-shapes with 24–36 inches of prep space, granite or sealed concrete counters, and a 12-inch bar overhang for guests. Add warm LED lights, wind screens, and rosemary in pots, and you’ll cook easier, chat longer, and maybe even impress the in-laws with fewer burnt burgers.
Key Takeaways
- Choose a built-in grill station with granite counters, weatherproof cabinets, and island, L-shape, or U-shape layouts for smoother outdoor cooking.
- Maximize small spaces with a compact grill corner, slim prep shelf, vertical storage, and a mini-fridge for essentials.
- Use durable materials like concrete, porcelain tile, stone, or stainless steel for heat resistance, drainage, and year-round outdoor performance.
- Add weather protection with a pergola, shade panels, and wind screens to improve comfort, safety, and seasonal usability.
- Improve function and ambiance with task lighting, path lights, GFCI outlets, and clear walkways between grilling, dining, and fire pit zones.
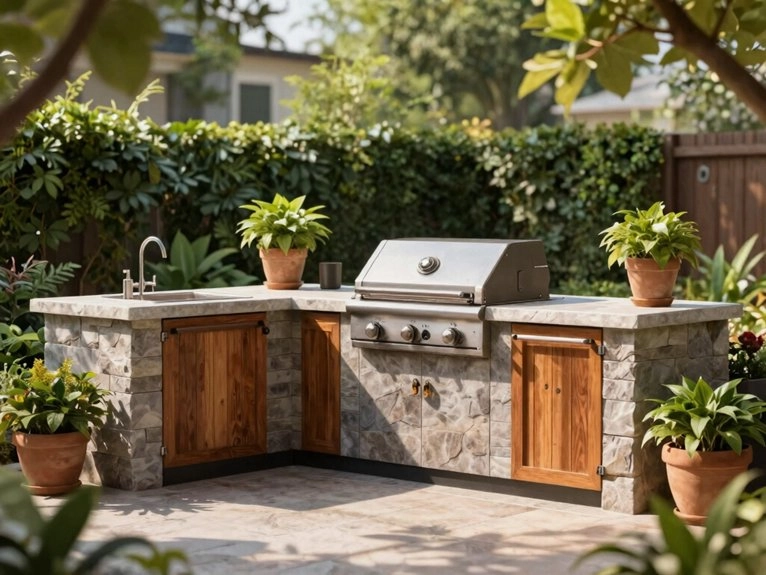
Built-In Grill Station
When you build a grill station into stone, brick, or sealed concrete, you’re creating a permanent outdoor kitchen base that feels sturdy and ready for years of cookouts.
I’ve seen a stainless-steel built-in grill like a Napoleon paired with granite counters and weatherproof cabinets, and it turns the patio into a real hangout spot with less running back and forth to the house.
If you’ve got space for an island, L-shape, or U-shape layout, you can keep prep on one side, grilling in the middle, and serving on the other—pretty handy when the burgers start multiplying like they’ve got plans.
Permanent outdoor kitchen base
I’d start a permanent outdoor kitchen with a solid built-in grill station, because the base does the heavy lifting long before the food hits the flame.
You’ll want a masonry or paver foundation, plus foundation ventilation and an insulated slab, so heat and weather don’t bully your setup.
I like stone, brick, or stucco walls with a stainless grill, granite or frost-proof tile counters, and sealed natural stone that laughs at rain.
Add cabinets, a small fridge, and a sink.
A linear or L-shaped island with a pergola keeps your crew close, fed, and happily hovering.
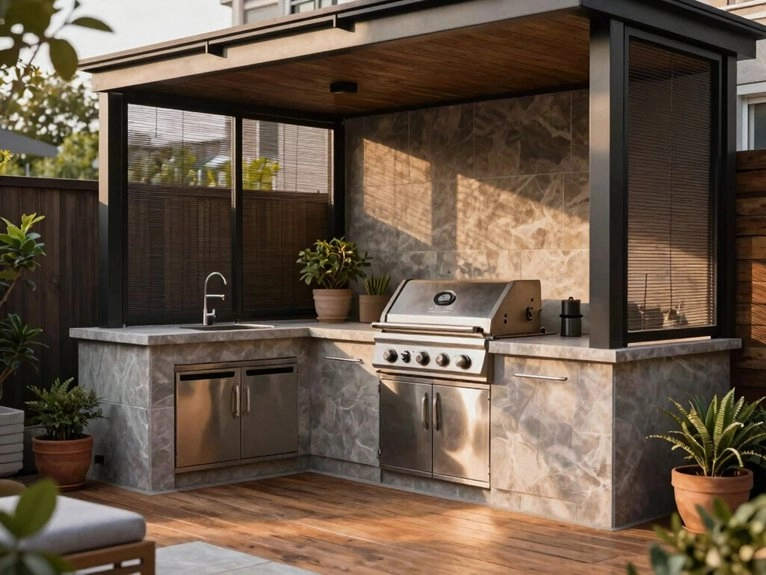
Covered Pergola Setup
If you add a covered pergola over your grill, you’ll get welcome shade and solid weather protection, so you can cook even when the sun’s blazing or a light rain shows up like an uninvited guest.
I’ve found that a cedar or powder-coated aluminum pergola feels sturdy and looks great, and my family likes how it cuts glare and keeps those annoying flare-ups a little more manageable.
It’s a smart way to make your grill area feel ready for almost any season without turning it into a sauna.
Shade and weather protection
A covered pergola can turn your grill zone into a spot you’ll actually want to use in the middle of a hot afternoon, and I’ve seen it make a big difference fast—my own family lasted a lot longer outside once the direct sun stopped turning the patio into a frying pan.
You can add shade fabrics or rainproof awnings for extra cover, then use tempered polycarbonate or metal panels if you want safer roof protection. I like LED strip lights, an outdoor fan, and side screens because they keep you comfy when the weather gets moody. Cedar or aluminum helps, too.
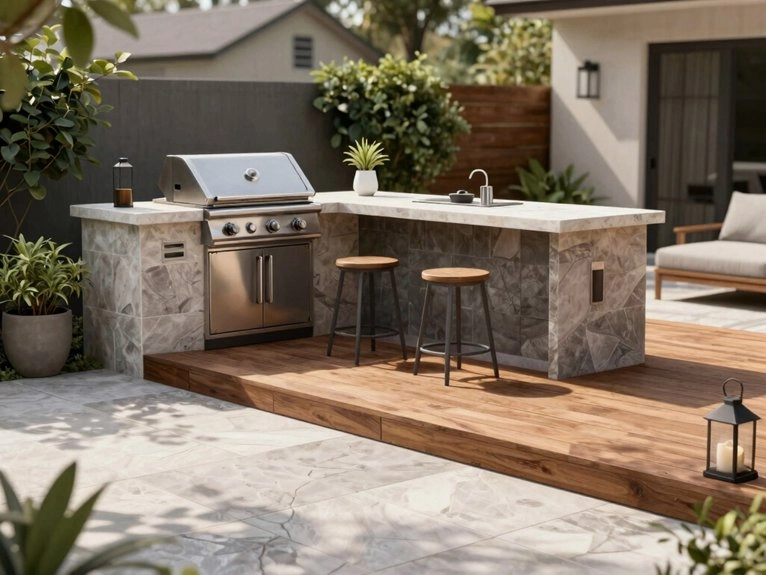
Outdoor Bar Counter
When you add an outdoor bar counter, you turn your grill area into a social serving space where friends can sit, snack, and chat while you cook.
I’ve seen how a 12–18 inch overhang gives you knee room for barstools, and a raised ledge helps hide the “I’m still flipping burgers” mess from guests—bless it. Add a compact under-counter fridge, a few LED lights, and sturdy granite or sealed stone, and you’ve got a hangout spot that works hard and feels ready for family time.
Social serving space
I love carving out a social serving space because it turns the grill zone into the place everybody drifts toward.
You can extend the counter 12–18 inches and add casual seating with weatherproof stools, so friends can lean in without crowding you.
I’ve found a 24–48 inch drink fridge nearby keeps the party moving and saves me from a million kitchen trips.
Raise the service edge 6–12 inches, then finish it with granite or sealed stone and a stainless drip edge.
- LED strip lights
- String lights overhead
- Easy cleanup
- Cooler drinks
- Better together
Compact Grill Corner
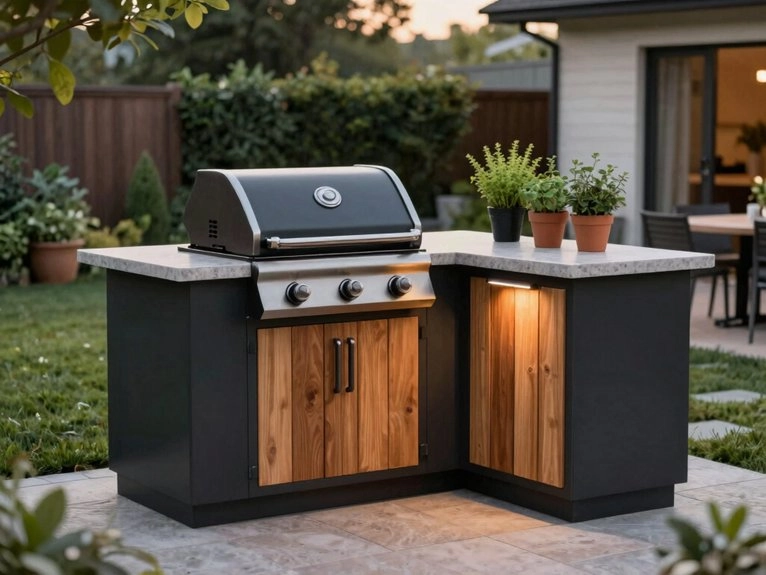
A compact grill corner is a smart small-space solution when you want to cook outside without turning your patio into a traffic jam.
You can fit a built-in or portable grill in just 4–6 feet of counter space, then add a slim prep shelf, a 1–3 cu ft mini-fridge, and vertical storage so everything stays handy.
I like using stainless steel and sealed stone or porcelain tile, plus LED strip lights under the counter, because they hold up well and keep you from fumble-grabbing tongs in the dark like a backyard raccoon.
Small space solution
Even in a tiny patio corner, I’ve found you can build a grill setup that feels smart instead of cramped. I like an L-shaped nook with a 24-inch grill, a 12-inch prep counter, and a slim fridge; it keeps you close to the action and out of the kitchen.
- I use space saving seating with a 12-inch counter overhang.
- I add a vertical herb garden for fresh basil.
- I pick sealed stone or porcelain tile.
- I keep storage to one drawer and one shelf.
- LED strips make late dinners feel cozy.
My family always claims the best seat.
Stone and Brick Surround
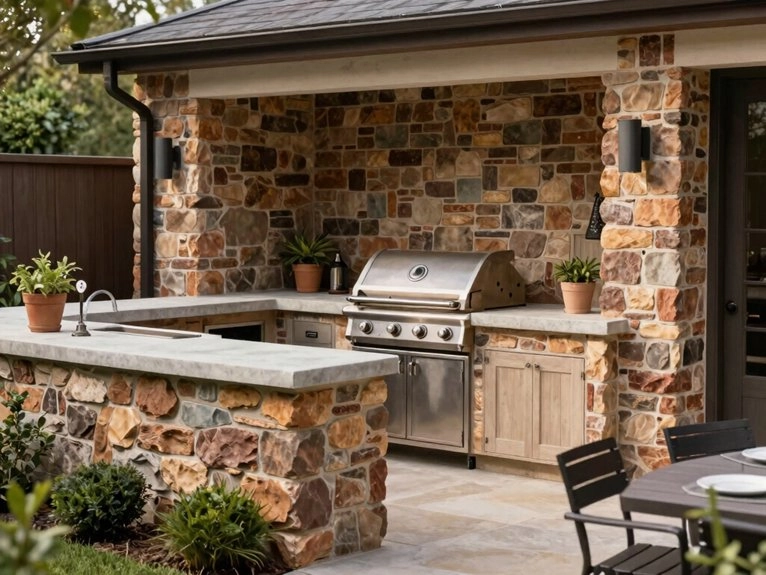
When you build your grill surround with natural stone or high-temperature brick, you get a tough, heat-safe shell that can handle hot summer cookouts without sulking. I’d pick frost-proof stone, fire-rated brick, and matching mortar, because I’ve seen cheaper materials crack like a cookie under pressure, and nobody wants that drama near the burgers.
With the right sealant and good drainage, your surround stays strong, looks great, and keeps your backyard ready for family cookouts for years.
Durable heat-safe materials
- Heat resistant countertops keep cleanup easy.
- Seal porous stone every 1–3 years.
- Pair with stainless-steel appliances.
- Choose exterior-rated granite or tile.
- Keep the base noncombustible, always.
Open-Air Dining Area
You can keep dinner moving smoothly by placing your table or bar-height counter 8–12 feet from the grill, so plates travel fast without turning your patio into a smoke zone.
I like a BBQ island with barstools or a simple communal table, because it lets you serve, eat, and chat in one spot—my family treats it like the command center, which is oddly fun.
Add a pergola or retractable canopy, string lights, and LED task lights, and make sure you’ve got 36 inches of clear walkway so everyone can pass without doing the awkward sidestep dance.
Seamless eating flow
For a grill setup that actually feels easy to use, I like to keep the grill island just 3 to 6 feet from the dining table—close enough that I’m not doing a weird little food relay, but still far enough to stay safe from heat and foot traffic.
That spacing makes flow choreography and staging etiquette feel natural, especially when my family’s passing plates around on a summer night.
- Keep a 12–18 inch serving edge
- Set a small fridge 2–4 feet away
- Use bar seating or a perpendicular table
- Leave 36–48 inch walkways
- Share clear sightlines for easy handoffs
Grill Island Design
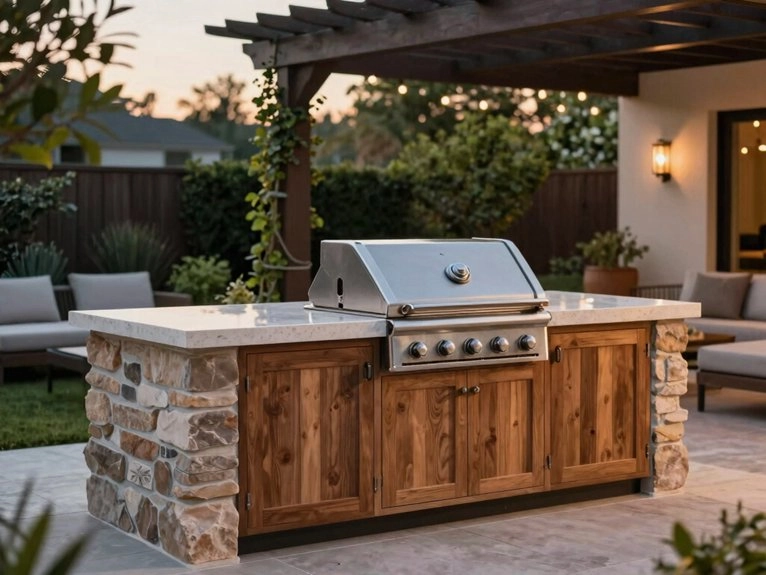
When you build a grill island, you’re creating a central cooking zone that keeps you in the middle of the action, not stuck running back and forth like a kitchen relay race.
I like using a built-in grill with stone or stainless steel counters, plus a few barstools, so you can cook, chat, and still keep an eye on the burgers without missing the fun.
My family loves islands with a sink, compact fridge, and outdoor-rated cabinets, because everything stays close at hand and you won’t be doing surprise indoor sprints for tongs or ketchup.
Central cooking zone
Picture a grill island as the heart of the outdoor kitchen, because that’s where the real action happens. You’ll want ergonomic heights, solid ventilation requirements, and 36–48 inches of counter space on both sides. I’ve seen family cookouts run smoother when the island fits us, not the other way around.
- Choose stone or sealed concrete.
- Add stainless panels and granite tops.
- Keep 42–48 inches clear for movement.
- Use a sink, fridge, or drawers.
- Light it with LEDs or string lights.
My kids love the pizza-oven nook, and honestly, so do I when dinner gets loud.
Lighting Around Grill
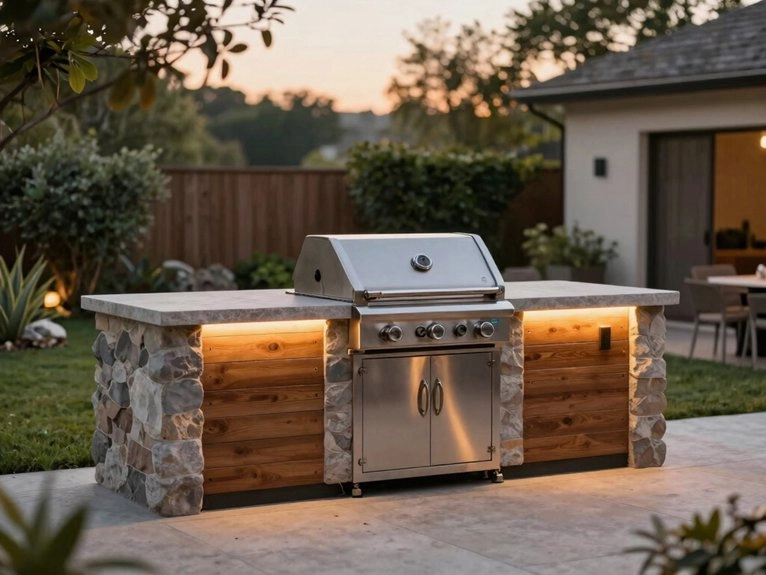
You’ll keep your grill area safe at night when you light the cooking zone well, like using adjustable LED under-counter strips or a swivel-mount grill light that gives you clear sight of the food instead of mystery-charcoal mode.
I like to add warm string lights high above the patio and low-voltage LED path lights along the walkways, because they help my family move around without blinding anyone or turning the grill into a shadowy monster.
If you want even more control, I’d use dimmable pergola fixtures with separate task switches and weather-rated under-counter LEDs, so you can brighten the grill when it’s go time and keep the rest of the space calm.
Safe evening use
For safe evening grilling, I always start with the lights, because nothing ruins a good burger faster than guessing where the tongs went.
I use low glare LED strips under the counter, plus a motion activated step light by the path.
My family likes warm 2700–3000K bulbs; they feel cozy, and the bulb temperature keeps food looking real.
- Put task lights 12–18 inches above prep spots.
- Hang string lights 8–10 feet high.
- Use IP65 fixtures near water.
- Check the maintenance schedule monthly.
- Keep GFCI circuits and surge protection on.
Storage Cabinets Outdoors
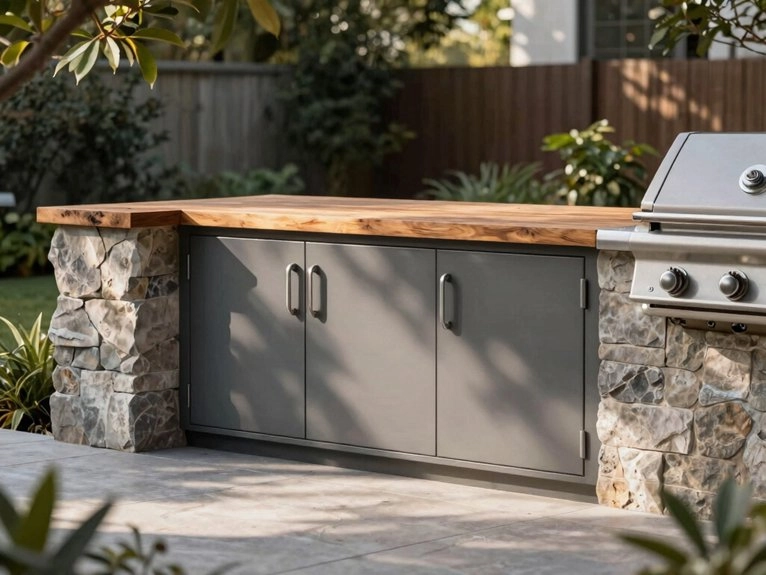
You’ll want stainless-steel outdoor cabinets and lockable drawers, so your tools and accessories stay dry, neat, and ready when the grill gets going.
I like 304 stainless and weather-sealed hardware because tongs, thermometers, and that one mystery spatula my family keeps “borrowing” all have a real home.
Keep the cabinet depth around 18–24 inches, leave at least 36 inches of walking space, and place everything so doors and drawers open cleanly—because nobody needs a shin bruise at burger time.
Tools and accessories
Tame the tangle of tongs, thermometers, and propane gear with outdoor storage cabinets that can actually handle the weather.
I keep my weatherproof gloves, propane regulator, and grill tools in 18–22 gauge stainless cabinets, so rust doesn’t crash dinner. You’ll like vented, lockable drawers for spatulas and 12–18-inch tongs, plus a tall cutout for propane tanks. I’ve found sealed plywood backs and raised bases make cleanup easy after saucy spills.
- Keep tools dry
- Add soft-close drawers
- Use 24-inch-deep cabinets
- Fit a cutting-board insert
- Organize condiments and trash
With a cabinet-fridge combo, you’ll cook like you belong here.
Sink and Prep Area
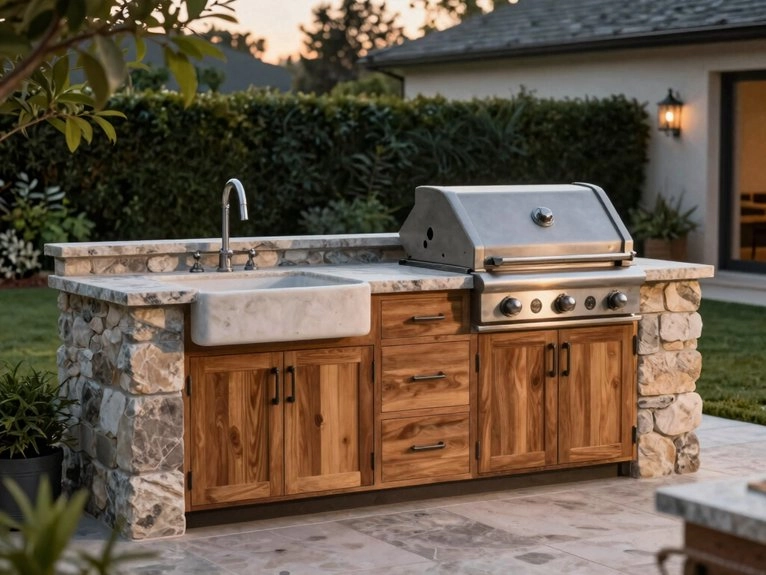
You can turn your grill zone into a full kitchen by adding a stainless-steel outdoor sink with a hot/cold faucet and drainboard, which makes rinsing, chopping, and plating feel a lot less like backyard chaos.
Keep the sink 24–36 inches from the grill prep spot, and tuck in weather-rated cabinets, GFCI outlets, and a compact fridge or refrigerated drawer nearby so your burgers don’t have to take a field trip.
I’ve seen this setup make family cookouts run smoother, and honestly, when everything has a place, even the picky cousin with the “is it ready yet?” face chills out.
Full kitchen function
Picture a grill area that works like a real kitchen, not just a hot spot with a lonely spatula. I’d build yours with a handwashing station and a dedicated prepspace, so you and your crew can chop, rinse, and plate without the dash indoors.
- Sink: 20–30 inch basin
- Prep counter: 24–36 inches
- Distance: 3–5 feet from grill
- Materials: granite, sealed concrete
- Mini-fridge: within 5 feet
I like weatherproof cabinets for tongs, boards, and soap. Add an outdoor-rated faucet, and you’ve got a backyard setup that feels ready for family dinners, not just burgers.
Concrete Countertops
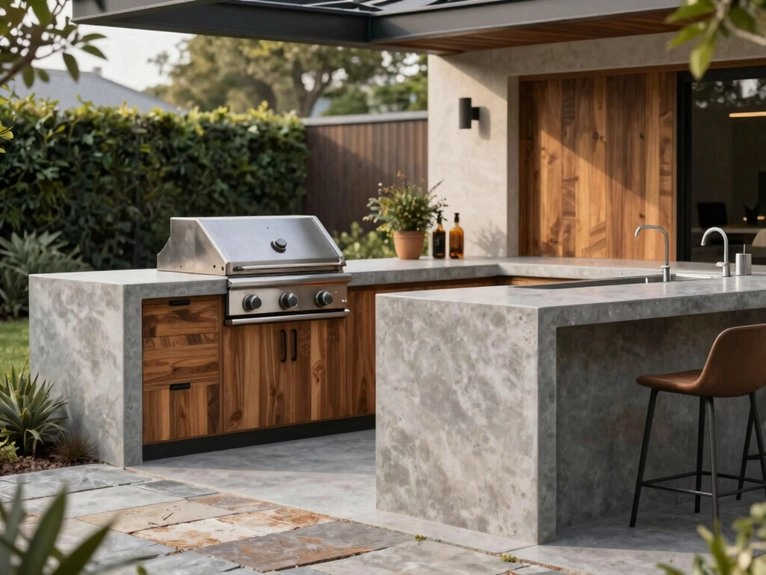
I’ve seen concrete countertops turn an outdoor grill area into a modern, tough-as-nails work zone, and they handle hot pans and messy prep without blinking.
You can pour them in place or use precast slabs, then add color, texture, or a smooth edge so they fit your style—because plain gray isn’t the only trick in the toolbox.
Seal them with a UV-resistant product and keep the mix strong and well-cured, and you’ll have a surface that holds up when family cookouts get a little wild.
Modern durable surface
Concrete countertops can turn an outdoor grill area into a tough, good-looking work zone that doesn’t flinch at hot pans, splashes, or the occasional sauce disaster. I like them for family cookouts because they feel solid and welcoming.
You can add heat resistant finishes and choose lightweight cores for big overhangs, so your setup stays strong without stressing cabinets. I’ve seen exterior-grade, fiber-reinforced mixes handle grill heat well. Seal yours with a UV-stable penetrating sealer or epoxy topcoat. Try polished, stained, or exposed-aggregate looks.
- Durable near grills
- Easy to match
- Less cracking risk
- Outdoor-ready sealing
- Stylish, shared space
Wood and Metal Combo
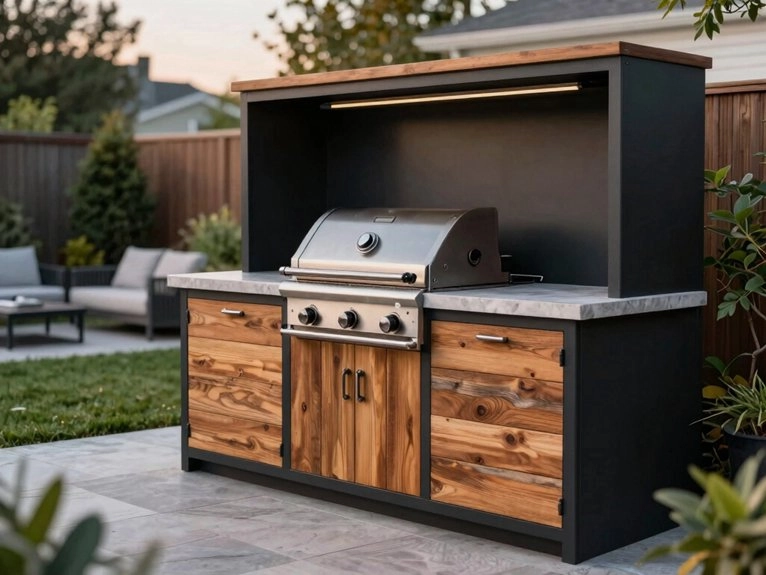
I like how a stainless-steel built-in grill pairs with cedar or redwood, because you get tough, weather-ready metal and warm wood that feels right at home for family cookouts.
You can add powder-coated steel framing, thin metal accents, and wood cabinet doors to keep the look balanced, and yes, it hides the “where did I put the tongs?” chaos pretty well.
Just keep a 2–3 inch heat gap near hot spots and finish the wood with a marine-grade sealer, so your setup stays sharp instead of turning into a weathered science experiment.
Balanced material contrast
Wood and metal can be a great tag team in an outdoor grill area, and I’ve seen that combo make even a small patio feel pulled together. You’ll get thermal juxtaposition from cedar or redwood beside 304 stainless steel, plus tactile contrast from reclaimed wood against stone or concrete.
I like pressure-treated pine near the grill, paired with powder-coated steel frames, because nobody wants warped shelves that act dramatic.
- Use blackened steel trim
- Add brass hardware
- Choose matte black cabinets
- Seal wood yearly
- Rinse metal after cookouts
Fire Pit Nearby
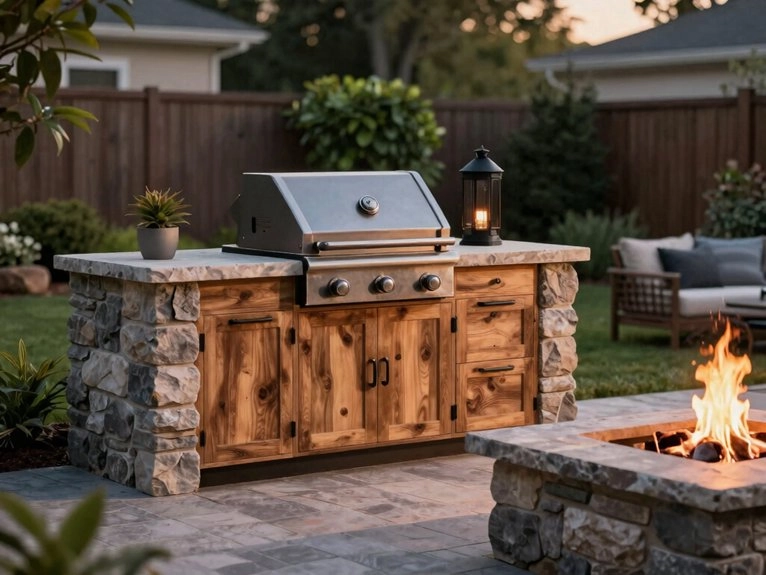
I’ve found that a fire pit nearby turns your grill space into a true extended gathering zone, where you can keep the conversation going after dinner and your family can linger without feeling rushed.
Place it about 10–15 feet from the grill on stone, pavers, or concrete, and leave a 3-foot clear ring around it so sparks don’t crash the party.
If you match the fire pit’s materials and lighting to your grill area, you’ll get a cozy setup that feels pulled together and lets you use the space well into the night.
Extended gathering zone
When you want the fire pit to feel like part of the grill area—not a smoky cousin hanging off to the side—place it about 10 to 15 feet away from the cooking zone so the heat doesn’t bully your burgers while guests still stay close enough to chat.
I’ve found this setup supports neighbor etiquette and acoustic zoning, too. You’ll keep traffic easy, the mood relaxed, and nobody’s shoe on fire, which my family appreciates.
- Stone, pavers, or concrete underfoot
- Keep 3–4 feet clear for walking
- Semi-circle seating faces both zones
- Add a shared counter or ledge
- Layer task, strip, and accent lights
Outdoor Fridge Setup
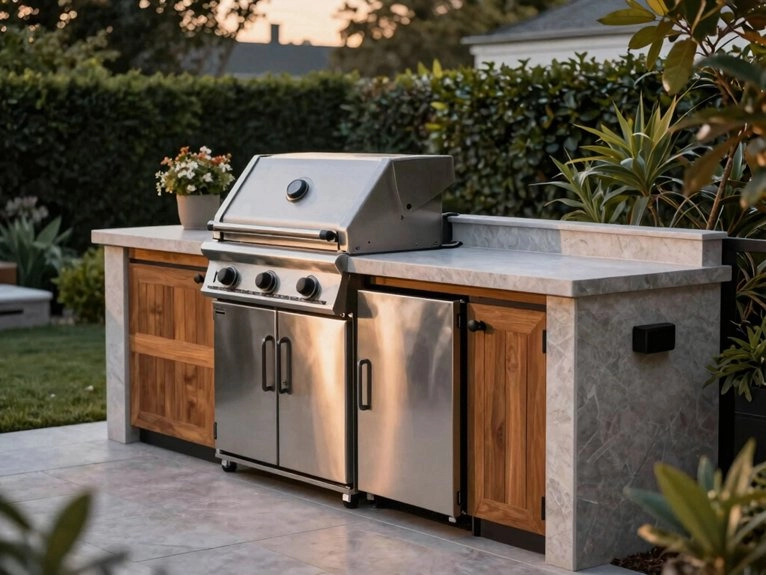
I like placing a compact outdoor-rated fridge just 3 to 5 feet from the prep counter, because you can grab cold drinks fast and keep the party flowing without extra steps.
Choose one made for outdoor use—think stainless steel, weatherproof seals, and UV-safe parts—and set it near the bar, but not next to the grill, so your sodas stay chilly instead of getting a front-row seat to the flames.
I’ve found that a 24-inch under-counter model or drawer-style fridge with a dedicated GFCI outlet and a little clearance around it makes beverage storage feel easy, neat, and a lot less “who moved my beer?”
Convenient beverage storage
For a grill area that really works on busy days, I always like to tuck a compact outdoor fridge within 3 to 4 feet of the main prep counter or bar, because nobody wants to do laps just to grab a cold drink while burgers are sizzling.
- You’ll love beverage proximity.
- I keep mine in a ventilated enclosure.
- Pick stainless steel for easy cleanup.
- Stay 2 to 3 feet from the grill.
- A 3 to 4 cu ft fridge suits drinks; 5 to 8 cu ft handles snacks.
I’ve found it keeps my family mingling, not wandering.
Minimalist Layout Plan
You can keep your grill zone calm and easy to use by setting up a straight or L-shaped counter with hidden storage, so your tools don’t stage a yard sale every weekend. I like a simple mix of smooth concrete, flat-panel cabinets, and stainless steel appliances, plus a built-in grill, a small fridge, and a sink tucked into a tight work triangle that keeps everything moving in a clean line.
At my house, a little LED strip under the counter lip and soft recessed pergola lights do the trick after dark, and the whole space still feels open instead of like it’s trying too hard.
Clean visual flow
When I want a grill area to feel calm instead of chaotic, I start with a simple line or an L-shaped island and keep the whole thing visually quiet. You’ll get linear symmetry, hidden clutter, and a space that feels like your crew actually belongs there.
I like flat-panel stainless cabinets, a continuous concrete top, and only two finishes, like matte black and polished concrete.
- Keep 24–36 inches of prep space
- Add an 18–24 inch landing zone
- Use LED strips, not pendant drama
- Hide tools behind matching panels
- Choose a slim overhang with barstools
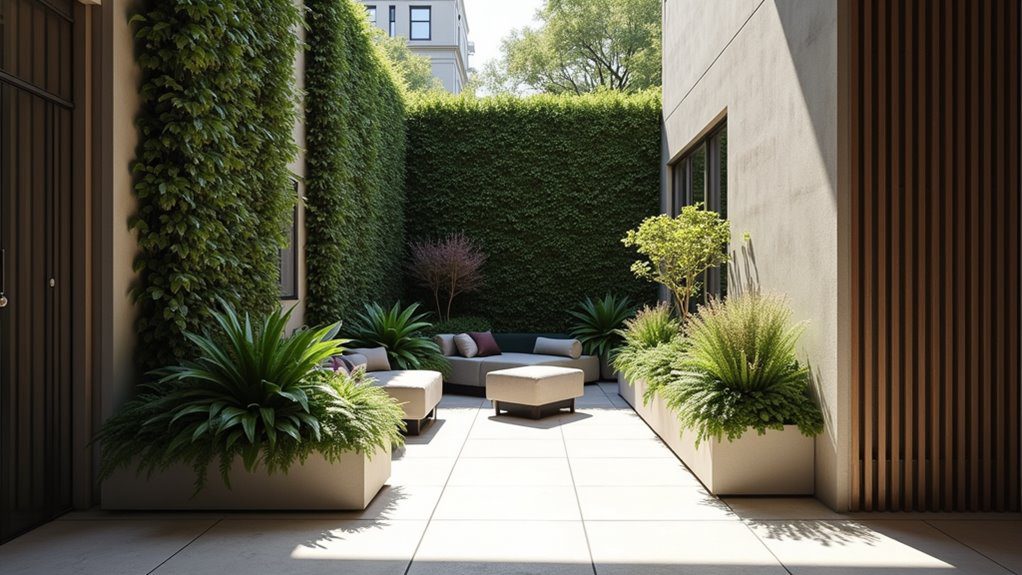
Greenery Around Grill
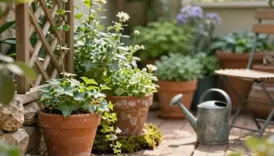
You can soften a grill zone fast with the right greenery, and I’ve found that a few pots of rosemary or lavender make the whole space feel calmer, fresher, and less like a hot metal box.
Keep heat-tough plants like sage, bay laurel, or dwarf evergreens a safe distance away, and use gravel or pavers close to the grill so you get that nice green edge without turning your backyard into a fire-risk drama.
In my family’s setup, even a couple of terracotta planters on a sunny ledge make the area look finished, and honestly, the herbs smell so good that someone always “checks” them before dinner.
Natural softening effect
A little greenery can make a grill area feel less like a hot metal box and more like part of the yard. I’ve found that plant textures and seasonal blooms help you and your family feel at home.
Try these ideas:
- Lavender, rosemary, and bay laurel add scent.
- Boxwood or dwarf holly gives year-round structure.
- Potted olive or citrus trees move when heat gets bossy.
- Gravel or decomposed granite softens the floor.
- Trellised vines on metal supports frame the space.
Keep plants 3–6 feet away, and your backyard’ll look welcoming, not like a barbecue battlefield.
Flooring with Tiles or Deck
I’d use frost-proof porcelain tile or a sturdy deck to carve out a clear cooking zone, so you know exactly where the grill lives and where people can stand without crowding the chef.
Porcelain tile on a sloped mortar bed drains well and won’t freak out in winter, while wood or composite decking feels warmer for nearby seating—just keep it sealed and away from hot grill splatter unless you enjoy surprise repair bills.
I’ve found that a defined floor plan makes the whole area feel calmer, safer, and a lot less like everyone’s trying to steal your tongs.
Defined cooking zone
I like to anchor the grill in its own little cooking zone, because it instantly makes the space feel organized instead of “everything everywhere all at once.”
Around my own grill, I’d choose frost-proof porcelain tile rated for exterior use, ideally PEI 4–5, since it can handle freeze-thaw cycles, greasy drips, and the stampede of kids, guests, and my own clumsy flip-flop steps. It gives real defined cooking and smart task buffering for my crew.
- Keep a 3–4% slope
- Pick matte, non-slip tile
- Use heat-safe backer board
- Match deck transitions neatly
- Leave expansion joints, always
Wind Protection Screens
I’ve seen tempered glass panels, 4–6 foot lattice screens, and even retractable fabric shields help steady the heat, so your burgers cook more evenly and your whole family isn’t standing around like it’s a weather report.
Just keep 18–36 inches of open space behind and above the grill, and you’ll get better cooking control without turning your patio into a wind tunnel.
Better cooking control
When the breeze keeps messing with your flame, a good wind protection screen can be a game-changer. I’ve watched burgers go from moody to steady at my own backyard cookout. You’ll feel the difference fast.
- Block upwind gusts
- Hold heat better
- Cut flare-ups
- Use adjustable windbreaks
- Try portable baffle panels
Set screens 3–4 feet high on the windy side, and leave 2–4 inches behind the grill for airflow. Stainless steel mesh, tempered glass, stone, or masonry all work well. For my family, that meant calmer searing, smoother smoking, and fewer “who stole my dinner?” moments.


It only works when I’m Juan de Nova Island.
I saw one of these in Barbados and I bought one.