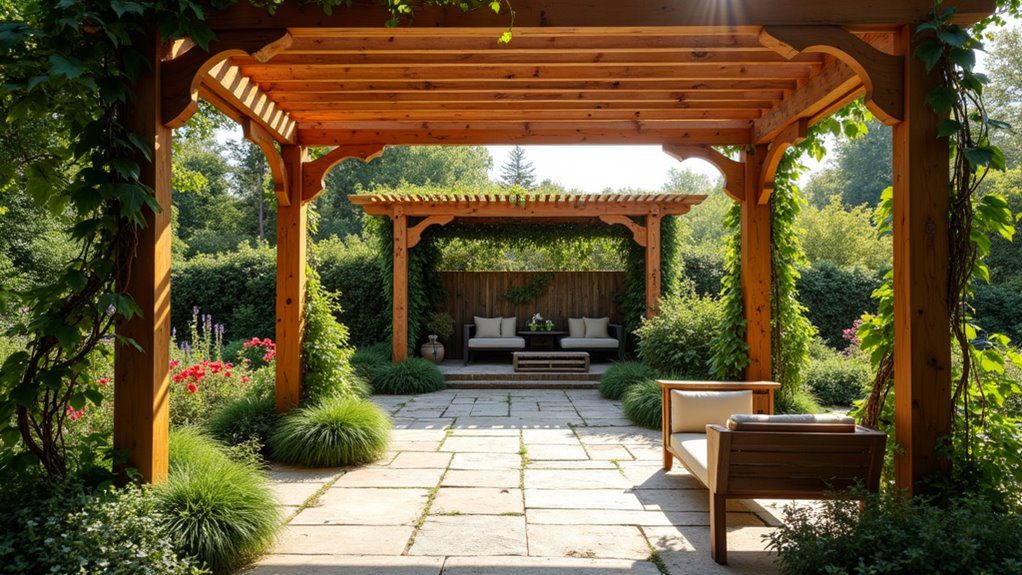
Cinder Block Garden Ideas That Look Creative and Functional
- Cinder Block Garden Ideas That Look Creative and Functional
- Key Takeaways
- Best Cinder Block Garden Ideas
- Why Cinder Blocks Save Money
- Plan Your Cinder Block Garden Layout
- Map Functional Zones
- Balance Beds And Seating
- Build a Cinder Block Raised Garden Bed
- Build a Cinder Block Retaining Wall
- Wall Layout Basics
- Drainage And Stability
- Planting And Styling
- Make a Cinder Block Planter
- Try a Modern Tiered Planter
- Bold Color Stacks
- Layered Plant Displays
- Vertical Garden Appeal
- Create Raised Bed Planters
- Use Cinder Blocks as Garden Risers
- Display Plants At Height
- Pair With Wooden Tops
- Add Painted Cinder Block Garden Decor
- Design a Cinder Block Privacy Wall
- Wall Layout Ideas
- Built-In Planter Sections
- Privacy And Drainage
- Build Planter-Style Furniture
- Make a Cinder Block Garden Bench
- Create a Cinder Block Side Table
- Add a Cinder Block Garden Bar
- Build a Cinder Block Fire Pit
- Set Up a Cinder Block BBQ Station
- Use Cinder Blocks for Potting Stations
- Try Cinder Block Vegetable Garden Fencing
- Add Garden Steps With Cinder Blocks
- Create a Zen Cinder Block Garden
You can turn cinder blocks into a garden that’s creative and super useful! Build 4×8 raised beds with 2–3 stacked courses, fill them with 60% topsoil, 30% compost, and 10% perlite, then tuck herbs or strawberries into the holes. Add tiered planters, seating, potting stations, or even a BBQ nook with caps or planks for a cleaner finish. Start with a level gravel base, and the coolest ideas are waiting just ahead!
Key Takeaways
- Build 4×8 raised beds 2–3 blocks high, filled with 60% topsoil, 30% compost, and 10% perlite.
- Use hollow cinder block cells for herbs, strawberries, succulents, or extra storage pockets.
- Create modern tiered planters by offset-stacking blocks and capping them with paving stones or slabs.
- Add functional features like block seating, side tables, potting bars, or garden bars with wooden tops.
- Plan zones first, and use drainage gravel, perforated pipe, and geotextile fabric for stable, long-lasting builds.
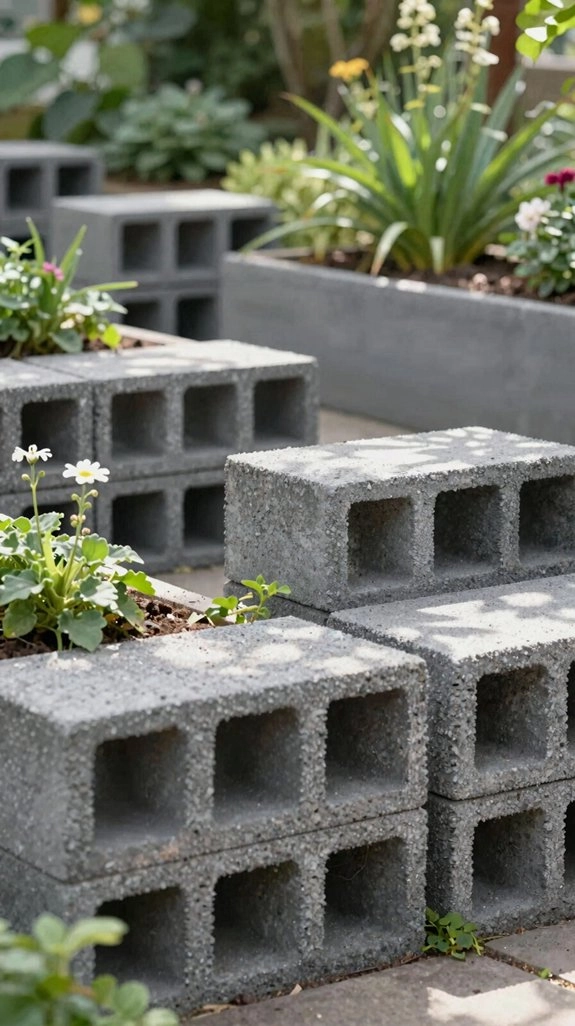
Best Cinder Block Garden Ideas
If you’re looking for a garden project that’s sturdy, affordable, and a little bit clever, cinder blocks can do way more than just hold up a wall! Try a raised bed, about 4 by 8 feet and 2–3 blocks high, filled with 60% topsoil, 30% compost, and 10% perlite for tomatoes and greens.
Next, build tiered beds on slopes for layered planting.
For a space-saver, make a staggered tower with vertical herb pockets, then pack each cell with rich soil.
You can also use individual block cells for thyme, basil, mint, and oregano, neat and friendly!
Why Cinder Blocks Save Money
Because cinder blocks are inexpensive and easy to find, they can save you a surprising amount of cash right from the start! In a Cost saving DIY, you skip pricey lumber and decorative frames, then use the hollow cells for soil, potting mix, or simple bases. That means your plan stays budget friendly planning, even for raised beds, planters, and cute benches.
Try a 4-by-8 bed with blocks stacked two or three high, and you’ll buy only what you need. Plus, these durable outdoor materials fight weather for years, so reduced maintenance costs keep your garden crew smiling!
Plan Your Cinder Block Garden Layout
Start by mapping your garden into clear zones, like beds for veggies, a spot for herbs, and maybe a little seating nook, so every cinder block has a job before you build.
A 4-by-8 raised bed is a super handy size, and you can keep it comfy with 2 to 3 block courses, which makes planting a lot easier on your back—your knees will thank you!
If your yard slopes, add a terraced layout, and don’t forget the fun part: those hollow block pockets can turn into tiny homes for herbs or flowers, which is pretty cool.
Map Functional Zones
As you sketch your cinder block garden, think of it like organizing a tiny outdoor city, with each zone doing its own job!
Set an edibles zone with 4-by-8-foot raised beds, 2–3 blocks high, so veggies and herbs feel right at home. Add Soil amendment tips at the start, then follow seasonal crop rotation to keep the soil happy.
Next, mark a plant-display zone with vertical towers or wall planters, cells facing out for big color in small spaces.
Save a maintenance zone for a potting bar or storage bench, and use block edging to guide paths.
If your yard slopes, tiered terraces can save the day—nice!
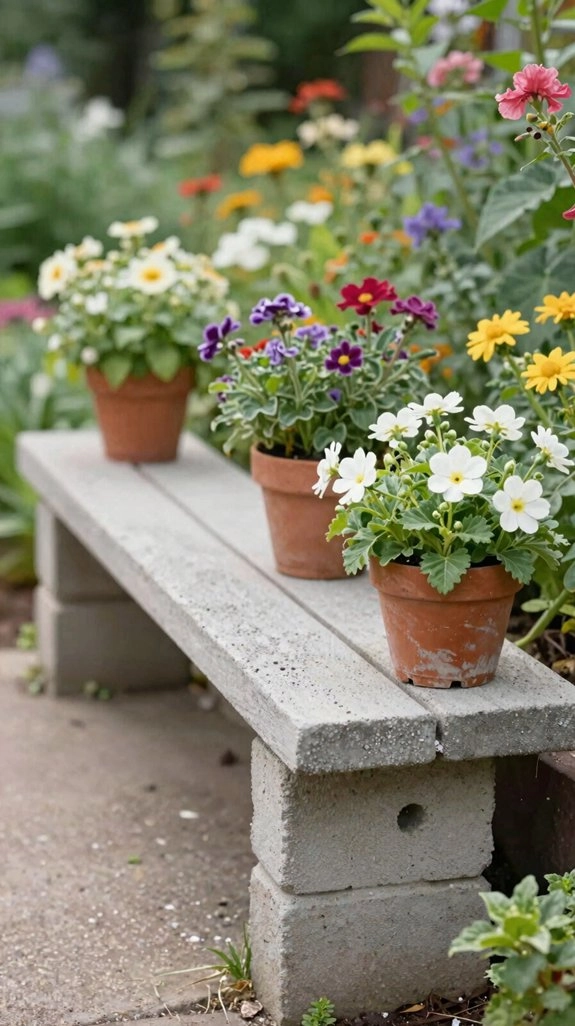
Balance Beds And Seating
In a well-planned cinder block garden, the beds and the seating should feel like best neighbors, not awkward strangers! You can pair a 4 ft x 8 ft raised bed with stacked-block seating and 44-inch planks, so you harvest, chat, and sip lemonade without trampling beans.
Fill the bed with topsoil, compost, and perlite, then tuck utensil cubbies and tool storage into the nearest hollow cells.
For Terrace access, place a low border wall between lawn and beds, then butt the bench to it for clean path definition.
A tiered corner? Even better!
Build a Cinder Block Raised Garden Bed

Once you’ve got your spot picked out, building a cinder block raised garden bed is one of those satisfying DIY projects that looks impressive without being fussy!
Start with a bed about 4 ft wide and up to 8 ft long, then stack 2–3 courses high.
Use topsoil, compost sourcing, and perlite for a loose mix, then think seasonal planting for easy wins.
- Lay blocks in a neat rectangle.
- Fill with 60% topsoil, 30% compost, 10% perlite.
- Plant tomatoes, peppers, salads, and roots.
- Try herbs in hollow cells.
- Add paving-stone caps for a polished finish!
Build a Cinder Block Retaining Wall
Start by mapping your wall layout, because staggered cinder blocks look tidy and hold up better, and you’ll want to set that first course on a level gravel base.
Next, pack in drainage gravel and a drain pipe or weep holes, since water pressure can turn a solid wall into a wobbly mess—no one wants a garden surprise!
Then cap the top, add a few plants or a clean stone finish, and you’ll end up with a sturdy wall that looks like it belongs there.
Wall Layout Basics
As you map out a cinder block retaining wall, think of it like building a sturdy little staircase for your yard, only this one holds back soil instead of people! You’ll fit right in once you nail the layout.
- Mark your terrace slope first.
- Set block alignment with string lines.
- Try mortarless stacking for a dry-fit start.
- Use leveling tools every course.
- Check rebar spacing before filling cores.
Build a wider base, then stack in staggered rows, nice and steady.
For a tidy finish, cap the top course.
Soon, your wall feels solid, friendly, and ready for plants!
Drainage And Stability
With a cinder block retaining wall, drainage and stability are the real MVPs, because water is sneaky and heavy, and it’ll push like a toddler mad at nap time if you let it!
Start on a level, compacted crushed-stone base so the first course stays true. Add perforated pipe and gravel backfill for hydrostatic relief, then tuck in geotextile fabric to keep the drainage layer from clogging.
Stagger each block course, and fill hollow cores with concrete or rebar where you need extra muscle.
A slight back tilt helps too, and a cap block finishes the job cleanly.
Planting And Styling
Once the wall is stacked and steady, the fun part begins: turning those plain gray blocks into a living little garden! You can fill some cells with a 60% topsoil mix, tuck in bird friendly herbs, and let trailing blooms spill over like a friendly welcome.
Add a mulch topping to hold moisture and keep weeds from crashing the party.
- Choose low-cost plants
- Clip in decorative lighting
- Use pathway edging for a neat finish
- Plant strawberries in sunny pockets
- Try a last-row surprise: colorful sedums
With compacted backfill and smart drainage, your wall looks good, lasts longer, and feels like yours!
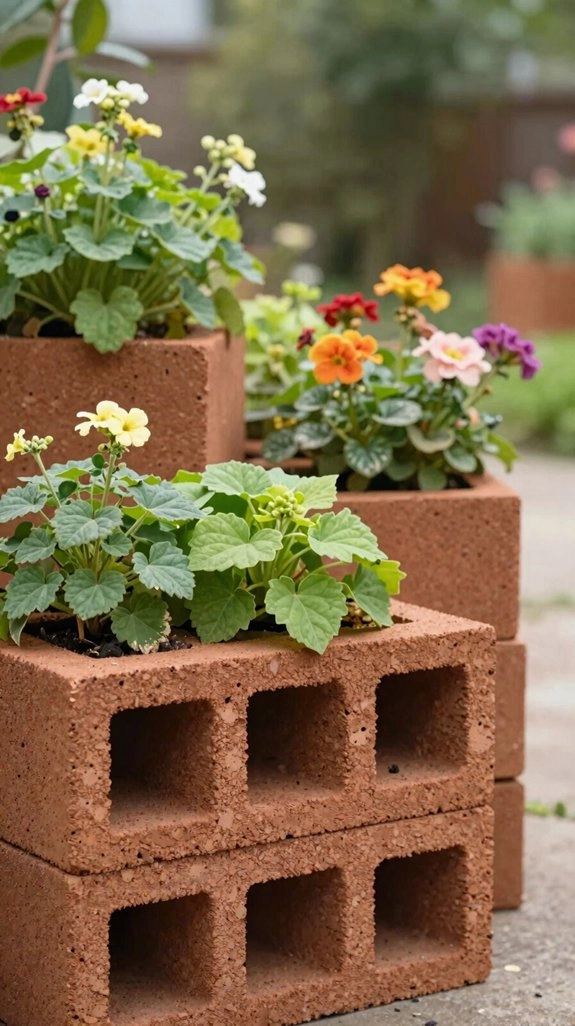
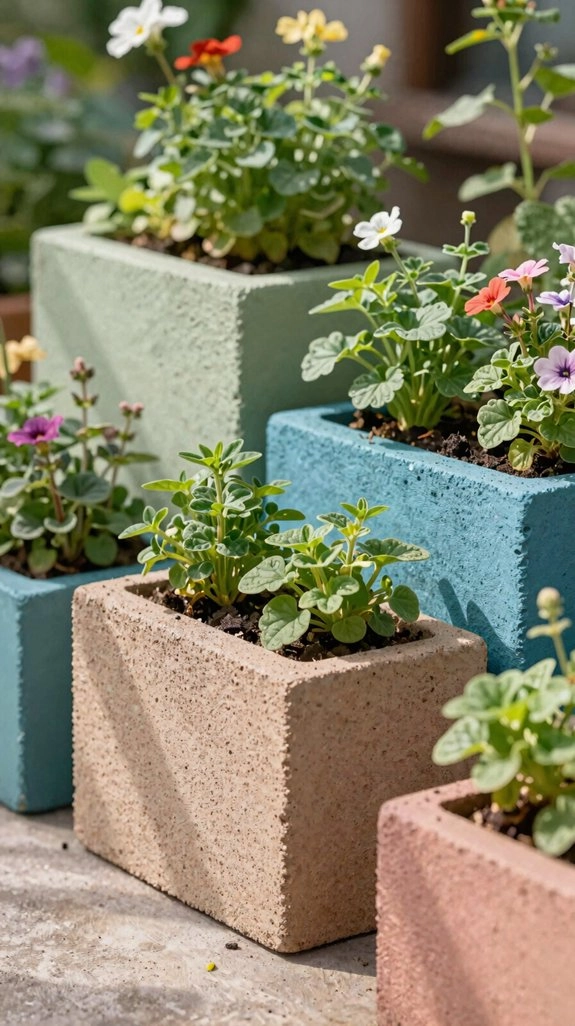
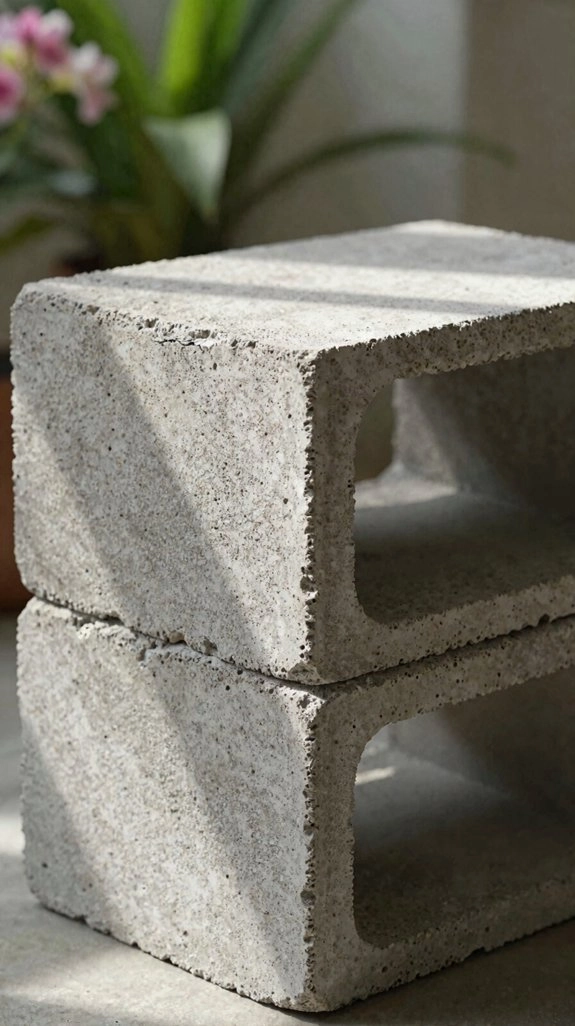
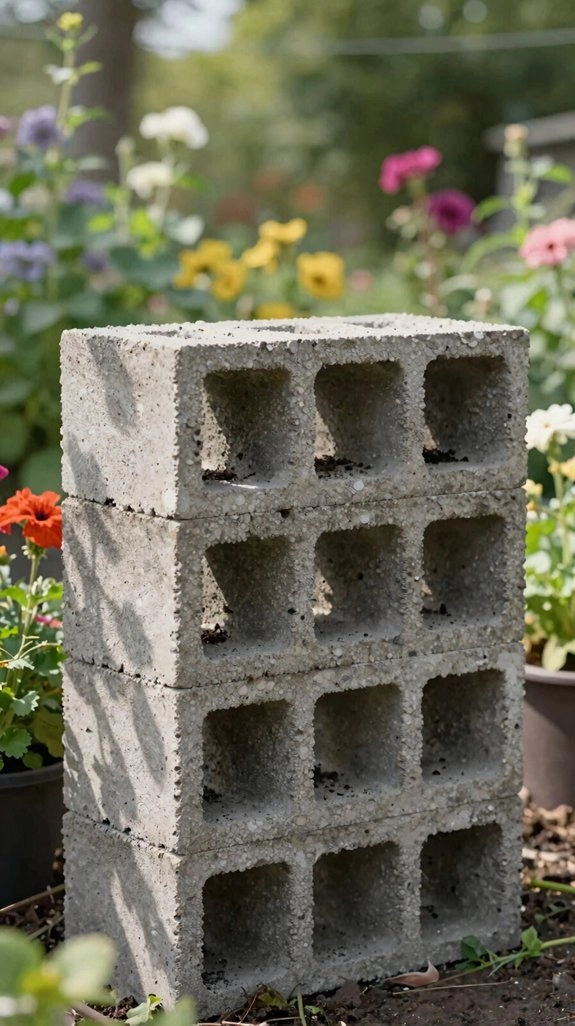
Make a Cinder Block Planter
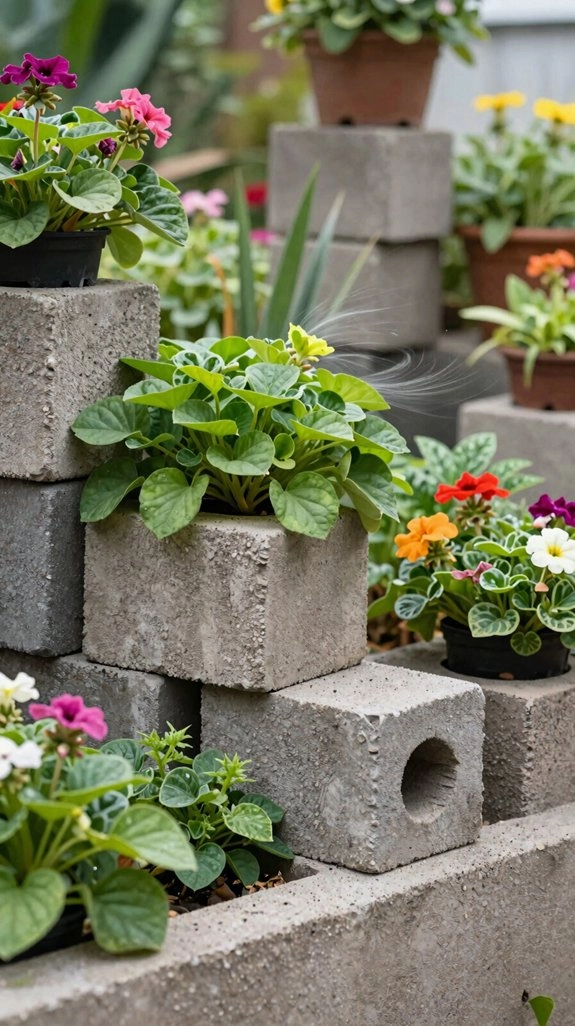
To make a cinder block planter, start by picking blocks with hollow cells, because those little openings do most of the work for you!
Check drainage hole checks first, then add a thin layer of gravel in each cell.
Mix soil with soil amendment tips in mind: about 60% topsoil, 30% compost, and 10% perlite, so your plants feel right at home.
Pack the mix firmly around roots, then tuck in flowers or succulents.
Want extra charm? Paint the outside with outdoor acrylics and painter’s tape, and for bigger builds, a flat slab on top keeps everything steady.
Easy, fun, and wow-worthy!
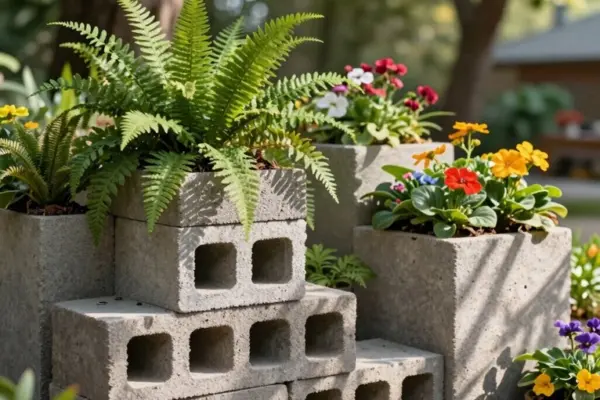
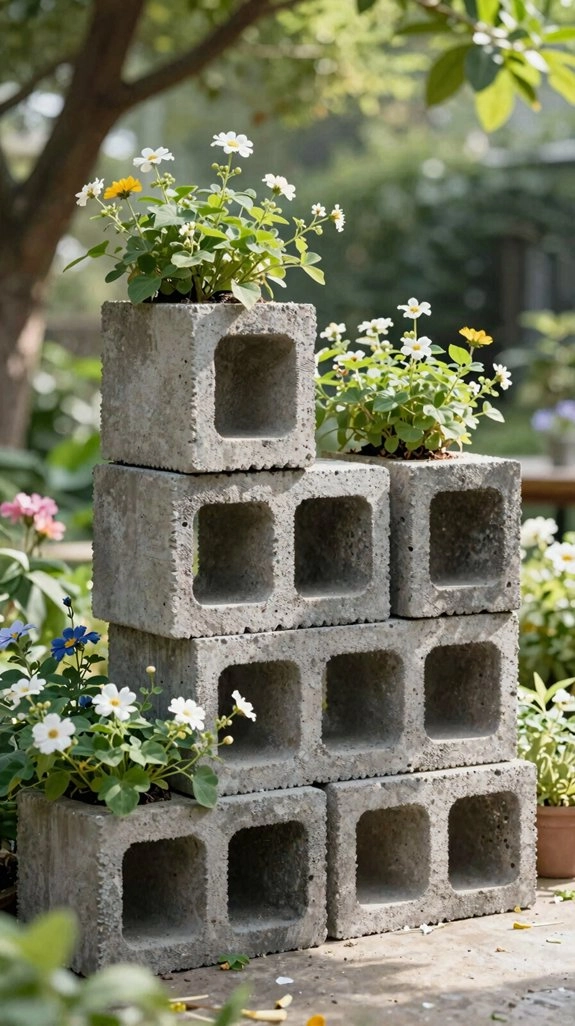
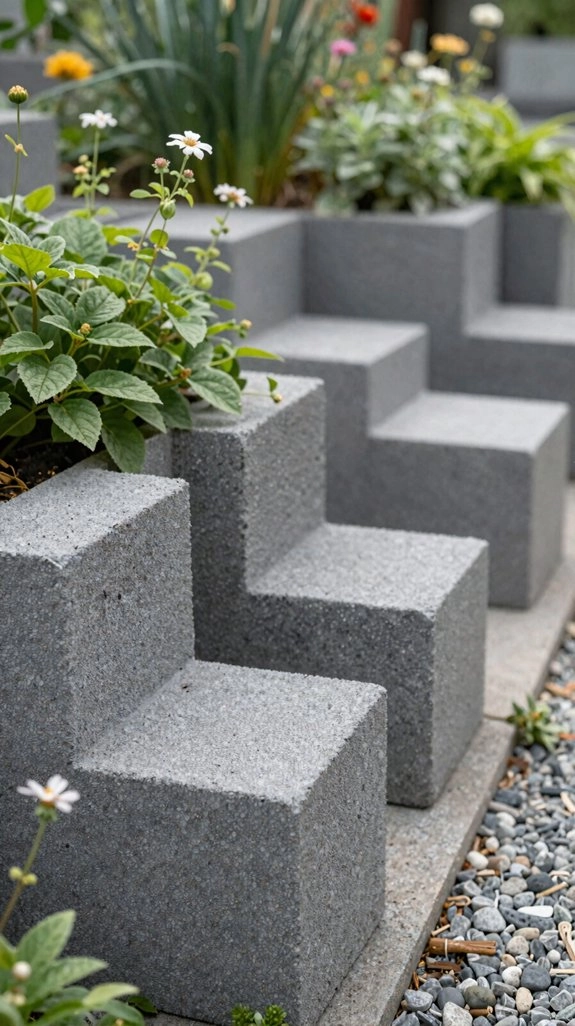
Try a Modern Tiered Planter
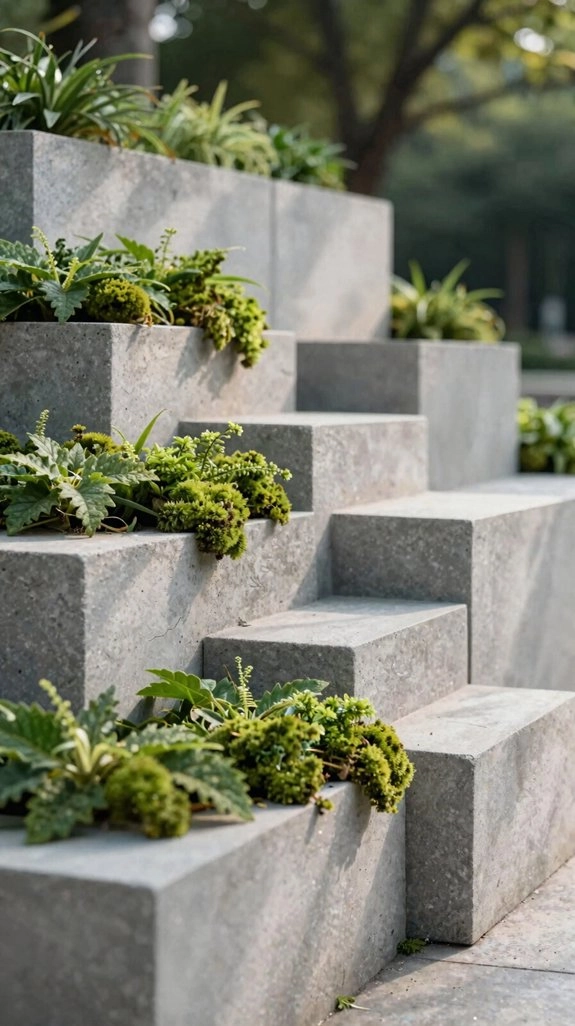
Want a planter that looks sharp and saves space?
Stack cinder blocks into stepped levels, paint them in bold color blocks with painter’s tape for crisp edges, then tuck herbs, succulents, or small flowers into each hollow pocket for a fun layered display.
It’s an easy way to create vertical garden appeal on a patio or balcony, and the best part is, it looks way fancier than the price tag!
Bold Color Stacks
If you’re after a planter that looks fresh, fun, and a little bit stylish, a tiered cinder block stack can do the trick! You’ll feel right at home building this bold setup, and it’s easier than it looks.
- Stack blocks into stepped levels.
- Paint them in one strong, opaque shade.
- Use tape color blocking for crisp edges.
- Add soil with perlite for drainage.
- Try succulents tier planting in sunny spots.
Your blocks become a cheerful mini landmark, not a boring pile. Let the paint cure first, then fill the cells and tuck in shallow-root plants. On a porch or balcony, the clean shape feels modern, welcoming, and just plain cool!
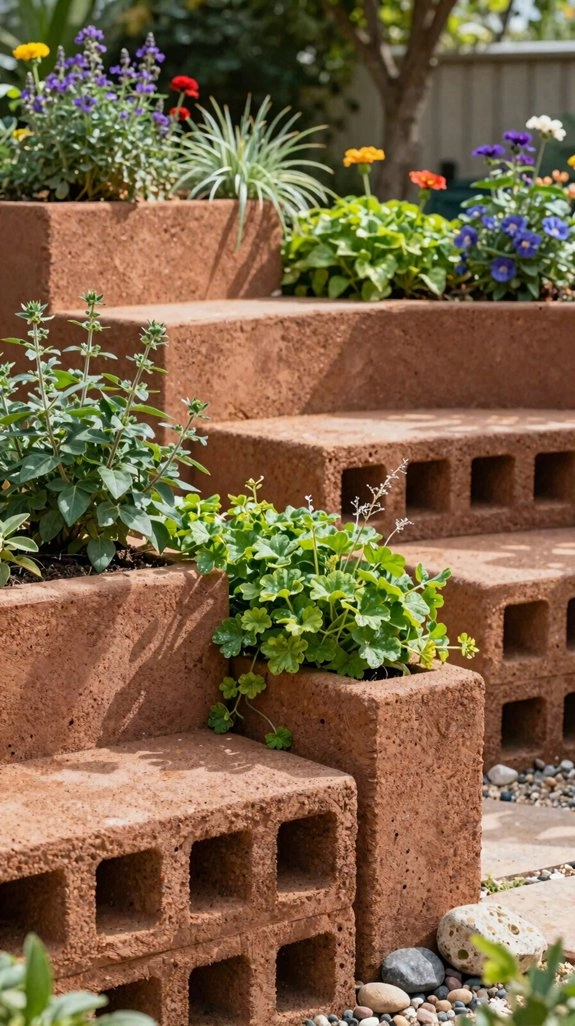
Layered Plant Displays
Layered plant displays take that bold cinder block look and give it a smart, modern twist! You stack blocks in an offset pattern, and each hollow becomes a tiny planting pocket, wow.
Use a simple soil amendment of topsoil, compost, and perlite for steady drainage.
Then follow easy plant spacing rules: tuck trailing succulents or herbs up top, and place fuller plants lower where roots have more room.
Add capping stones for a clean finish, less water intrusion, and less mess.
Keep a maintenance schedule, check watering tips weekly, and your tiered planter will feel friendly, fresh, and surprisingly polished!
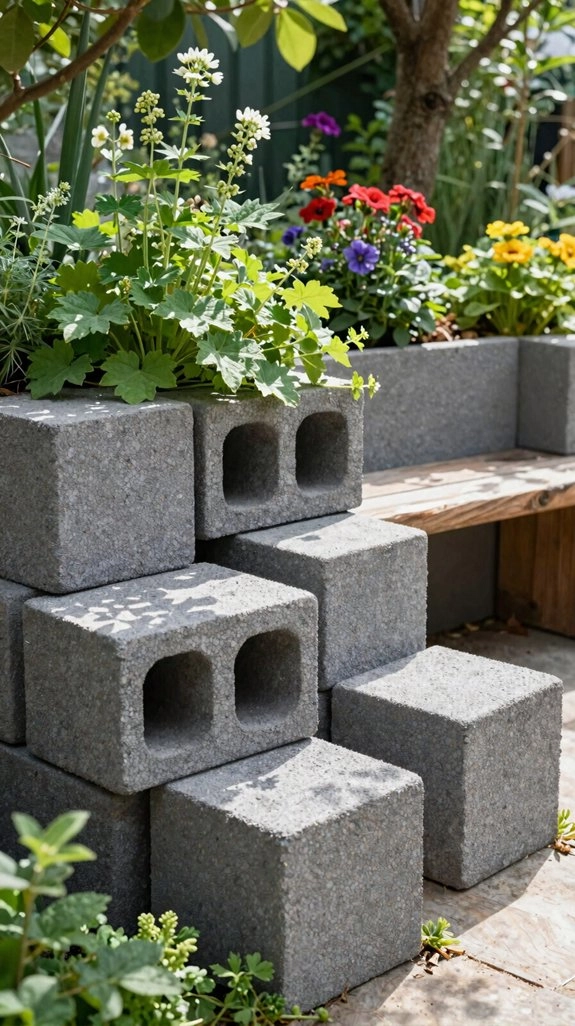
Vertical Garden Appeal
Stacking cinder blocks into a tiered planter turns a plain wall or empty corner into a mini vertical garden, and it looks way fancier than the price tag suggests!
- Stack blocks in a staggered layout.
- Fill cells with rich, draining mix.
- Pick succulents, herbs, or tiny blooms.
- Match container plant choices to each tier.
- Try seasonal watering tips so roots stay happy.
You can build this in an afternoon, and the hollow pockets make planting easy. Rotate blocks 90 degrees for more space, then paint one bold color for a wow finish. Your patio crew will think you hired a designer—cute, right?
Create Raised Bed Planters
Once you want a garden bed that looks neat and works hard, cinder blocks make a pretty handy shortcut! Stack them in a rectangle, about 4 feet wide and 8 feet long, then build 2 or 3 courses high.
Fill the cells with a 60% topsoil, 30% compost, and 10% perlite mix, and cap the top with paving stones for a clean, sturdy edge.
Need more room? Use the hollow openings for herbs or strawberries, a sweet space saving trick.
A quick soil testing check helps too, and rainwater harvesting plus natural mulch keeps your crew happy.
Use Cinder Blocks as Garden Risers
Cinder blocks make great garden risers when you stack them to lift your planters and pots, so your bonsai or bright focal flowers sit higher and catch more light and air—nice little stage, right?
Set the blocks on level ground for a steady base, then top them with a flat wooden board or concrete cap so wider pots and garden ornaments sit securely.
Want a fun twist? Fill the hollow cells with soil and tuck in succulents or herbs, and you’ve got a display that works hard and looks pretty clever!
Display Plants At Height
Why keep your favorite plants hugging the ground when a few cinder blocks can raise them right into the spotlight? You’ll love how easy this feels!
- Stack blocks on level soil for instant height.
- Set bonsai near eye level for better bonsai sightlines.
- Try vertical container styling in porch corners.
- Fill block holes with mix, then tuck in tiny bloomers.
- Cap the top with a flat stone for steady pots.
Use these risers to build friendly layers, so every plant gets noticed.
Keep the mix loose and drainage-friendly, and your raised display won’t stay soggy.
Cheap, cheerful, and wow, so neat!
Pair With Wooden Tops
Topped with a simple plank, stacked cinder blocks turn into sturdy garden risers that lift your pots, seedlings, or herbs right out of the damp and into better view. You can lay one board across a pair of blocks, or use wider boards for a tiny herb stage—easy, cheap, and oh-so handy!
Want extra function? Fill the hollow cells with soil for pocket planting or gravel for drainage, then seal the wood with exterior stain for weatherproofing tips that really last. Drill or fasten the top so it stays put, even when temperatures shift. Nice bonus: it also helps with pest control!
Add Painted Cinder Block Garden Decor
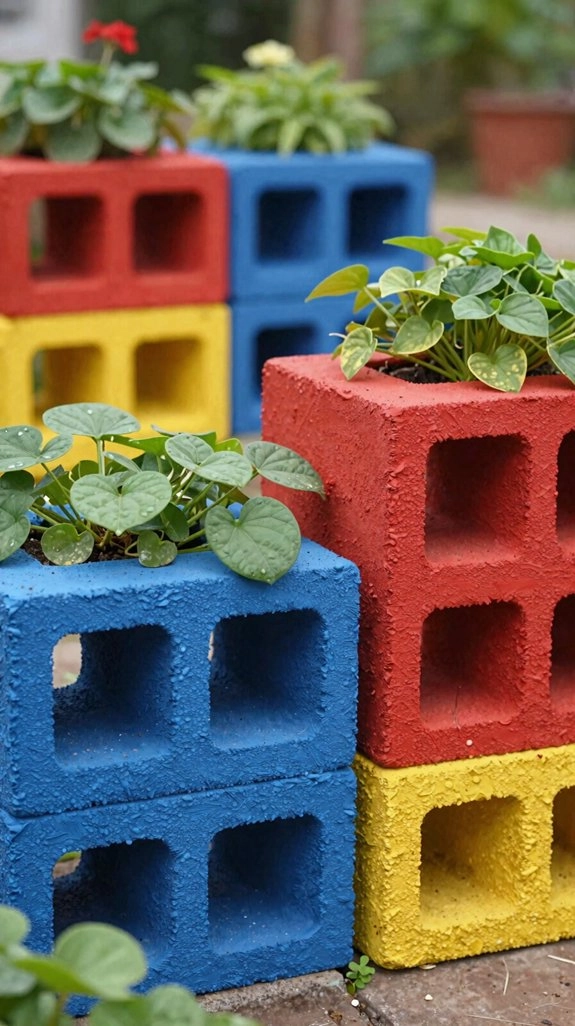
If you want your garden to feel a little more playful, painted cinder blocks are a fast and budget-friendly way to do it! You can join the crew with bold acrylic outdoor paint, and try textured paint finishes for extra charm.
- Tape clean color blocks first.
- Paint bright orange or blue-yellow combos.
- Fill holes with gravel and soil.
- Stencil flowers on the front.
- Finish with weatherproof sealing tips after curing.
These little blocks work great as planters, table bases, or accent pieces, and they don’t need skilled skills.
Honestly, your patio may start looking oddly proud of itself!
Design a Cinder Block Privacy Wall
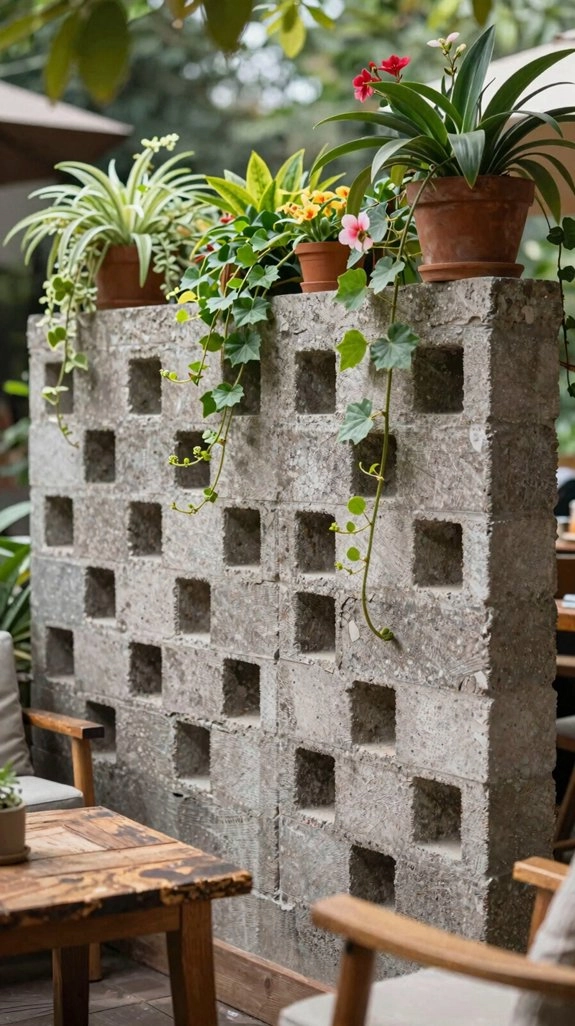
You can stack cinder blocks into a sturdy privacy wall that gives your yard a clean, bold backdrop, and you can even shape it to fit a straight run or a gentle curve—nice, right?
Try leaving a few openings for planter pockets, then tuck in gravel and soil for succulents so the wall feels lively instead of plain.
For the best result, stagger the blocks, keep the hollow cells filled where you can, and cap the top to help block water and make the whole thing look polished.
Wall Layout Ideas
A cinder block privacy wall can do a lot more than just block a view—it can set the whole mood of your yard, and that’s where the fun starts! Try these Fence Line Options to shape your space, then add Privacy Wall Lighting for a warm glow after dark.
- Stack blocks in staggered courses for strength.
- Shift seams to tighten the visual barrier.
- Paint or render for a polished look.
- Leave a few grid breaks for interest.
- Reinforce key cores where needed.
You’ll get a wall that feels friendly, sturdy, and totally yours. Nice, right?
Built-In Planter Sections
Built-in planter sections can turn a plain cinder block privacy wall into a mini garden that actually shows off a little! Stack the blocks with hollow cells facing out, then tuck in moisture-retentive potting mix for easy pockets of color.
Use staggered courses for strength, keep rows even, and start with a straight layout if you want a tidy look fast. Add succulents, trailing plants, and a little mulch moisture to help them settle in.
Drip irrigation makes watering simple, while seasonal pruning keeps growth neat. Seal and firm each cell so plant maintenance stays easy, and your wall feels welcoming, not wobbly.
Privacy And Drainage
When privacy matters, and you don’t want your wall to turn into a soggy science project, a cinder block design can do both jobs at once! Build it in staggered courses, and use block cores creatively for strength and style.
- Fill lower cores with gravel
- Slope soil away from the wall
- Leave a few weep openings
- Add planter pockets up top
- choose weatherproof finishes and seal gaps
That combo lets water drain, cuts pressure, and keeps the wall looking neat.
Cap it with coping or paving stones, and you’ll get a sturdy, friendly screen that feels like your own backyard clubhouse!
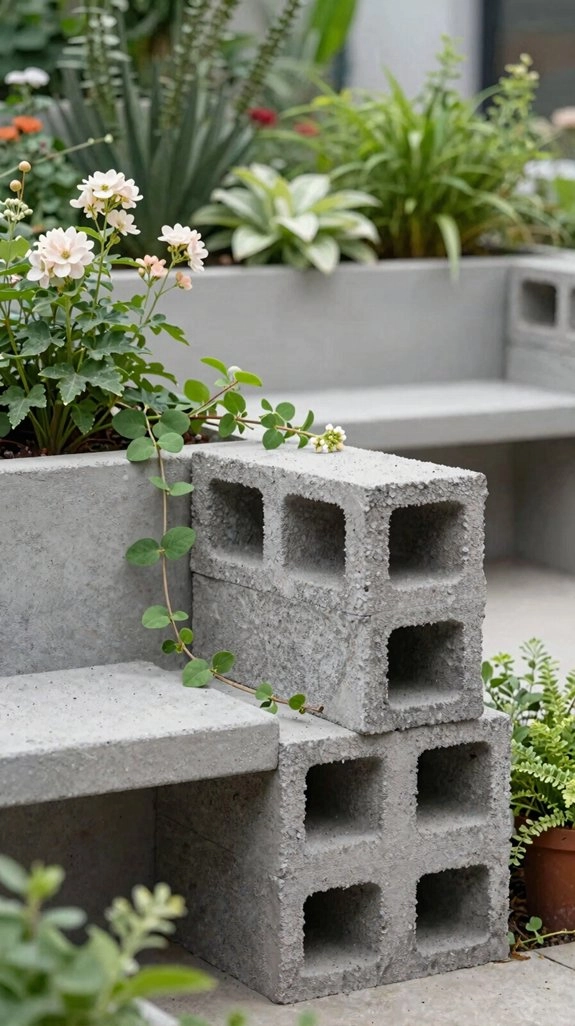
Build Planter-Style Furniture
To turn cinder blocks into planter-style furniture, start by stacking hollow blocks into a simple bench or side-table frame, then level everything carefully so it doesn’t wobble like a tired lawn chair!
You’ll get a friendly spot for herbs, succulents, or a drink, and it’s easier than it looks, promise.
Fill the cells with outdoor potting mix, or a blend with composting tips in mind: 60% topsoil, 30% compost, 10% perlite.
Add irrigation strategies by watering lightly and letting extras drain.
Paint the outer blocks with weather-resistant acrylic, then cap the top with wood or a slab for a polished, welcoming finish.
Make a Cinder Block Garden Bench
If you want a bench that looks charming, works hard, and doesn’t cost a fortune, cinder blocks can do the trick!
You’ll fit right in with this easy DIY, and your garden gets instant seating.
Stack blocks 2–3 high, add a slab or flat board, and you’ve got a sturdy base.
- Face cubbies up for storage.
- Use treated planks for comfort.
- Add cushions for easy lounging.
- Try weatherproofing tips on wood.
- Paint blocks for a fun finish.
For extra grip, use adhesive and gravel.
Cushion setup ideas make it cozy, and that hidden storage keeps snacks handy—cute, right?
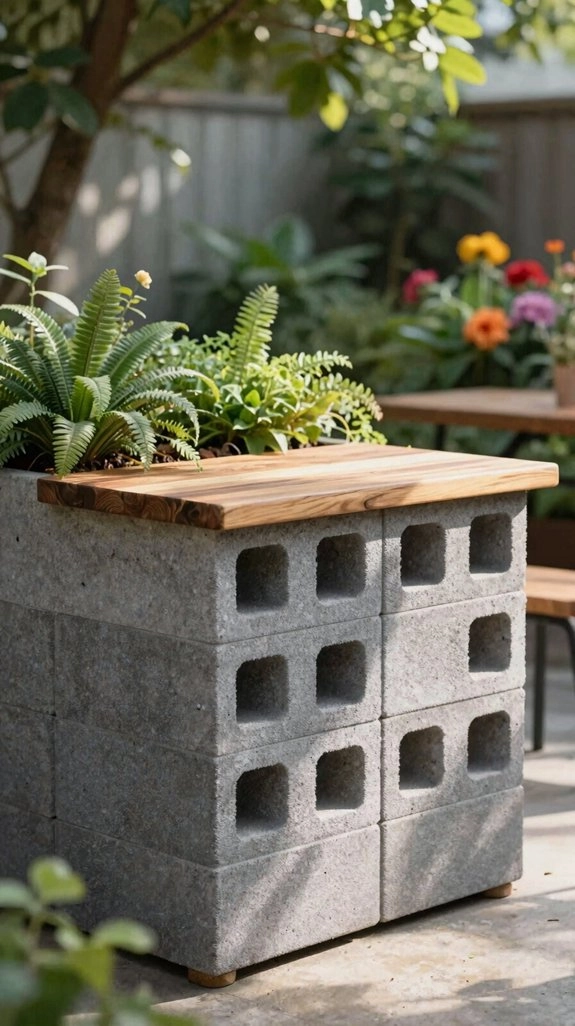
Create a Cinder Block Side Table
Stacking cinder blocks into a side table is a tiny project with big backyard payoff, and honestly, it’s way easier than it looks!
You’ll need standard blocks, a concrete slab, and a little drainage leveling so the top sits steady.
Set it beside your patio seating, then use the hollow spaces for patio storage, like utensils or grilling tools.
For a cleaner look, brush on Weatherproof paint or exterior acrylic, then add sealing storage by leaving some cells open or filling them with herbs.
It’s cheap, beginner-friendly, and your guests may assume you hired a pro!
Add a Cinder Block Garden Bar
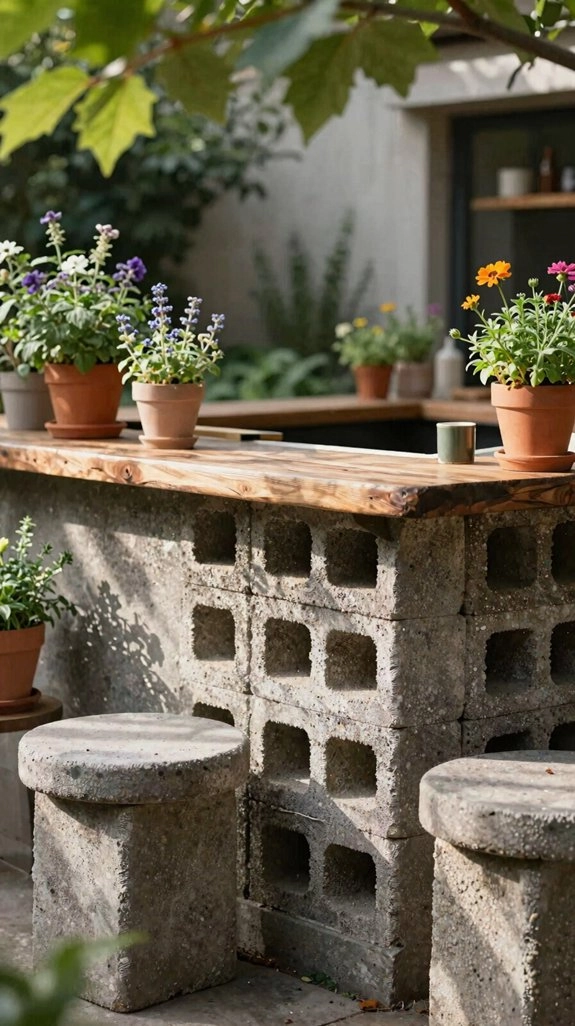
That handy cinder block side table can grow up into a full-on garden bar, and wow, it’s a backyard game-changer! Stack blocks into a sturdy base, top it with a slab, and you’ve got a spot for drinks, snacks, and happy hangouts.
- Fill planter holes with gravel, soil, and herbs.
- Use hollow cells for cups, napkins, and tools.
- Leave a flat overhang for plates.
- Add a plank shelf for glassware.
- Finish with a Weatherproofing checklist and decorative sealing options.
Paint it or add stone veneer to match your crew’s style. It’s cheap, beginner-friendly, and instantly feels like your own little party zone!
Build a Cinder Block Fire Pit
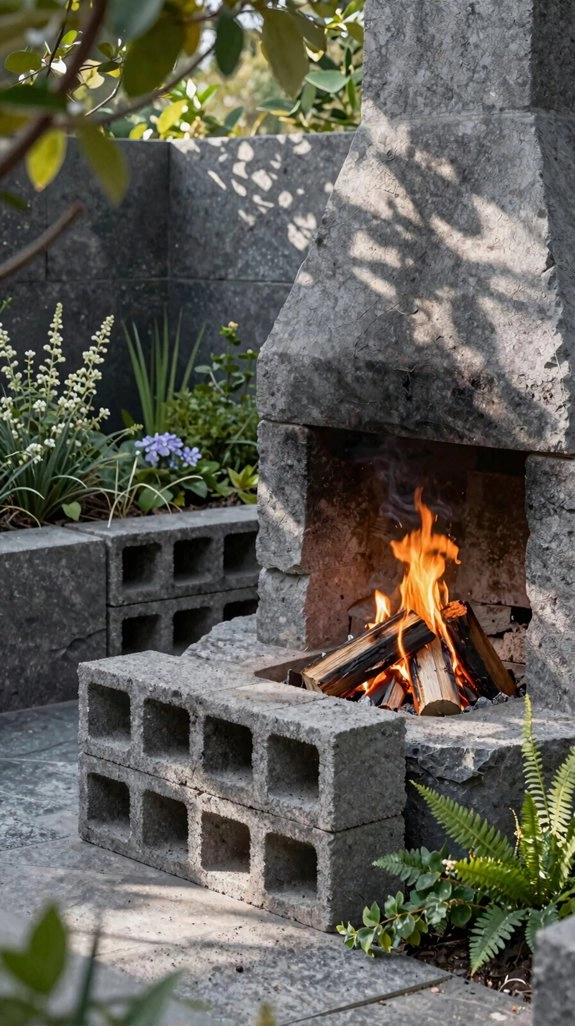
A cinder block fire pit can turn a plain patio into the coziest spot in the yard, and you don’t need special tools to pull it off!
Start on a level base of gravel and sand, then lay a half-square block firebox and check that it feels solid.
Leave a few hollow cells open for texture, but fill the ones near the flame with non-combustible material, and add a fire pit insert if you want extra safety.
Finish with pebbles, a simple top course, and nearby outdoor seating, plus patio lighting.
Keep water close, and you’re set for warm, easy nights!
Set Up a Cinder Block BBQ Station
If your cinder block fire pit already has the yard feeling warm and welcoming, why not keep the good times cooking?
Build a simple BBQ station with stacked blocks, and you’ll get a sturdy spot that feels like part of the crew. Try this:
- Lay a U shape for the grill
- Use a grate or support to keep it level
- Fill hot-area cavities with gravel
- Add a slab or plank countertop
- Seal it for weatherproofing tips
You’ll love the easy prep space, and smart safe grilling tips make it feel easy, not fussy.
Add cubbies for tools, and boom, backyard chef status!
Use Cinder Blocks for Potting Stations
As soon as you stack a few cinder blocks into a sturdy counter shape, you’ve got the start of a potting station that feels surprisingly polished—without the pricey garden-center drama!
Add a solid board or slab on top, and you’ll have a comfy work surface that keeps you in the groove.
Line the openings with fabric, then tuck in potting mix for herbs, seedlings, and a little seedling labeling fun.
Use the block cavities for Tool organization, spare pots, and twine, plus weatherproof coverings when rain rolls in.
Finish with masonry paint options, and seal gaps for a tough, friendly setup that’s all yours.
Try Cinder Block Vegetable Garden Fencing
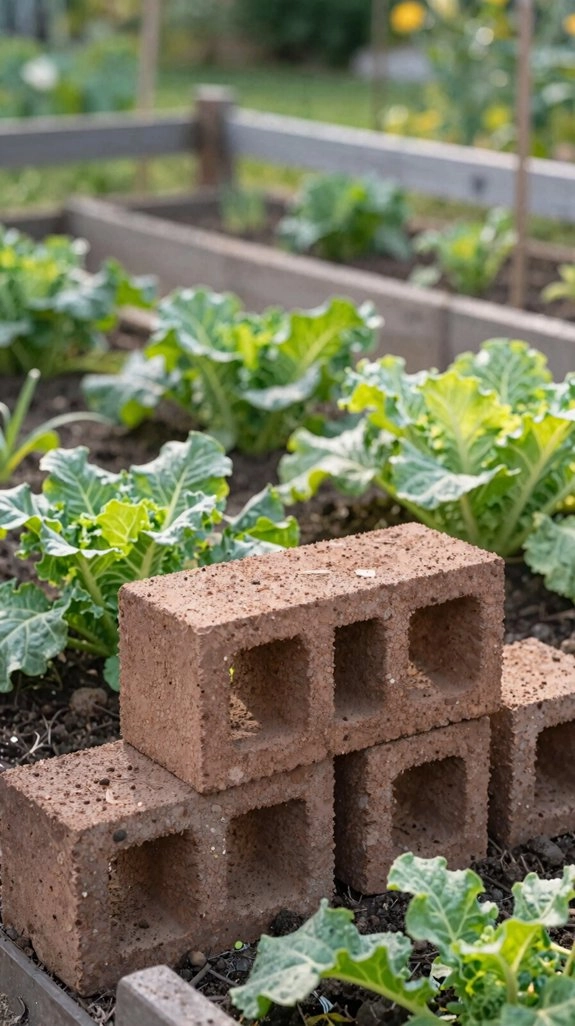
Stacking cinder blocks into a vegetable garden fence is a smart, low-cost way to give your beds a little backbone and a lot more pest protection! You’ll fit right in with gardeners who want simple wins and a tidy look.
- Lay blocks in a line, hollow cores up.
- Backfill for stability, then pack the base.
- Mix in trellis panels for climbing beans.
- Use wire attachment tips to tie chicken wire tight.
- Try compact corner fencing, and cap the top for seasonal pest proofing.
If you like, tuck soil into a few holes for thyme or oregano—tiny bonus pockets, big garden joy!
Add Garden Steps With Cinder Blocks
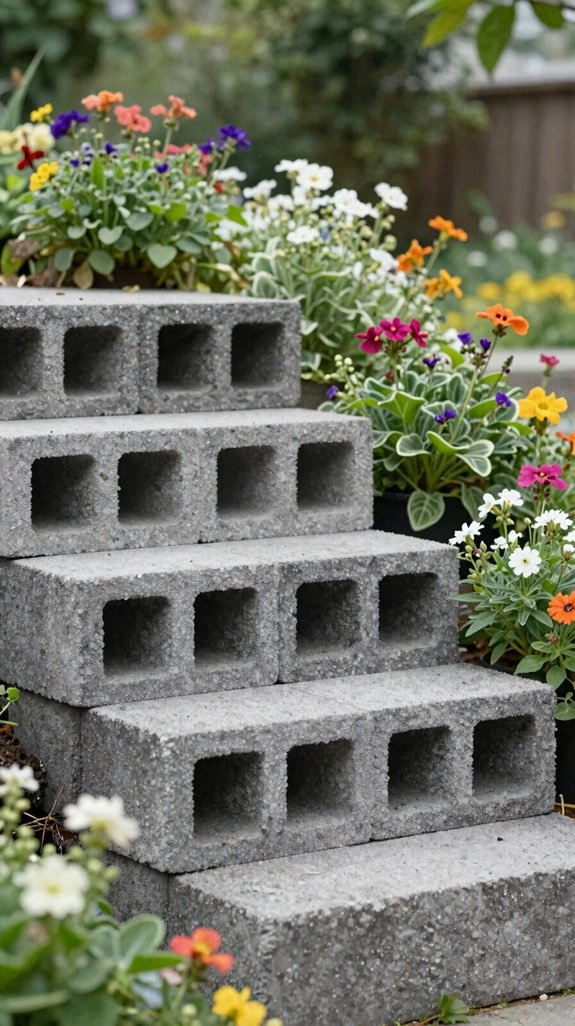
Turn those plain cinder blocks into handy garden steps, and suddenly a bumpy slope feels a lot more manageable! You can stack them in a riser pattern, then backfill behind each step with soil or gravel for a sturdy, friendly path.
Start with level base prep using compacted sand or gravel, so nothing wobbles later.
Stagger the blocks like a tiny retaining wall, and keep each rise even for safer footing.
For drainage considerations, let water move away from the steps, not behind them.
Want extra polish? Cap each tread with a slab or paver, and fill hollow cells for strength or a cute planting pocket!
Create a Zen Cinder Block Garden
If you want a garden spot that feels calm the second you look at it, a Zen cinder block garden is a fun, low-cost way to get there!
You can build one fast, and it won’t boss you around like high-maintenance decor.
- Stack hollow blocks in a neat, symmetrical shape.
- Paint them in soft tones, then use painter’s tape for crisp lines.
- Fill cells with soil, or leave some empty for balance.
- Tuck in succulents, herbs, or slow flowers.
- Try Weatherproofing tips and a simple maintenance schedule.
Place it on a porch corner, and you’ve got instant calm—nice, right?