11 Raised Brick Garden Bed Ideas — and How to Build One That Lasts
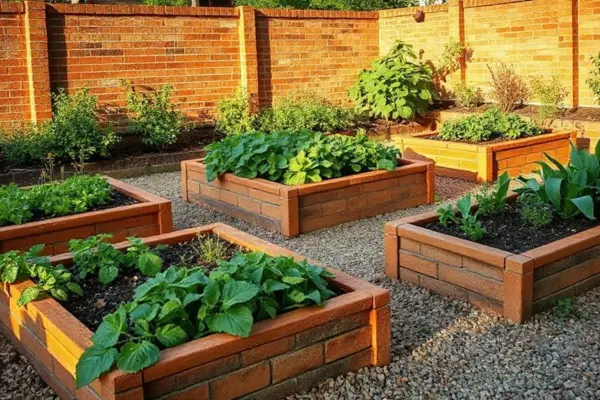
- 11 Raised Brick Garden Bed Ideas — and How to Build One That Lasts
- Key Takeaways
- Why Brick Outperforms Wood and Composite Over the Long Term
- 11 Brick Garden Bed Styles Worth Building
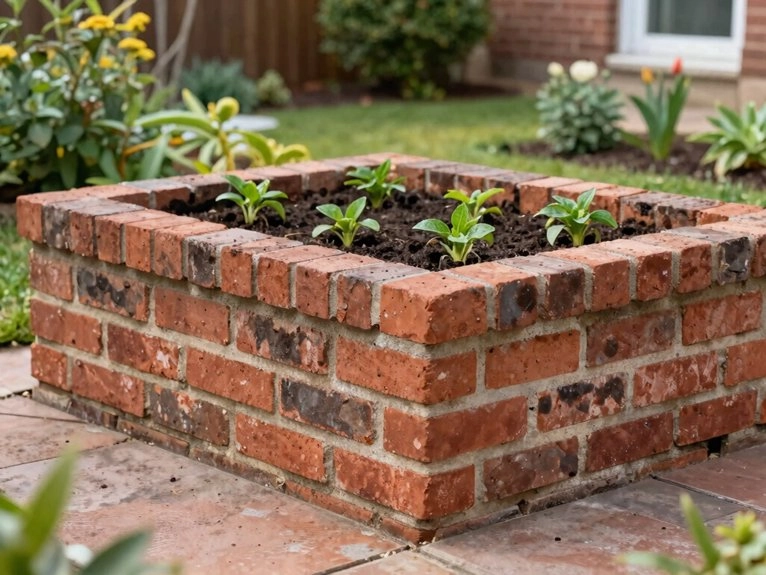
- Single-course low border bed
- Double-course cottage style
- Stepped tiered bed
- L-shaped corner bed
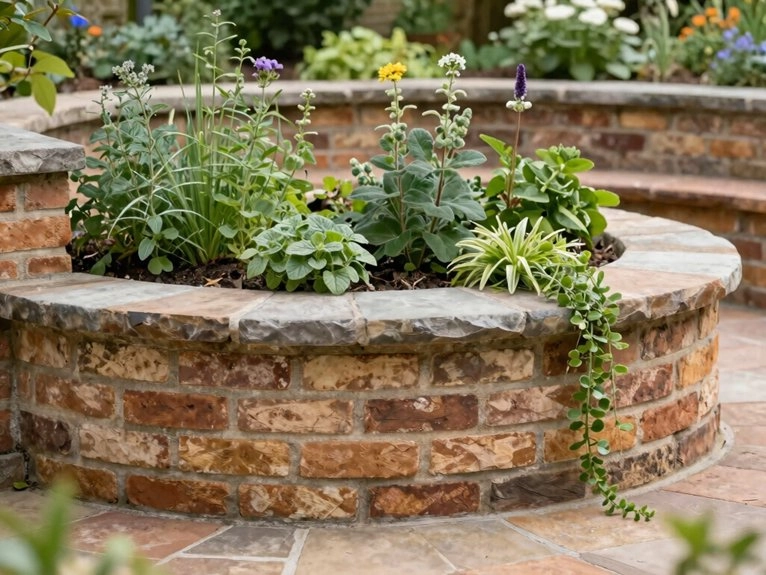
- Circular or curved bed
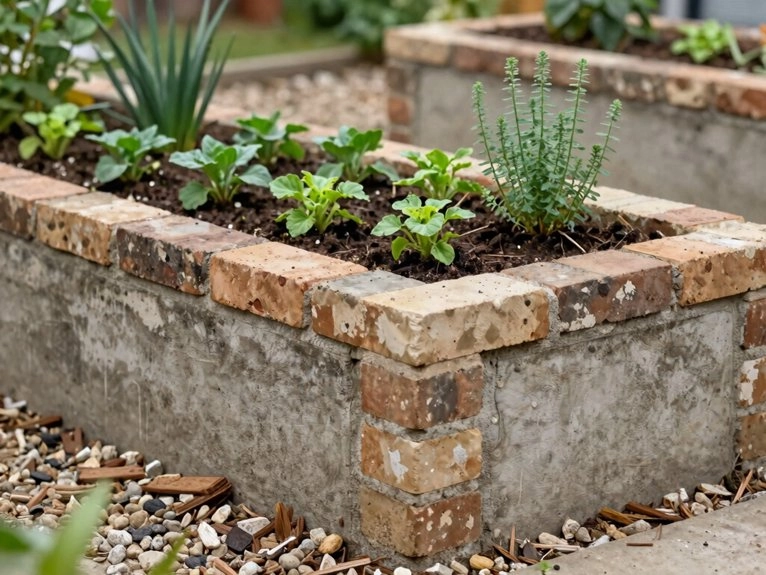
- Reclaimed brick rustic bed
- Whitewashed painted brick
- Mixed brick and timber
- Tall accessible kitchen bed
- Formal symmetrical pair
- Integrated seating wall bed
- Choosing Your Brick: Type, Finish, and How Each One Weathers
- Facing and stock bricks
- Engineering bricks
- Reclaimed and salvaged
- Concrete and reconstituted
- Height, Width, and Sizing Decisions Before You Lay a Single Brick
- How to Build a Raised Brick Garden Bed — Mortar vs Dry Stack
- Marking out and base prep
- Foundation course and leveling
- Laying courses and corners
- Drainage holes and backfill
- Coping and finishing the top
- Filling and Preparing Your Bed — Soil, Drainage, and Depth
- What a Raised Brick Bed Costs to Build — DIY vs Hiring Out
I’ve built brick beds that outlast wood by years. For a bed that lasts, use new clay or engineering brick, set the first course 1–2 inches into compacted gravel or MOT Type 1, and cap it with coping bricks or concrete blocks. Try a low border, double-course cottage style, or a stepped tier for slopes. Fill with 60–70% topsoil and 30–40% compost, add weep holes, and keep paths 3 feet wide. I’ve got the rest next.
Key Takeaways
- Choose new clay or engineering bricks for edible beds; avoid reclaimed bricks unless you verify they’re clean and paint-free.
- Match the bed style to your space: low borders, cottage walls, tall kitchen beds, tiered slopes, or built-in seating.
- Build on a level, compacted base with a shallow trench and 4–6 inches of gravel or MOT Type 1 in frost-prone areas.
- Use running bond with staggered joints, setting the first course slightly into the ground for strength and a planted look.
- Finish with durable coping bricks or cap blocks, and seal porous reclaimed brick only after full curing.
Why Brick Outperforms Wood and Composite Over the Long Term
When I started comparing raised bed materials, brick quickly won me over, because it just keeps doing the job year after year without begging for repairs.
You get thermal inertia, so your soil warms sooner in spring and cools more slowly at night. That helps you and your family stretch the season a bit.
I also like the chemical safety of new clay brick for edibles, since it’s inert when clean. Wood can rot, and composite boards can fail.
Build it well on a firm base, and you’ll join the happy crowd that plants once and relaxes later.
11 Brick Garden Bed Styles Worth Building
If you want a brick bed that fits your yard and your patience level, I’d start with the style that matches how you garden, not just how pretty it looks.
I like short, unmortared beds for herbs; they’re quick, reusable, and easy to move when my family changes plans.
For carrots or beets, I build double-thick walls with staggered joints.
On slopes, terraced beds make smart little microclimate pockets and keep water where roots want it.
Add a climbing trellis for beans, cap the top with coping bricks, and line the base with hardware cloth.
Use clean clay brick only—safe, sturdy, done.
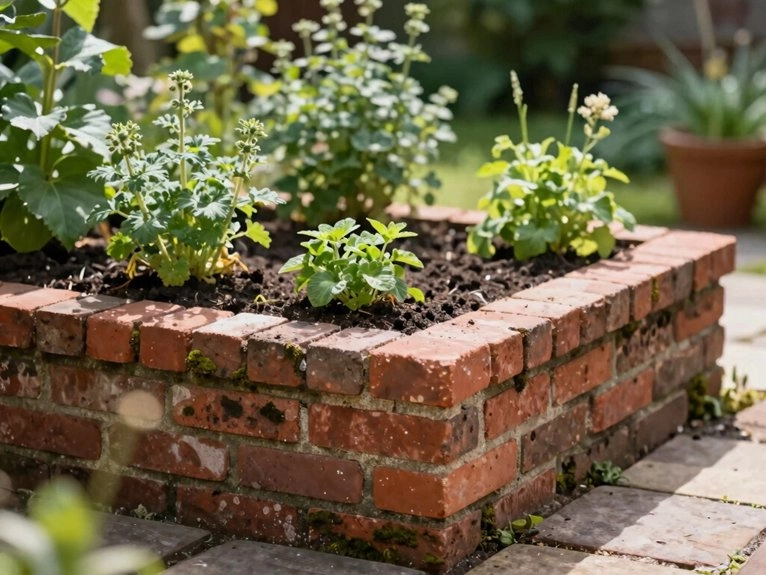
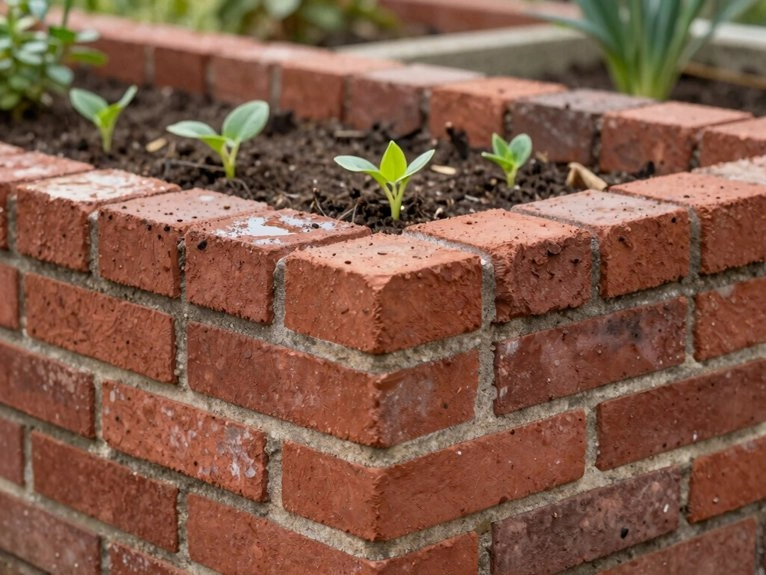
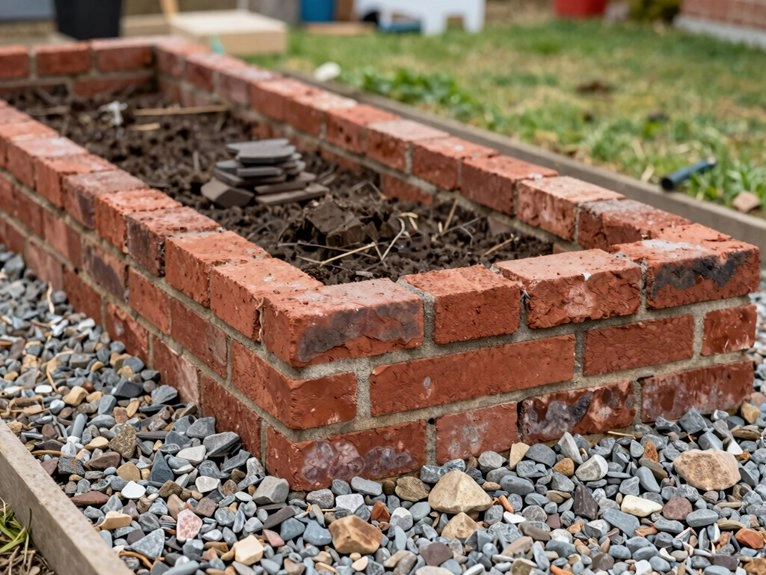
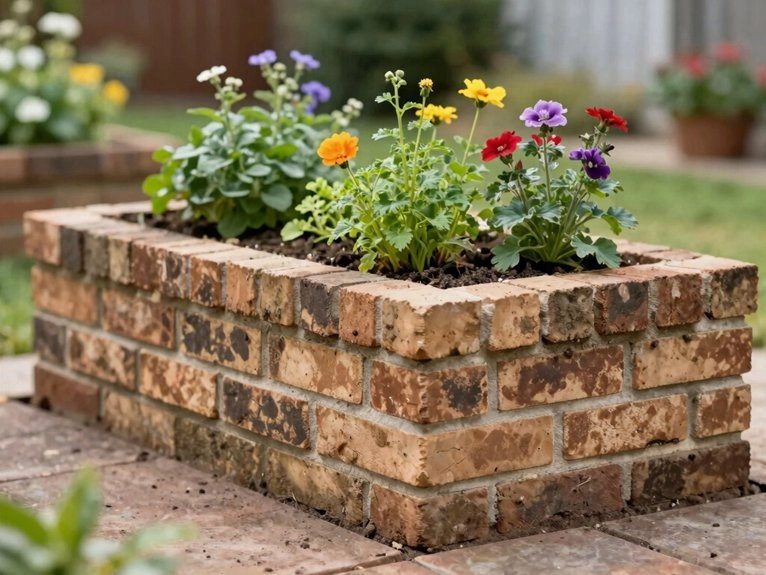
Single-course low border bed
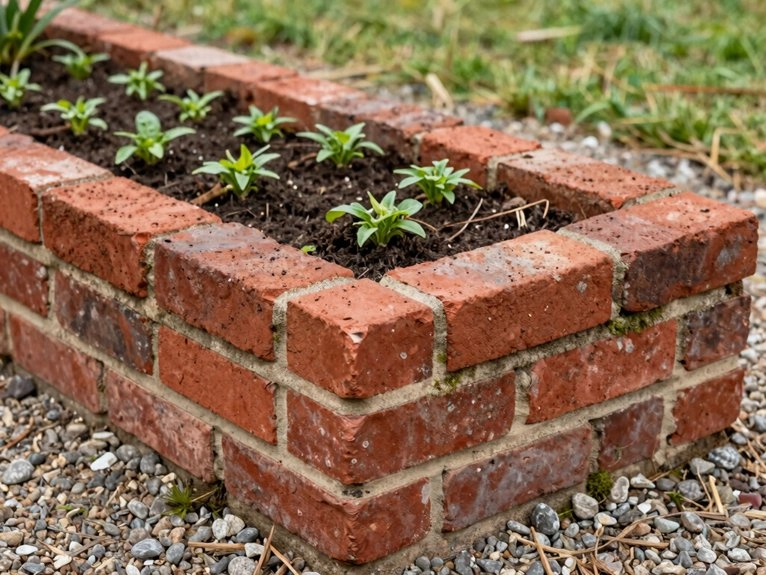
For a clean, low-key edge that still does real garden work, I love a single-course brick bed. I set new, unpainted clay bricks on cleared, level soil, sink them 1–2 inches, and stagger the joints.
That gives you a neat 4–8 inch border for mulch and shallow-rooted edge plants. Keep paths about 3 feet wide, and make the bed under 4 feet across so you can reach in without acrobatics.
I fill mine with topsoil and compost, then watch for settling. Seasonal maintenance stays simple, and hardware cloth helps if burrowing pests start acting bold.
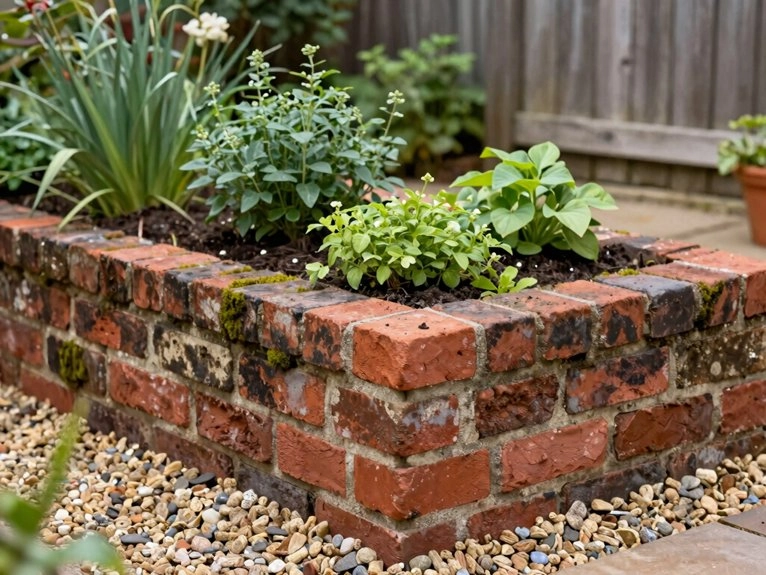
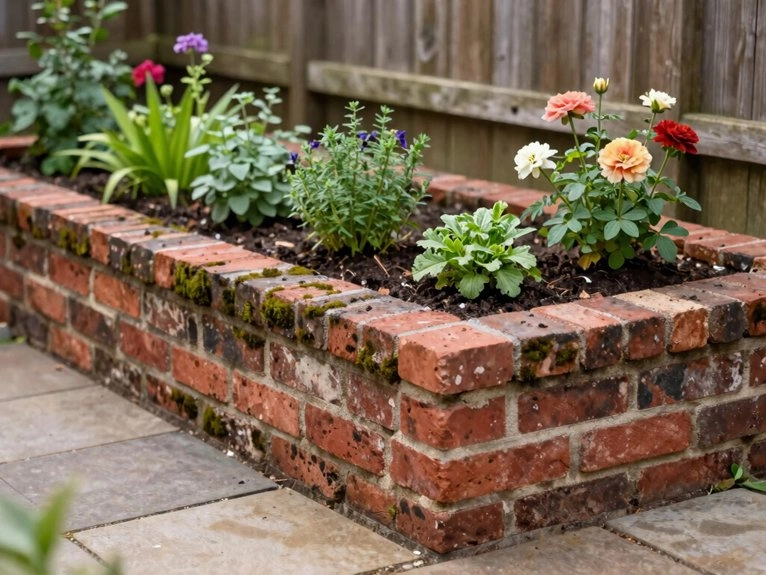
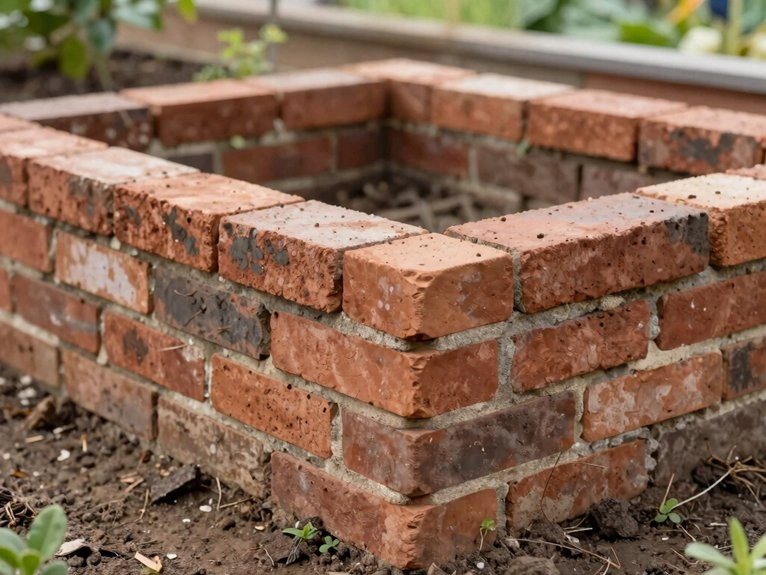
Double-course cottage style
Cottage charm starts with a sturdier wall. I build double-course beds with two brick widths, and you get cottage aesthetics that feel welcoming, not fussy.
Set the first course in a shallow trench, then stagger each brick in running bond so the wall stays steady without mortar. A laser level helps a lot; my family jokes it’s my “garden referee.”
Keep the bed 3–4 bricks high, fill it with topsoil and compost, and leave room for mulch. That setup gives you microclimate benefits for herbs and flowers, plus a neat, lasting edge.
Stepped tiered bed
After the cozy cottage look, I like to add a stepped tiered bed when I want a little more drama and a lot more planting room.
I build mine with two to four brick tiers, each 6 to 8 inches tall, so you can tuck in herbs below and blooms above.
I set the lowest course on a level gravel base, stagger seams, and mortar the walls for strength.
Keep each tier 2 to 3 feet deep, and leave 3-foot paths.
I fill them with topsoil, compost, and mulch for seasonal color.
Smart irrigation planning keeps everyone happy, even my picky basil.
L-shaped corner bed
When I want to make the most of a tricky corner, I go with an L-shaped brick bed because it hugs a fence or wall and still leaves the middle of the yard open.
You get a cozy corner microclimate, and your tomatoes stop acting like drama queens.
I lay two perpendicular walls, 3–4 courses high, with staggered bricks and a double-thick outer corner if frost’s a bully.
I set the first course 1–2 inches down on leveled gravel or Type 1 MOT, then cap with solid bricks or 4x8x16 blocks.
Add planting pocket mulch, keep it under 4 feet wide.
Circular or curved bed
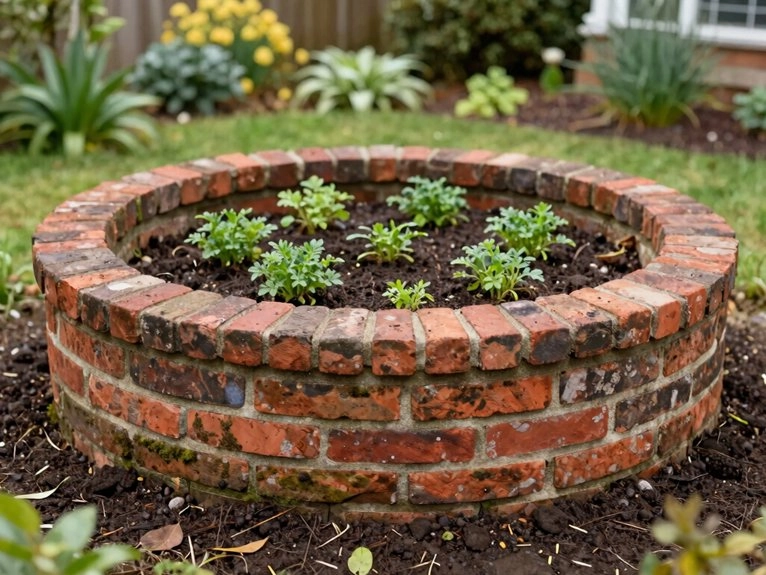
Shaping a curve is one of my favorite ways to turn a plain brick bed into a real focal point.
I’d build yours with three or four courses of new clay bricks, set on a packed stone base or tamped soil. Use full and half bricks to keep the arc smooth, and stagger each row so the wall stays strong. I like a laser level here; it saves my sanity.
For low maintenance planting, line the inside with weed fabric, then add compost-rich soil. Plan curved irrigation early, because dragging hoses around a circle gets old fast, trust me.
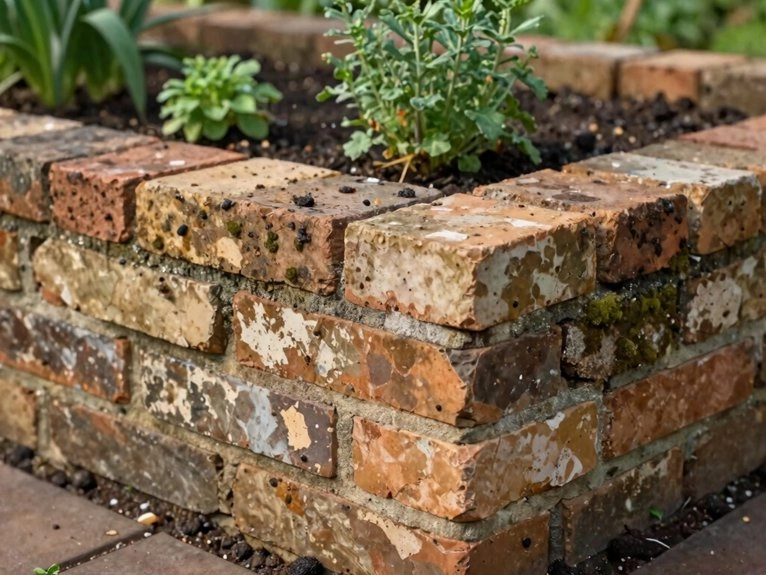
Reclaimed brick rustic bed
Old bricks have a lot of charm, and I love using them for a rustic garden bed because they make the space feel lived-in right away. You get that historic patina without trying too hard, and your yard starts feeling like a place your people belong.
Stack reclaimed bricks dry in short beds, three or four bricks high, or go double-thick and sink the first course 1 to 2 inches. I check for paint or creosote before planting edibles. For a longer-lasting bed, I use sand-based mortar and plant safe sealing after curing. Fill with topsoil, compost, then tuck leftovers into paths.
Whitewashed painted brick
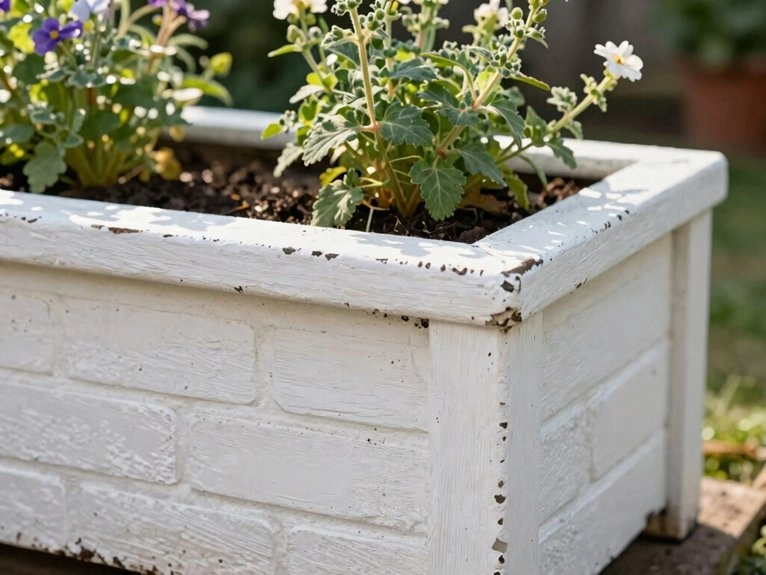
If the rustic, timeworn look is your thing, whitewashed painted brick gives you the same cozy charm with a brighter, fresher feel.
I mix one part limewash or latex paint with four parts water, then brush it on like a friendly veil, not a costume. I always scrub off dirt first and let new mortar cure 28 days, because wet brick can get cranky. For limewash safety, I choose breathable products; my old clay bed thanked me. I test a patch, wait a few weeks, then add coats. For edible safe finishes, I keep paint above soil level.
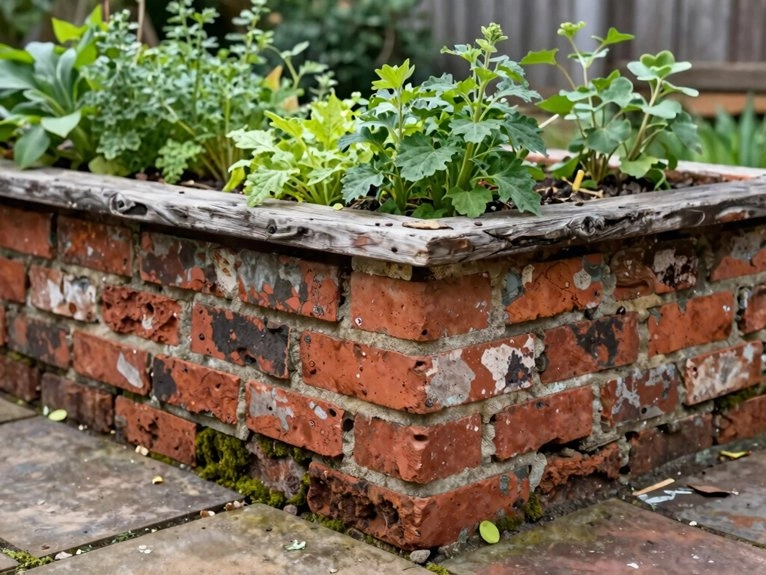
Mixed brick and timber
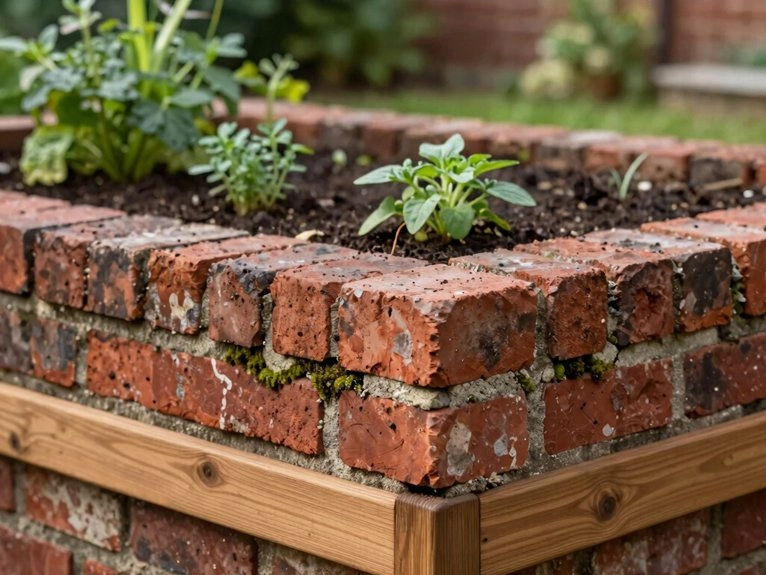
A sturdy mix of brick and timber gives you the best of both worlds, and I love how it turns a plain raised bed into a spot you can actually sit on while you work.
I use reclaimed clay brick below and cedar 2x8s on top, which feels like a heritage pairing with real charm. Build the base two bricks wide, anchor the cap with galvanized masonry screws, and keep food-safe bricks on the top course.
On slopes, add metal straps.
I line the inside with weed barrier, pack gravel in the hollows, and do seasonal maintenance—because rot likes shortcuts, too.
Tall accessible kitchen bed
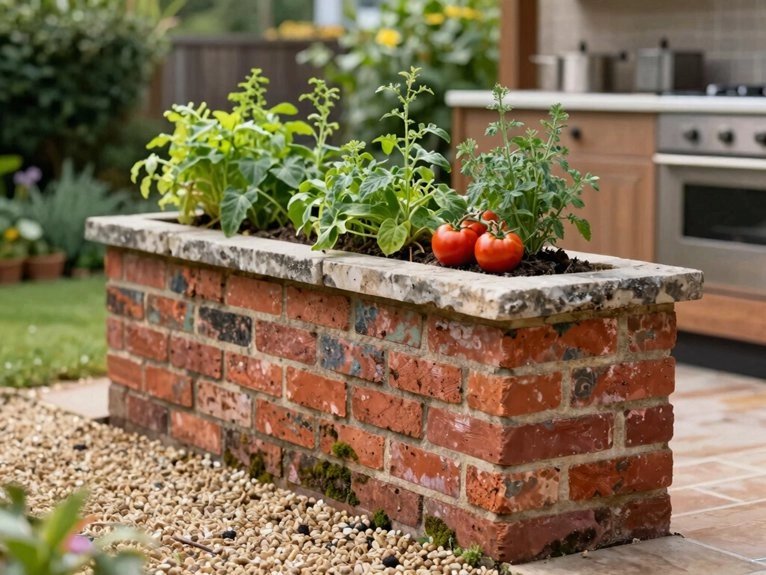
Build this tall accessible kitchen bed at about 18 inches high—roughly three brick courses—so you get 14 to 16 inches of rich soil without having to crouch like you’re hunting for dropped keys.
I’d stack clean clay bricks in a running bond, sink the first course 1 to 2 inches, and cap it with solid concrete or travertine blocks. That gives me a handy ledge and steady walls.
I line mine with heavy-duty weed barrier and, if pests are sneaky, hardware cloth. For ergonomic planting and accessible harvesting, I leave 3-foot paths and fill with composty topsoil.
Formal symmetrical pair
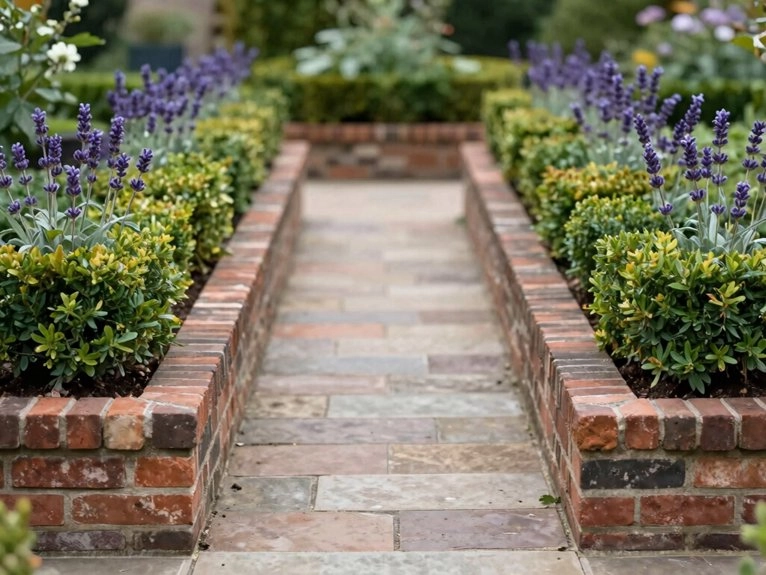
When I want a garden that feels tidy and calm, I go for a formal symmetrical pair: two identical brick raised beds placed opposite each other like they’re posing for a photo.
I set them on level ground, with a 3- to 4-foot path between, so my wheelbarrow and I don’t play bumper cars.
I use clean clay bricks, staggered three or four courses high, with matching caps.
Then I mirror pathways, paired trellises, and plant the same lettuces and herbs in both beds.
A boxwood edge or same-color mulch ties it together nicely, no garden drama.
Integrated seating wall bed
I like turning part of a raised brick bed into a built-in seat, because it makes the whole garden feel more useful and a little more welcoming. I’ve done this with my family, and it’s a cozy win.
- Use cap blocks or full bricks for built in seating.
- Aim for 16–18 inches high.
- Make the seat 10–12 inches deep.
- Build a curved bench or straight edge.
- Keep paths 3 feet wide.
Set the first course on compacted gravel, then stagger the bricks. Line the inside with weed barrier, and don’t make your bed wider than you can reach.
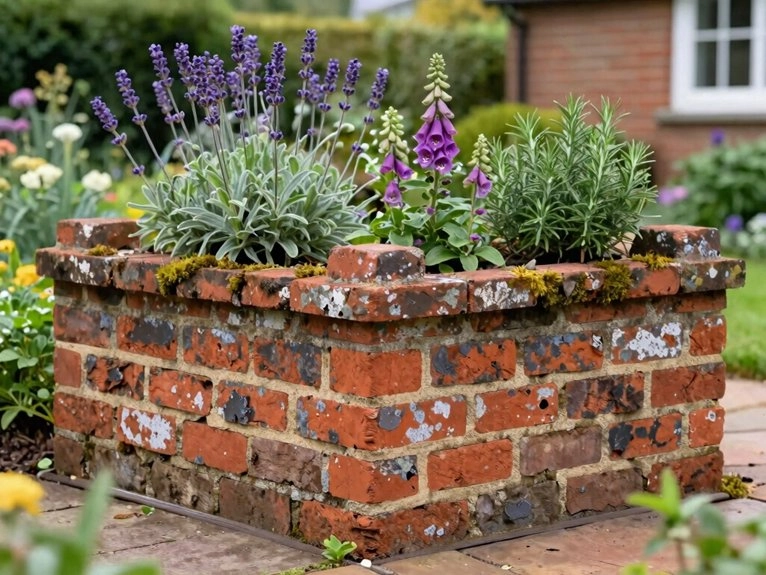
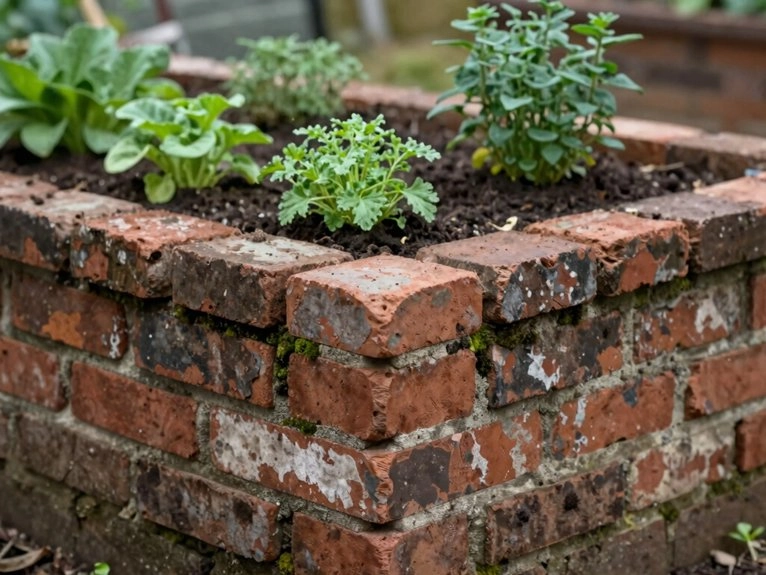
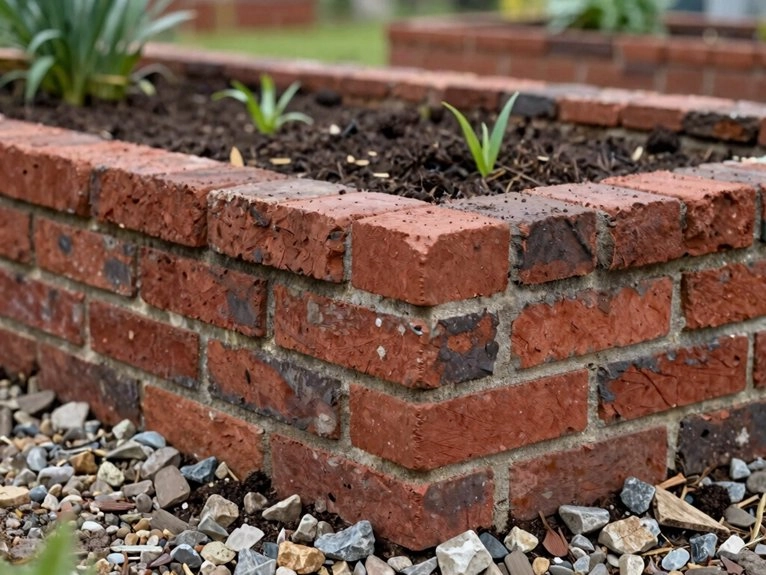
Choosing Your Brick: Type, Finish, and How Each One Weathers
Brick choice matters more than people think, and I’ve learned that the hard way while hauling more than a few mud-caked blocks with my family.
For edible beds, pick new clay bricks if you can’t trust the source; old painted or fireplace bricks can hide nasty stuff.
In cold places, choose dense, frost-resistant bricks with low water absorption, under 12%, so freeze-thaw won’t split them.
Smooth, glazed, or vitrified bricks shed moss better.
Rough reclaimed ones look charming, but they trap moisture and may need repointing.
Watch weathering patterns, and keep simple maintenance tips handy.
Facing and stock bricks

Once you’ve picked a brick that can handle weather and wear, the next choice is how that brick actually works in the bed. I’ve learned that facing bricks give you the pretty face, while stock bricks do the heavy lifting, like the friend who hauls the cooler. When I’m brick sourcing, I check for old paint, creosote, and industrial use to cut chemical leaching risk.
For my family’s beds, I like:
- new clay facing bricks
- sturdy stock bricks
- staggered running bond
- slightly buried base bricks
- sand-based mortar with curing
That combo feels solid, neat, and neighbor-worthy, too.
Engineering bricks
Engineering bricks are the overachievers of the brick world, and for raised beds, that’s a very good thing. I’ve used Class A and B bricks when I wanted a bed that felt solid and stayed put.
They’re dense, strong, and frost-resistant, so your walls won’t throw a winter tantrum. Their low porosity helps with thermal performance and keeps leaching worries low for edible borders.
I’d still follow smart installation tips: use a level compacted base or shallow gravel footing, and plan for the extra weight and cost. For taller beds, mortar helps.
Reclaimed and salvaged
Dig through a salvage pile carefully, and you can turn reclaimed bricks into a raised bed that looks rich without costing a fortune.
I’ve done this with my family, and it feels good to build something useful together.
Use source verification before you haul bricks home, then scrub them with simple cleaning techniques.
- Skip paint, tar, and creosote
- Check every brick for chips and wobble
- Sort by height before you stack
- Use double-thickness or staggered courses
- Keep extras for freeze-thaw repairs
For edibles, I choose new clay bricks if history’s fuzzy.
Clean, sound salvaged bricks? They’re garden gold.
Concrete and reconstituted
Concrete and reconstituted blocks can make a raised bed that feels sturdy, tidy, and built to last, and I like them when I want a no-nonsense garden wall that can double as a seat.
You’ll usually want hollow 8x8x16 blocks for the body and solid 4x8x16 caps on top. Check the concrete composition with the maker; I’ve asked before, because fly ash isn’t something I want near my tomatoes. For block stabilization, stagger the courses, fill upper hollows with gravel or rebar, and line the inside with weed barrier. A 6-inch gravel base helps, but frost can still play tricks.
Height, Width, and Sizing Decisions Before You Lay a Single Brick
After setting aside the heavy block talk, I always tell people to pause and measure the garden before they mix a single bag of mortar.
I’ve done this with my own family, and it saves headaches. Aim for 4 ft wide; that keeps everything in your reachability zones. Under 3 ft feels cramped. For comfort, I like these checks:
- 12–18 in tall for easy work
- 18–24 in if you want less bending
- 8 or 16 ft lengths to match brick runs
- 3 ft paths between beds
- Plan soil now; a 4×4 bed can eat 1.2 cubic yards
Those ergonomic edges matter.
How to Build a Raised Brick Garden Bed — Mortar vs Dry Stack
If you want a brick bed that feels solid for years, you’ve got two good paths: dry stack or mortar. I’ve built both with my family cheering from the porch. Dry stack is quick, reversible, and great for 3–4 brick rows; stagger joints, sink the first course 1–2 inches, and use a wider base so it won’t wobble like my uncle’s lawn chair.
Mortar gives rigid, taller walls; use sand-based mortar, a level footing, and let it cure. Expect settlement, so plan for seasonal adjustments and maintenance tips.
Marking out and base prep
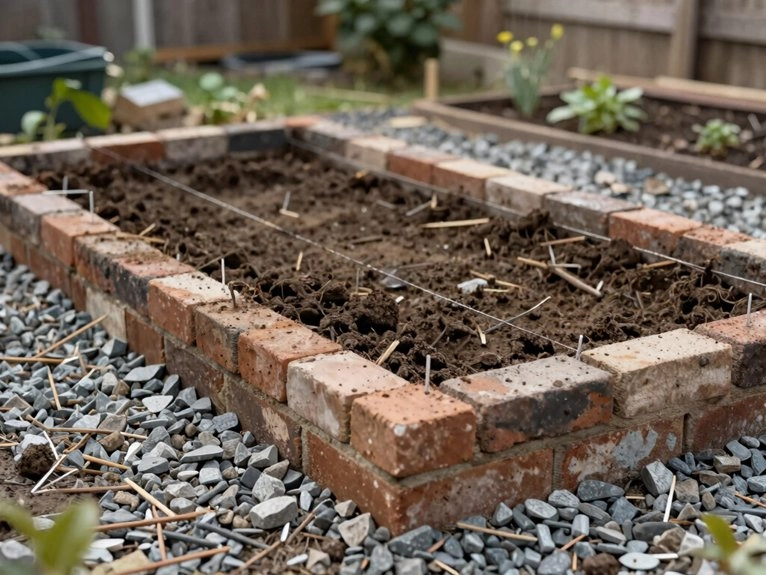
Once you’ve picked dry stack or mortar, the next job is getting the site ready so the brick bed starts straight and stays that way. I sketch the footprint, then use string layout and a chalk line so the bed feels like it belongs in the yard, not drifted in by a mischievous wind. I keep paths at 3 feet and beds under 4 feet wide.
- Clear sod and roots
- Dig 1–2 in. down
- Check with a spirit level
- Add compacted gravel if frost’s sneaky
- Lay bricks dry first
I also do soil testing, because guessing is for lottery tickets.
Foundation course and leveling
I always start the foundation course by laying the first bricks on soil that’s been cleared and leveled, then I sink each one about 1 to 2 inches by pulling out the sod underneath so the bed feels planted, not perched.
I use a string line and a spirit level, and I check both ends plus the middle, because “close enough” has a sneaky way of wobbling later.
In cold spots, I dig a shallow trench and add 4 to 6 inches of compacted gravel or MOT Type 1. That helps soil compaction, edge drainage, and family pride.
Shim with sand if a brick sulks.
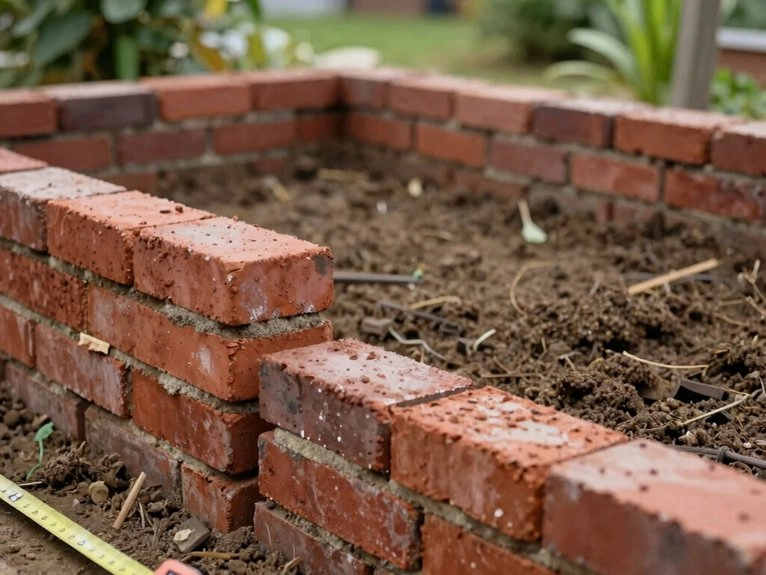
Laying courses and corners
With the base set, I start laying the next courses in a running bond, which just means each vertical joint lands halfway over the brick below it so the wall grips itself instead of acting like a stack of loose books.
I keep the stagger patterning tight and check every row with a spirit level and string line—because nobody wants a wobbly garden wall.
- Place bricks half a brick off each seam.
- Use alternating headers and stretchers at corners.
- Try rounded corners with bay-window cuts.
- Tap high bricks down.
- Add solid cap bricks on top.
Drainage holes and backfill
To keep a brick garden bed healthy, I always start with drainage, because soggy soil can turn a nice planting spot into a swampy mess. I’ve learned this the hard way in my own yard, and my family still teases me about my mud pies.
Put 2–3 inches of coarse gravel or crushed stone in the bottom if the bed sits on hard ground. Use permeable liners, not plastic, and let them run up the sides. If you’re using cinder blocks, fill the lower hollows with gravel. Add weep holes, then backfill in stages, topping up after settling. Seasonal maintenance helps, too.
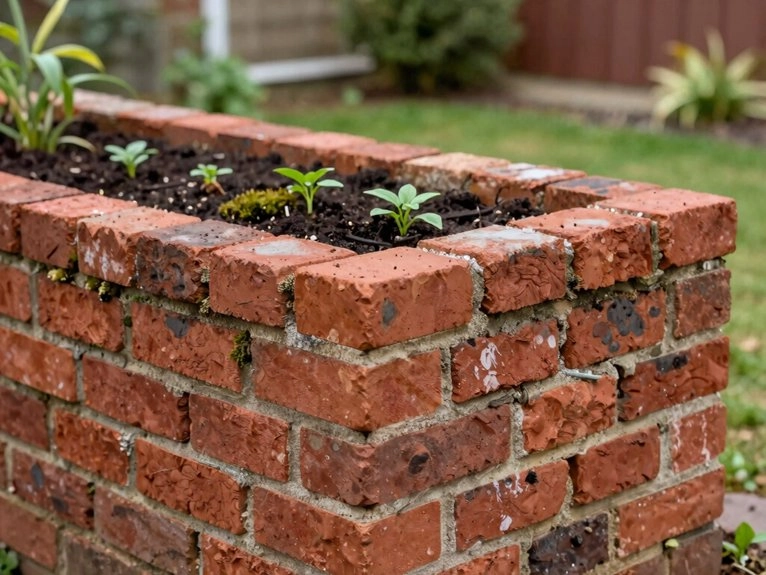
Coping and finishing the top
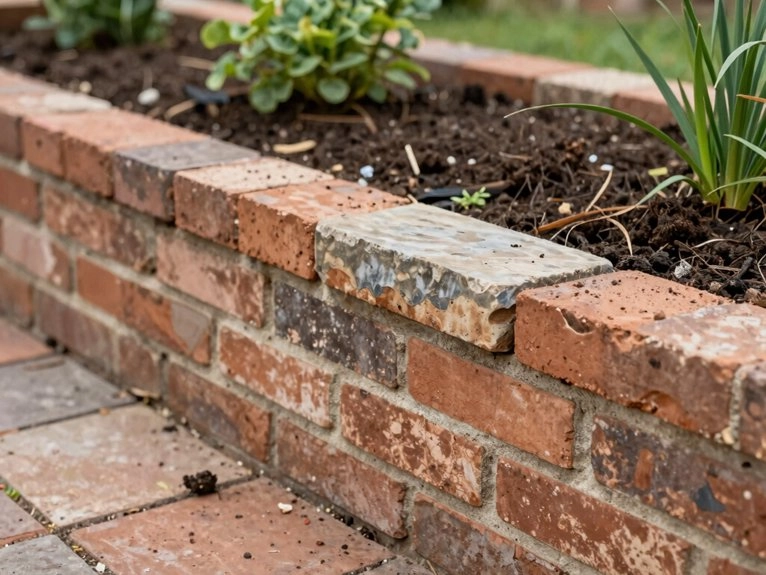
Once the bed walls are up, I like to finish the top with a proper coping layer, because that’s what makes the whole thing feel sturdy and done. You can use concrete cap blocks or full-width clay bricks for a comfy 3–4 in seat and real protection. I’ve learned the hard way that sharp edges invite scrapes.
Try:
- mortar bed, 1/4–1/2 in
- tight dry-stack joints
- staggered seams below
- tucked weed barrier
- edge rounding with bullnose
Seal porous tops with a breathable sealant for garden use. Your family’ll notice the difference fast.
Filling and Preparing Your Bed — Soil, Drainage, and Depth
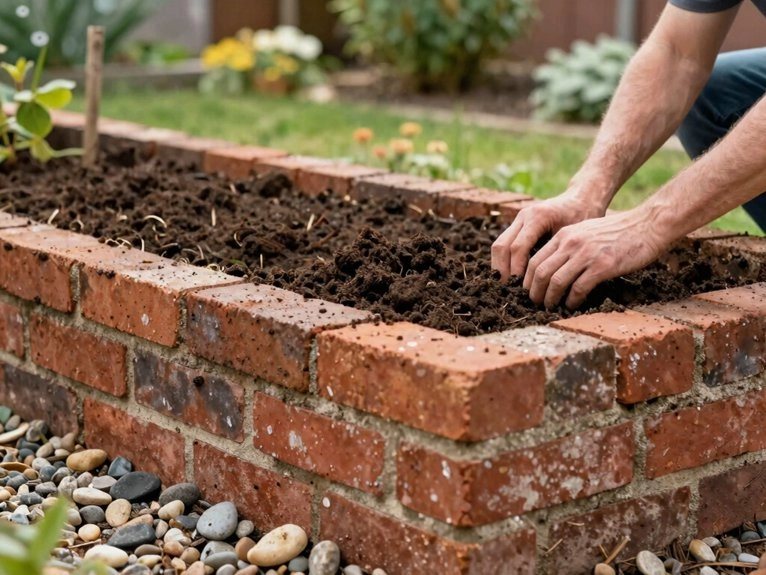
Before you start planting, I like to get the inside of the bed ready the right way, because the soil mix and the drainage setup matter just as much as the bricks.
I fill mine to the cap bricks, then let it settle 4–5 inches before topping up.
Aim for 12–18 inches of final depth, or 18 inches for carrots and tomatoes.
I use 60–70% topsoil and 30–40% compost, not potting mix.
I line the walls with weed barrier fabric, add hardware cloth below, and only use gravel if the ground stays soggy.
Moisture sensors help me keep the soil microbiome happy.
What a Raised Brick Bed Costs to Build — DIY vs Hiring Out
Budgeting for a raised brick bed can feel a little like shopping for a sturdy pair of boots: you can go basic, or you can pay for the ones that’ll still look good years later.
In my family, I’d start with a simple budget comparison. DIY for a 4×8 bed usually lands around $210–$600 for bricks, mortar, soil, and compost. Hiring a mason often jumps to $600–$2,000.
- New bricks: $150–$400
- Fill soil: $60–$200
- Reclaimed bricks: cheaper
- Labor breakdown: biggest swing
- Good builds can last decades