Fence Mural Ideas for Backyards That Feel Artistic and Unique
- Fence Mural Ideas for Backyards That Feel Artistic and Unique
- Key Takeaways
- What Makes a Great Fence Mural
- Plan Your Fence Mural by Panel
- Panel-by-Panel Sketching
- Treat Each Panel
- Colour Per Section
- Match the Mural Style to Your Fence
- Try Bold Colour-Block Fence Murals
- Panel-by-Panel Colour Blocks
- Bold Shapes, Big Impact
- Paint Nature-Inspired Fence Mural Scenes
- Add Graffiti and Street-Art Details
- Use Monochrome or Minimal Line Art
- Minimal Black Linework
- High-Contrast Fence Styling
- Simple Shapes, Strong Impact
- Build Depth With Ombre Layers
- Make Small Fence Sections Feel Bigger
- Seal and Protect the Finished Mural
You can turn a plain fence into backyard art with color-block diamonds, nature scenes, or clean black linework—nice, right? Start by sketching each panel on paper, then paint one section at a time with 3–4 exterior colors, chalk, and an angled brush. Try ombre for depth or bold shapes for small spaces. Finish with a UV-safe outdoor sealant after the paint dries, and your mural’ll stay crisp, bright, and ready for the next clever trick!
Key Takeaways
- Start with a clear focal theme like stars, waves, or a quote so the mural feels cohesive and artistic.
- Treat each fence panel as a mini canvas and plan the design with simple grid lines for clean alignment.
- Use bold, limited color palettes with strong shapes like diamonds, stripes, or silhouettes for striking impact.
- Match the style to your backyard vibe with nature scenes, graffiti accents, or crisp monochrome linework.
- Finish with weatherproof outdoor paint and a UV-resistant sealant to keep the mural vibrant longer.
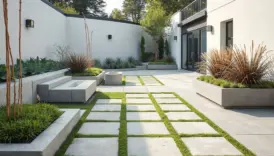
What Makes a Great Fence Mural
A great fence mural starts with the fence itself, not just the paint! You’ll get the best vibe when each panel feels like its own mini canvas, and your design fits the audience eye line from patios and paths.
Sketch first, then test scale from a few viewing distance testing spots so the shapes still pop.
Use durable materials, bold colours, and weatherproof sealing so rain and sun don’t steal the fun.
Pick one clear focal idea, like stars, waves, or a quote, and let everything else support it.
That way, your fence feels welcoming, polished, and totally yours!
Plan Your Fence Mural by Panel

Start by treating each fence panel like its own little canvas, because that makes planning way less overwhelming, and honestly, a lot more fun!
Sketch each section on paper first, using simple grid lines to match the panel size, then color one panel at a time so your mural stays neat and easy to follow.
If your fence has slats or gaps, mark the breaks before you paint, so your design lines up nicely instead of doing a surprise zigzag dance.
Panel-by-Panel Sketching
When you map out a fence mural panel by panel, the whole project feels way less intimidating—and a lot more fun! You’re not forcing one giant picture through awkward gaps; you’re giving each section its own mini-canvas. Start with Material prep, then sketch the full design on graph paper, using a simple grid to keep proportions steady.
Next, mark left, middle, and right guides on the fence, and use chalk for temporary mockups so you can fix wobbly spots fast.
That helps with clean edges, weather safe planning, and matching panels without stress. Build base colors first, then details last—boom, backyard magic!
Treat Each Panel
Now that you’ve sketched the whole mural, it’s time to treat each fence panel like its own tiny canvas, and honestly, that makes the whole thing feel a lot less scary!
Measure each panel, then fit your motifs inside those boundaries, even if the fence spacing isn’t perfect.
Start from the most visible end, because viewing perspective matters, and plan panel positioning so key shapes land at the same height.
You can rotate swoops, diamonds, or plant stamps from one panel to the next for easy flow.
Keep paint thickness bold, and watch focal point balance, so every panel feels complete, not lonely.
Colour Per Section
If you treat each fence panel like its own little colour-block canvas, the whole mural suddenly feels way more doable, and honestly, way more fun! You can set colour palette limits, then build a look that feels like your crew’s signature style.
- Sketch the fence as a grid on paper.
- Try leftover tins for bold, bright patches.
- Use panel contrast planning so each square pops.
- Keep crisp boundary painting at the edges, then use gradient control tips if you want a soft shift.
Pick 3–4 related shades per panel, switch at clear borders, and your backyard gets a playful, polished glow!
Match the Mural Style to Your Fence
To make your fence mural feel polished instead of pieced together, start by treating the fence itself like part of the art!
If your fence has slats or gaps, sketch panel-sized designs so each section reads plainly, like neighbors at a block party.
Try bold geometry on smooth wood, or experiment with texture and choose seasonal themes for a softer feel.
On long runs, repeat simple circles or swooping lines with cheap paint and a foam brush.
Want a calmer vibe? Go for birds, waves, or deer.
For the most unique look, grid your fence first, then scale a moon, sign, or graffiti edge.
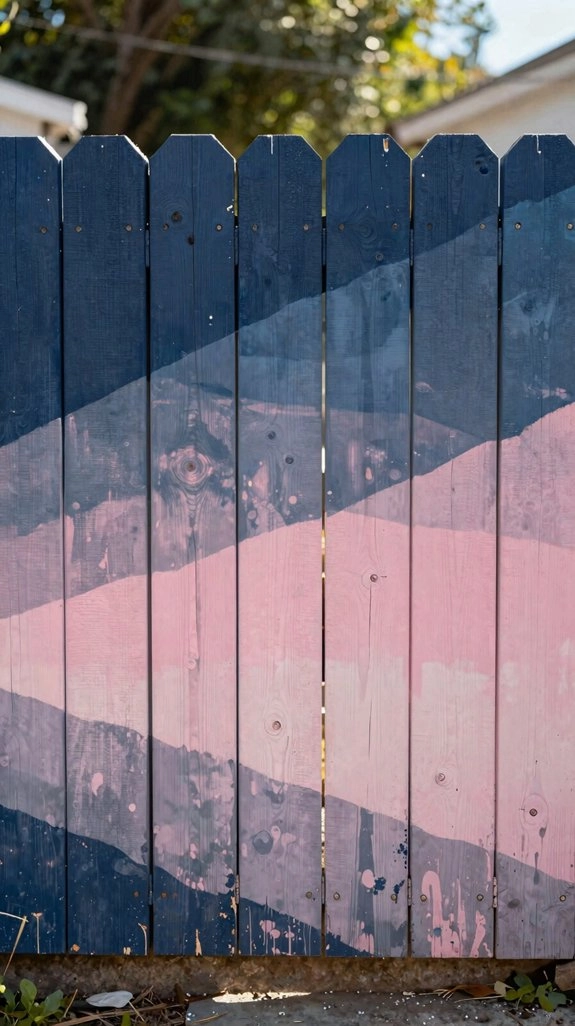
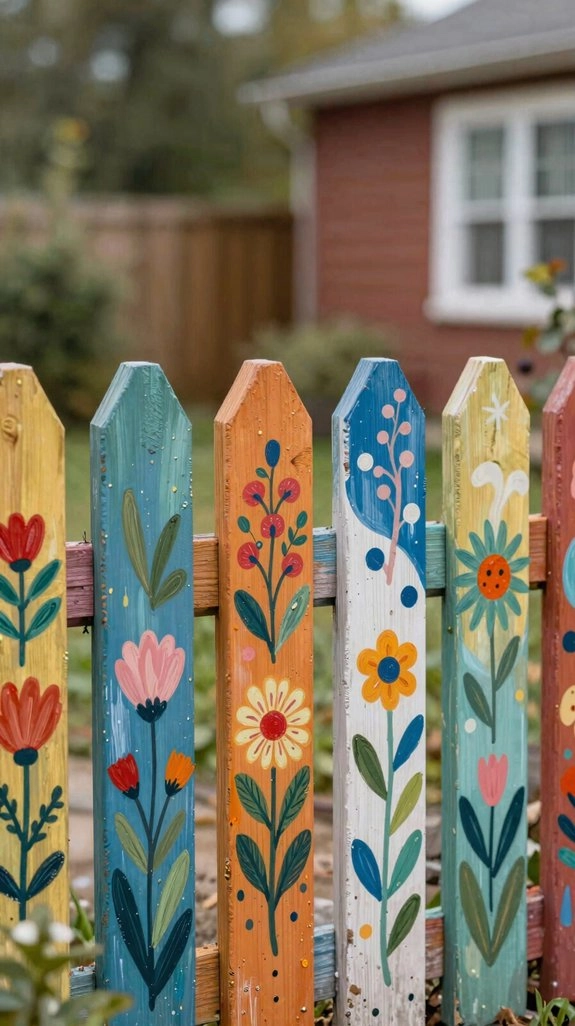
Try Bold Colour-Block Fence Murals
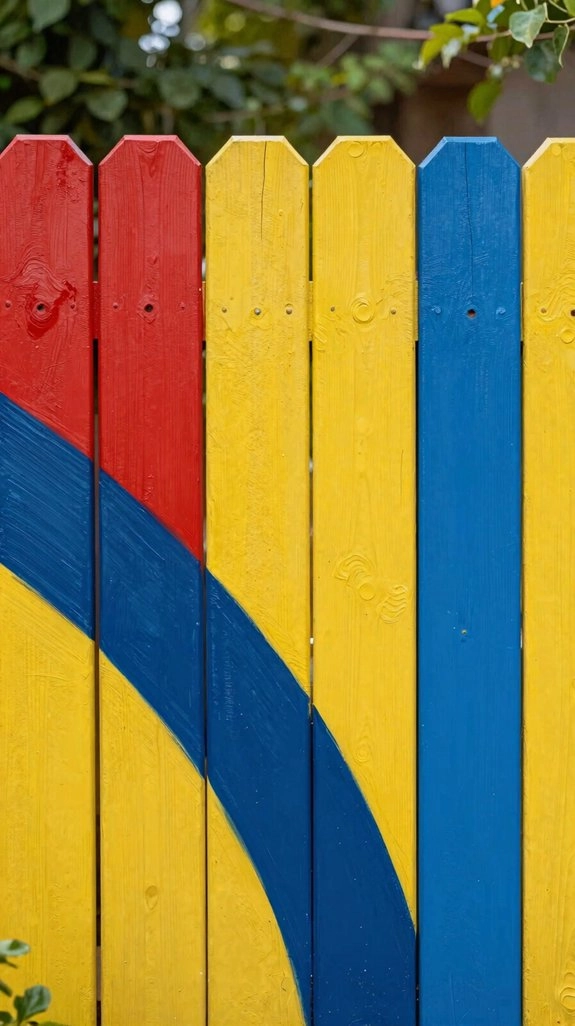
Color-block murals can give your fence a huge style boost, so start by breaking it into big diamonds, stripes, or rectangles and painting each panel one strong shade.
Keep your palette to just 3–4 colors, use a quick chalk layout so the lines stay neat, and if you want that sleek stripe-mural look, a small angled brush will help those borders look crisp.
Finish with a weather-ready exterior paint, and boom, you’ve got a bold backyard backdrop that can handle sun, rain, and all the chaos of outdoor life!
Panel-by-Panel Colour Blocks
With a few tins of leftover paint, you can turn each fence panel into its own mini masterpiece, and honestly, it’s way easier than trying to paint one giant mural!
Use a stencil template for a few clean accents, then grab a paint roller and block in bold shapes.
- Peach beside pink, bright and friendly
- Green with yellow, fresh like spring
- Stripes one panel, swoops the next
- Thick colour contrast that pops
Paint one panel at a time, letting each section stay quick drying before you move on.
Keep the same palette, but change block sizes so your fence feels artsy, relaxed, and totally yours!
Bold Shapes, Big Impact
When you want your fence to make a big statement, bold shapes are the easiest way to get there! Try rectangles, diamonds, or stacked bands in a tight 3–4 color palette, like peach with navy, and keep the edges sharp for real contrast texture.
Sketch your layout with chalk, measure with a tape, and use a simple grid so the blocks line up across panels.
Roll on the big areas first with smooth roller techniques, then tape or brush the edges clean.
For a friendly, artsy vibe, let each panel shift a little, like your own mini gallery!
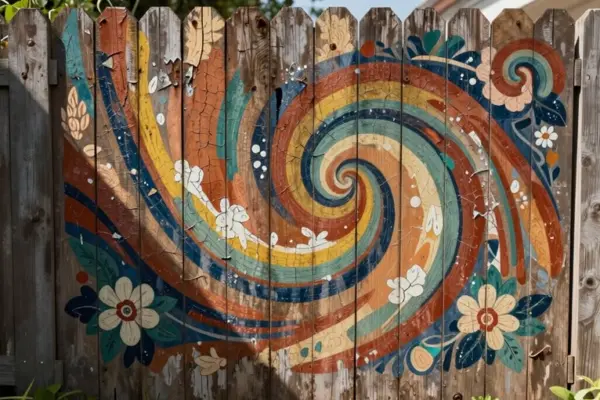
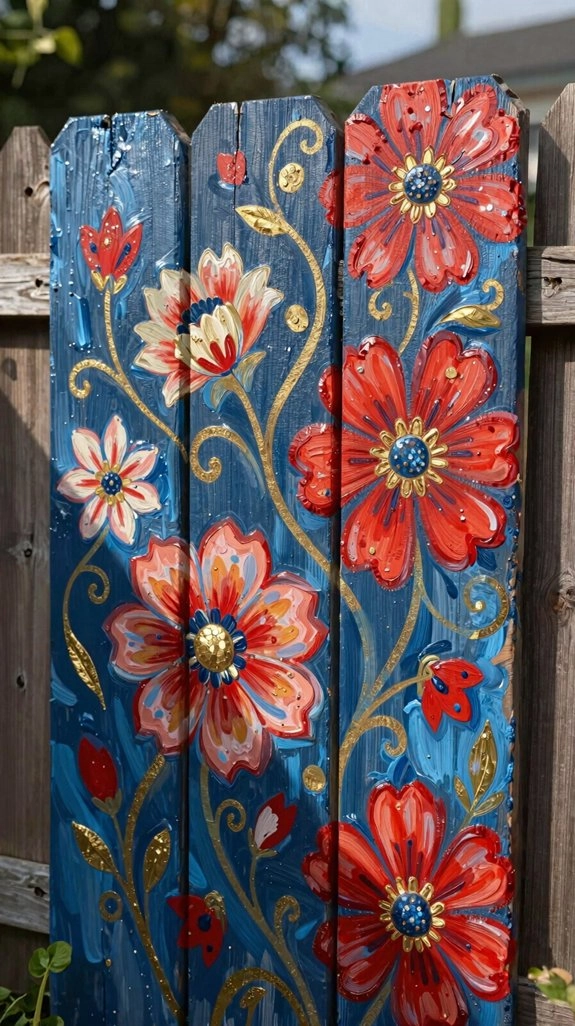
Paint Nature-Inspired Fence Mural Scenes
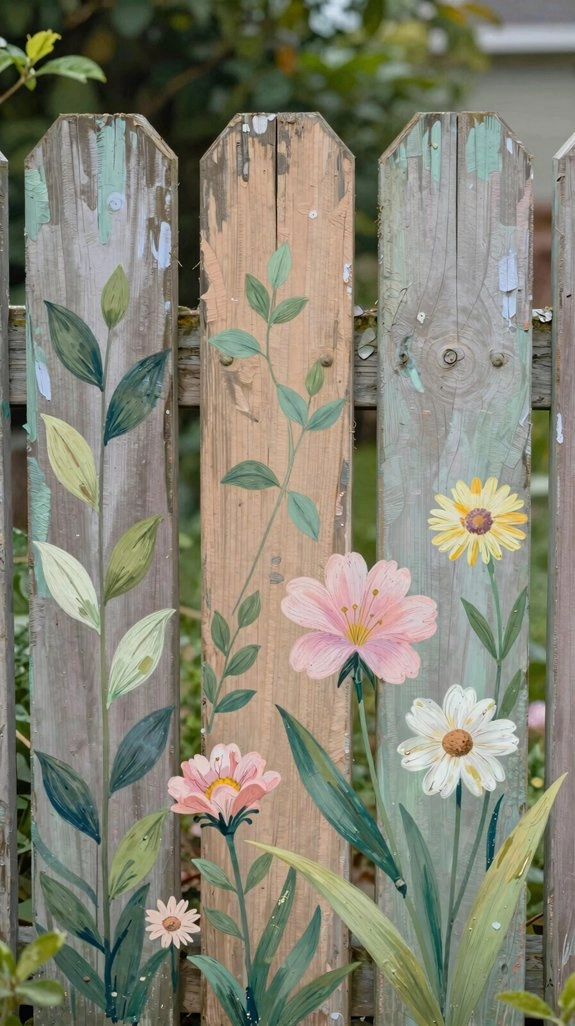
Nature-inspired fence murals can turn a plain backyard into a little escape, and you don’t need to be a pro artist to make it happen!
- Pick woodland blues, browns, and deep greens for a cozy forest vibe.
- Use birds, deer, and foggy shapes to add Texture and shadow.
- Try waves, lakes, or flowers with paint, brushes, and a little patience.
- Plan tall trees on high panels, and keep shorter sections simple so the scene feels natural with mural lighting,.
Start with a sketch, fill in colors, and let the fence feel like your group’s own secret retreat.
Add Graffiti and Street-Art Details
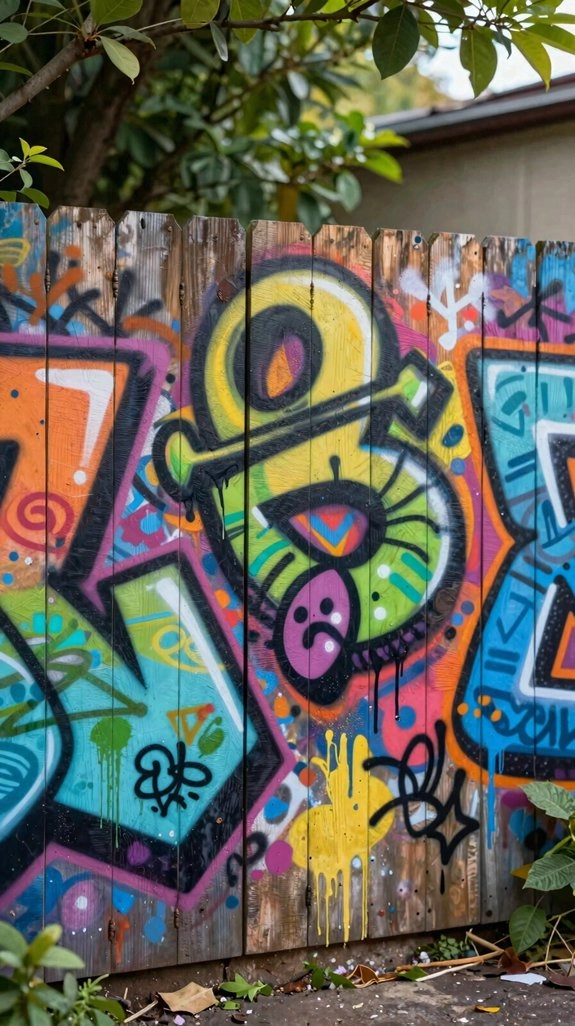
A leafy fence scene can get a cool edge fast, and a little graffiti or street-art flair makes it feel modern, bold, and way more personal!
Pick a style you actually love, like punchy lettering or comic shapes, then keep it easy to read from your patio.
Start with a bright base coat, grab stencils, spray paint, and a little tape, then add circles, drips, and sprays for Stencil texture depth.
For a cool DIY twist, hold the can close and let a few runs form weathered drip effects.
Layer in faux chipping, and your fence suddenly feels like the fun group wall!
Use Monochrome or Minimal Line Art
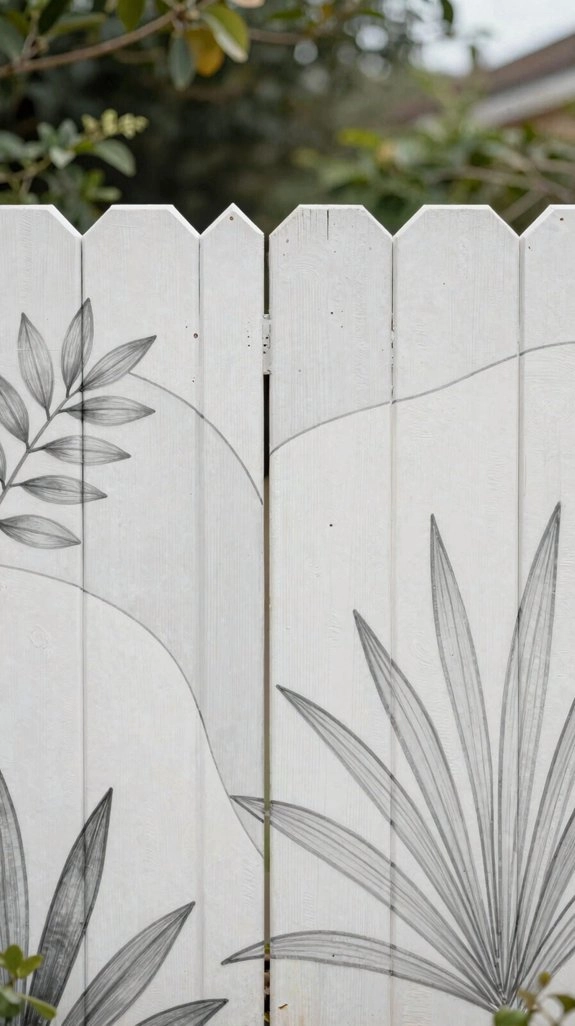
Try a monochrome fence mural with bold black linework on a plain background, and you’ll get a crisp, high-contrast look that pops from the patio and plays nicely with almost any garden style.
Keep it simple with shapes like flowers, birds, or swirly abstract lines, because less can really do more here—no color circus needed!
For the cleanest result, sketch lightly first, then trace steady lines, and you’ll end up with a modern mural that feels sharp, stylish, and surprisingly big on impact.
Minimal Black Linework
When you want your fence mural to feel clean, modern, and a little artsy without getting fussy, minimal black linework is such a smart move!
You can join the backyard club with a design that feels calm, creative, and easy to love.
- Sketch a single bold motif, like a leaf or bird.
- Transfer it with a grid, stencil, or projector.
- Paint only black, with tiny gray touches for minimal texture shading.
- Seal it after taping crisp edges and let it glow!
Continuous line silhouettes keep things fluid, and the simple look reads beautifully from the patio.
High-Contrast Fence Styling
If you liked the calm feel of minimal black linework, you can level it up with high-contrast fence styling that really pops from the patio and the yard gate alike! Use pure black paint on a white or off-white base, and keep the design lean so the boards don’t steal the show.
Sketch your idea on paper first, then map it with a simple grid for steady proportions. A single leaf cluster or bold outline works best, especially for Privacy friendly silhouettes and Stencil ready layouts.
Finish with a UV-clear coat, and your crisp art’ll stay sharp through sun, rain, and all the backyard chatter!
Simple Shapes, Strong Impact
A monochrome mural can totally wake up a plain fence without turning your backyard into a paint-splosion!
Start with surface preparation, then test a small patch on a clean background.
- Chalk a leaf sprig
- Trace a bird silhouette
- Sketch one looping line
- Paint bold, crisp edges
Use black, white, or gray, and keep the shapes simple so they pop from far away.
You’ll get texture contrast without extra colors, especially when fence slats leave little gaps.
For a polished look, vary line thickness a bit, then fill the rest with calm negative space.
Easy, cheap, and wow-worthy!
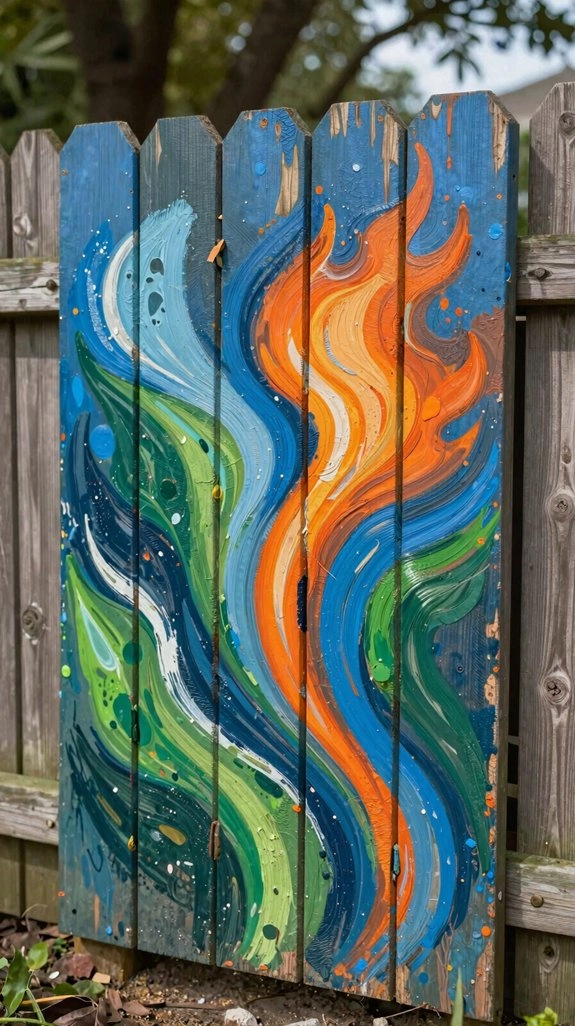
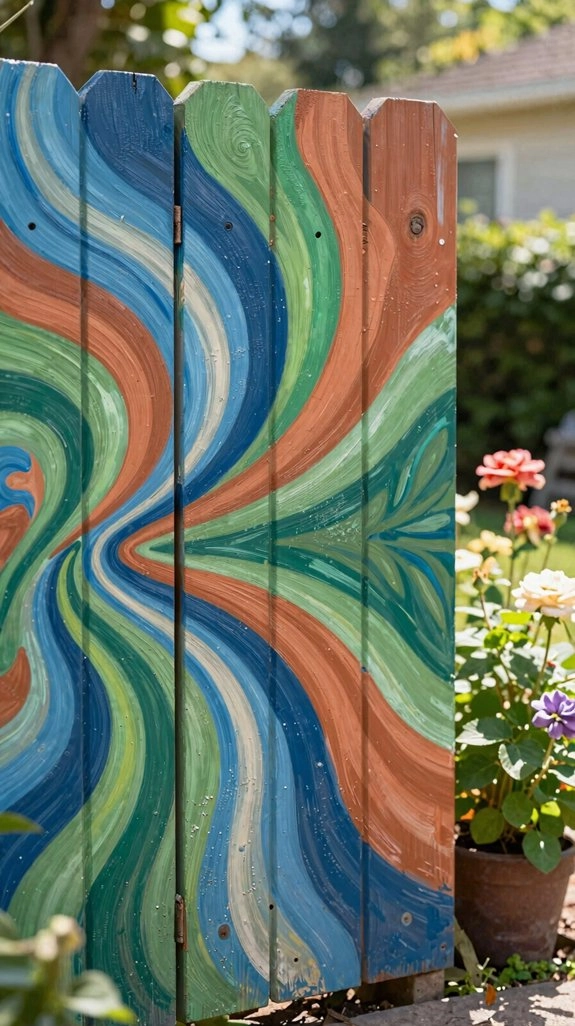
Build Depth With Ombre Layers
To give your fence mural real depth, don’t stop at one smooth fade—layer 2 to 4 paint shades so the ombré builds slowly and looks richer, almost like it has a little secret hiding inside.
Grab a sponge or roller, light and dark paint, and start with the palest tone first. Let each layer dry a bit, then add the next, letting texture layering and a little color bleed do the magic.
Blend the middle unevenly, not perfectly, so it feels alive, not flat—hello, backyard charm!
For extra wow, tuck in tiny peeping-through accents, like pink or yellow, and work panel by panel so your neighbors see one dreamy flow.
Make Small Fence Sections Feel Bigger
That dreamy ombré can also help small fence sections feel bigger, but the real trick is how you use each tiny panel! Treat it like a mini stage, and your yard starts feeling more welcoming right away.
- Paint one bold diamond on each panel for an optical illusion of width.
- Stack flowers or moons upward for vertical repetition that lifts the eye.
- Add leaf shapes over a flat square background for foreground layering.
- Keep white or mint around the art for negative space focus, so the design breathes.
Use a simple grid first, then repeat clean shapes. You’ll get a bigger, friendlier look, not a busy mess!
Seal and Protect the Finished Mural
Once the paint’s fully dry, give your mural a protective topcoat so all that hard work doesn’t get picked on by sun, rain, and sneaky mildew!
Choose the right clearcoat: a UV-resistant, water-repellent satin or semi-gloss outdoor sealant, not an indoor matte.
Before you coat the whole fence, test for haze effects on a small spot, especially if the air feels damp.
Then apply thin coats evenly with a clean brush or roller, following the label for temperature and dry time.
This helps prevent mildew growth, fading, and sticky overlaps.
Re-seal every 1–3 years, and patch chips fast, so your backyard art stays bright and welcoming!