Recycled Tin Can Ideas That Turn Waste Into Decor
- Recycled Tin Can Ideas That Turn Waste Into Decor
- Key Takeaways
- Best Tin Can Crafts to Try First
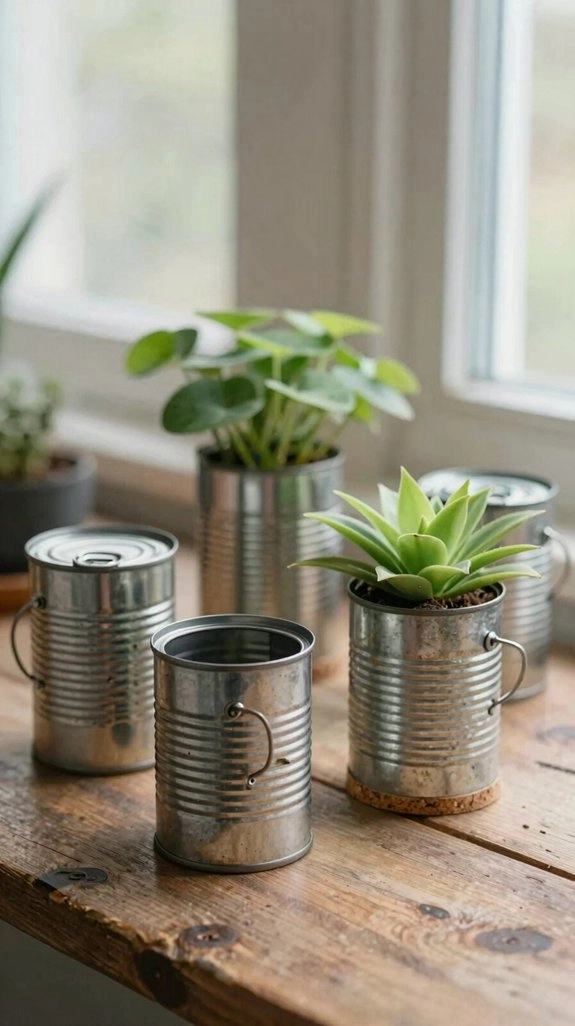
- Tin Can Planters for Spring
- Drainage for Live Plants
- Creative Tin Can Finishes
- Easy Spring Planter Ideas
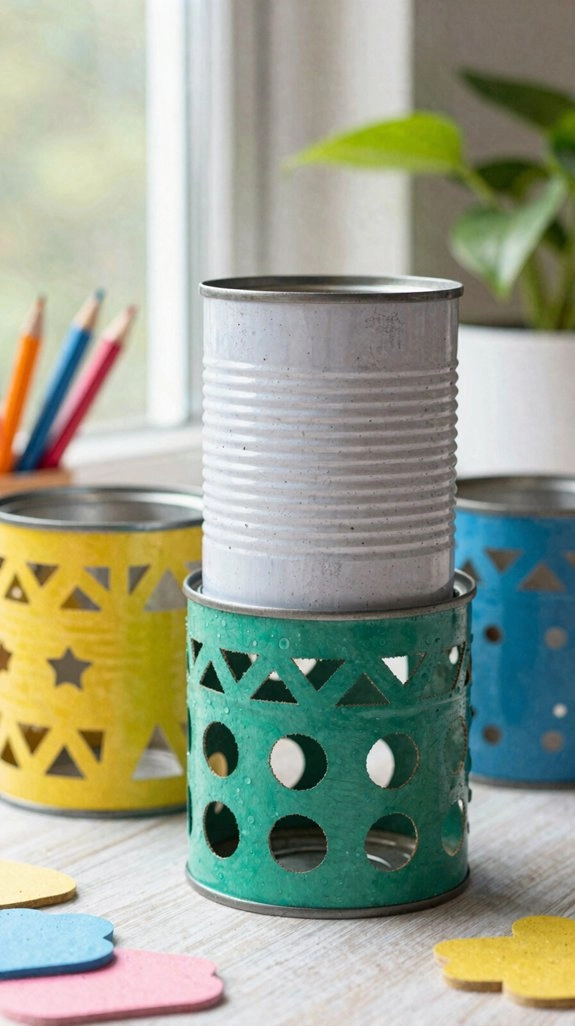
- Make Tin Can Lanterns
- Lantern Design Basics
- Lighting And Safety
- Try Tin Can Coasters
- Build Desk Organizers
- Create Wall Pockets
- Turn Tin Cans Into Wind Chimes
- Tin Can Chime Materials
- Assembly And Hanging Steps
- Make Tiered Tin Can Storage Caddies
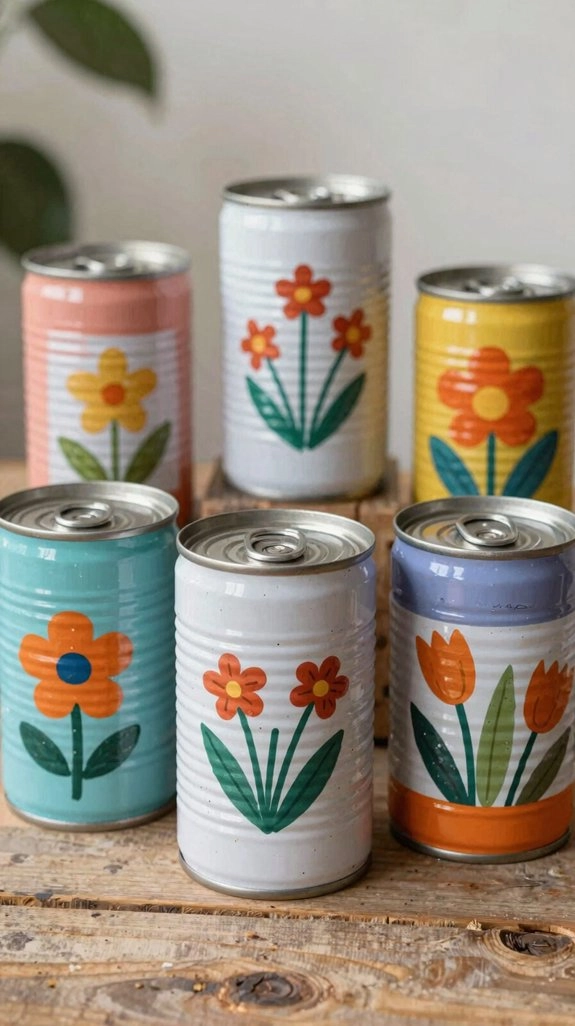
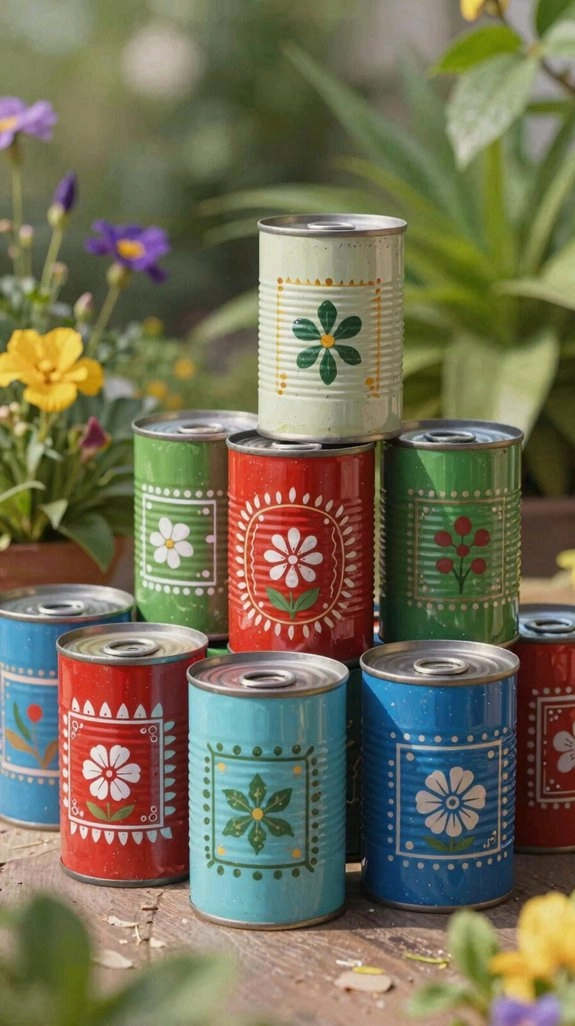
- Decorate Tin Cans With Paint
- Paint Tin Can Finishes
- Creative Painted Can Designs
- Use Decoupage on Tin Cans
- Add Cork Feet and Handles
- Make Rustic Farmhouse Tin Can Decor
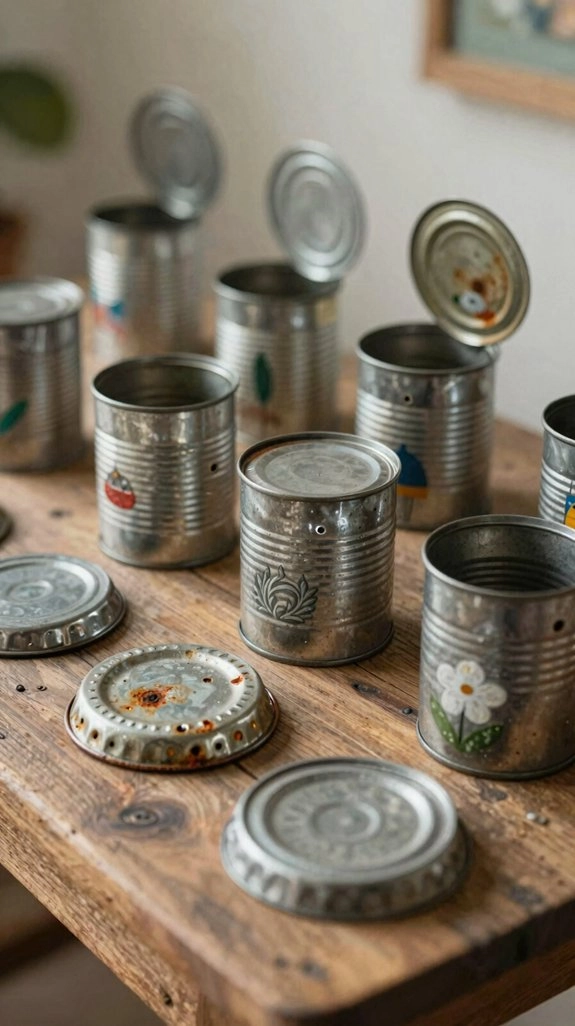
- Turn Tin Can Lids Into Projects
- Lid Removal Basics
- Safe Edge Finishing
- Lid-Free Project Ideas
- Create Garden Decor From Tin Cans
- Make Kid-Friendly Tin Can Crafts
- What You’ll Need to Get Started
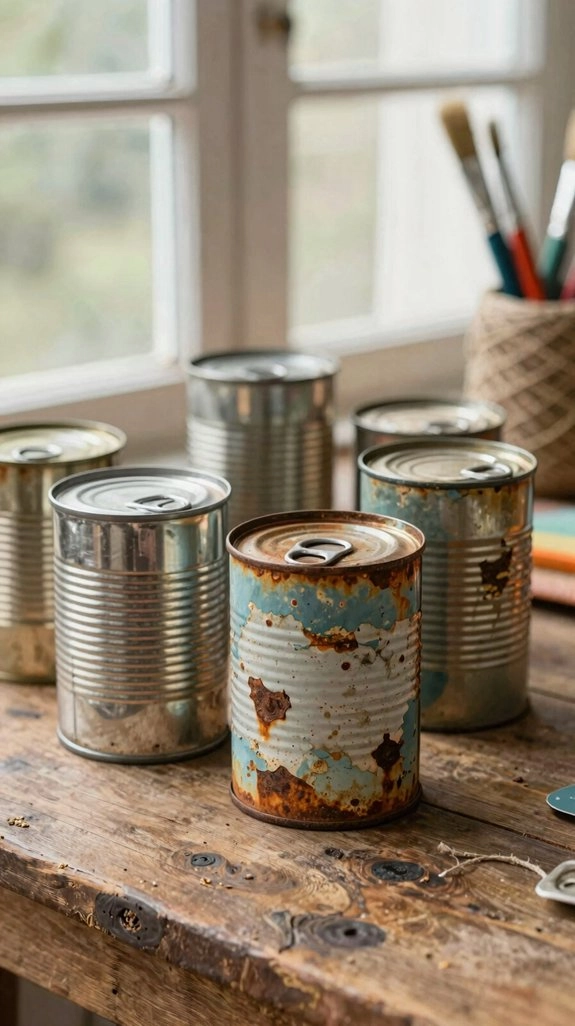
- Prep, Cut, and Clean Cans Safely
- More Recycling Bin Crafts to Try
You can turn old tin cans into cute decor fast! Start with easy wins: paint or wrap cans with scrapbook paper for pencil cups, add pennies and cork bits for coasters, or punch holes for twinkly lanterns. Want spring charm? Make planters, but drill drainage holes first so roots stay happy. A little Mod Podge, twine, or corrugated paper goes a long way, and the best surprise ideas are just ahead, waiting to shine.
Key Takeaways
- Turn clean tin cans into pencil cups, desk organizers, or utensil holders with paint, decoupage, or ribbon.
- Make spring planters from tin cans, but add drainage holes for live plants to prevent soggy roots.
- Create lanterns by punching decorative patterns, then use LED tealights instead of real flames for safety.
- Upgrade cans with faux-metal or faux-cement finishes using corrugated paper, acrylic paint, or joint compound.
- Stack and glue multiple cans into caddies or storage tiers, then seal sharp edges for safer everyday use.
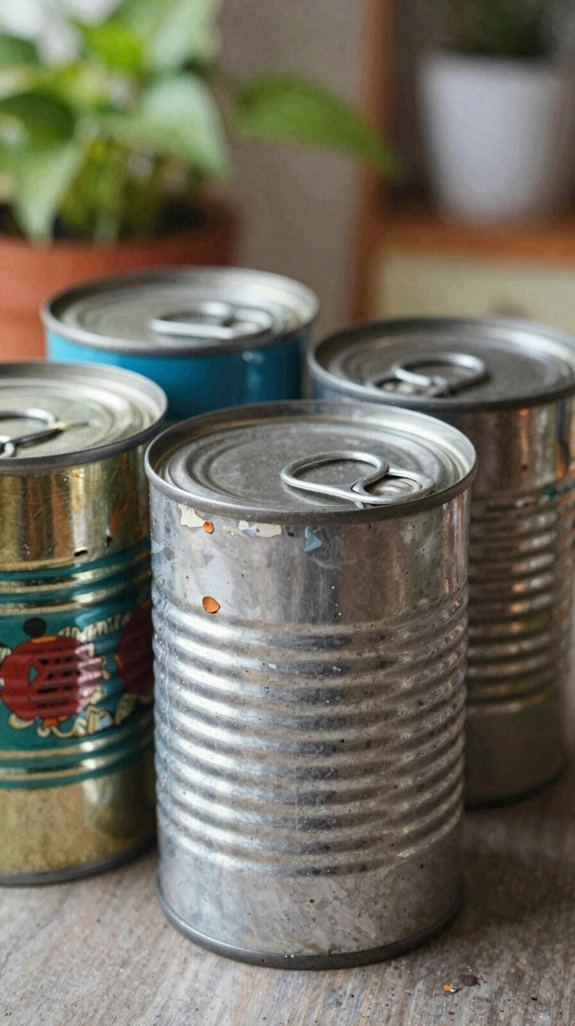
Best Tin Can Crafts to Try First
If you’re itching to turn an empty tin can into something cute, useful, and a little bit brag-worthy, start with the easy wins first!
For Upcycled Storage, add pennies, cork pieces, paint, and Mod Podge for rustic coasters that feel handmade.
Next, make Holiday Centerpieces with polka dot paper, twine, or ribbon, then seal it for a cheerful table touch.
Want a fancier vibe? Wrap corrugated craft paper around the can for a faux-metal look, or smear on joint compound for cement style.
Quick, cheap, and oddly addictive, right?
Keep these first, then grow bolder!
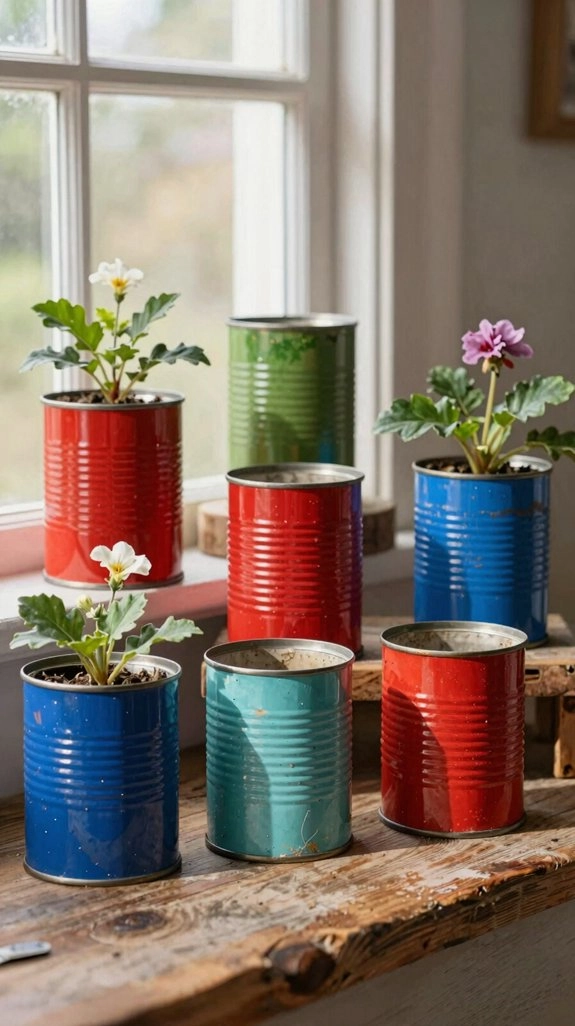
Tin Can Planters for Spring
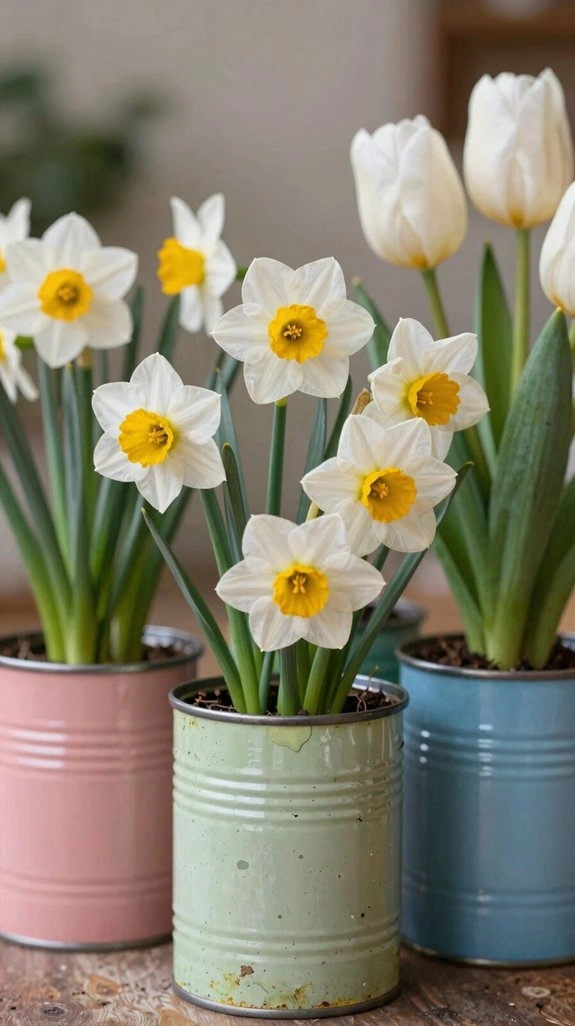
Spring’s the perfect time to turn plain tin cans into cheerful planters, and you’ll want to punch or drill drainage holes first so your live plants don’t end up swimming—yikes!
From a quick corrugated-paper wrap to a cementy plaster finish, you can keep it simple or get a little elaborate with paint, dowels, or scrapbook paper.
Start with an easy look, then save the fluted or decoupage version for a fun surprise that makes your porch or windowsill feel fresh and bright!
Drainage for Live Plants
For live plant tin can planters, drainage isn’t just a nice extra, it’s the secret to keeping your little spring beauties happy and healthy!
You can grab a 28 oz can, then punch or drill a few holes in the bottom, easy as that.
If you like, hammer a nail through for quick drainage maintenance, and your soil moisture will stay kinder, not soggy.
That little step helps you control watering frequency, protect root health, and keep plants from lounging in standing water like they own the place.
For decor-only cans, skip the holes, but for real plants, don’t.
Creative Tin Can Finishes
Once you’ve got those drainage holes punched, the fun part really starts, because a plain tin can can become almost anything with the right finish!
Try a corrugated craft paper seasonal wrap, glued on and brushed with silver paint for a faux-metal shine.
Want a budget friendly upgrade? Spread on joint compound, let it dry, then paint and seal it for a stoney look that won’t chip easily.
You can also hot-glue short dowels around the can for a fluted style, or use scrapbook paper and lace near the base for a sweet spring vibe.
Easy, cute, and totally yours!
Easy Spring Planter Ideas
After you snip off any sharp lid edges and punch or drill drainage holes in the bottom, your tin can is ready to become a tiny spring planter—cute, cheap, and way more stylish than you’d expect!
For a cheerful seasonal theme, wrap one with corrugated craft paper, add a silver paint mix, and tuck in herbs with potting mix.
Want softer vibes? Smear on joint compound for a faux-cement look, then seal it, so it won’t chip.
Try a paper-wrap planter too, or glue painted dowels for a fluted finish.
These styling tips and planting hacks make you feel right at home!
Make Tin Can Lanterns
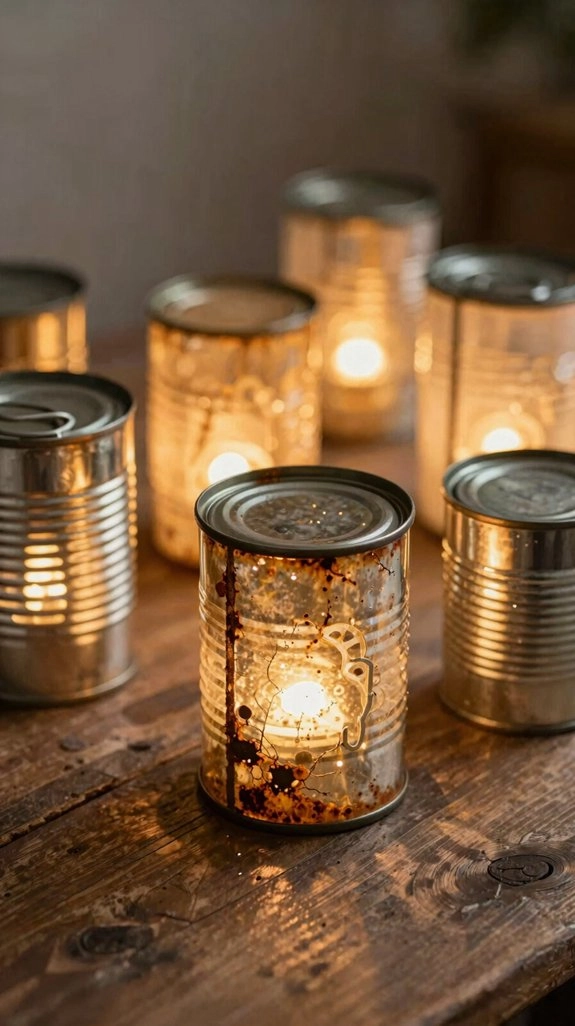
Tin can lanterns are super fun to make, and you can start by sketching stars, shapes, or a themed design on a clean, dry can before punching the holes with an awl.
For a cool twinkle effect, pop in a battery-operated LED tealight, since real flames and hot metal are a risky combo, yikes!
If you want it to look extra polished, paint or decoupage the outside first, then check that it sits flat and stays safe outdoors.
Lantern Design Basics
When you want a cozy glow without spending much, tin can lanterns are a fun little win! Start with a clean, dry can, then map your texture pattern planning before you punch star, dot, or lattice holes with a hammer or awl. That keeps the twinkle even and cute, not chaotic.
If you need to cut metal, wear gloves and make small snips, because your hands deserve peace, not surprise scratches. For balanced lantern stability, flatten the can slightly or add a sturdy base. Pop in an LED tealight, and boom, you’ve got a charming glow that feels handmade and welcoming!
Lighting And Safety
Glow safely first, then get slick! Clean your tin can, peel off labels, and let it dry fully so paint, Mod Podge, or decorative sealing coatings stick well.
Punch holes with an awl, slowly and in a star pattern or your own template, then smooth sharp points and wear eye protection.
Skip real candles, wow—use battery LED tealights or string lights instead.
For outdoor glow, pick thick coffee or tuna cans, and keep them far from dry leaves, paper decor, or dangling fabric.
Smart weatherproofing strategies help your lantern last, and your porch crowd will think you’re a pro!
Try Tin Can Coasters

If you’ve got an old tin can and a few scraps lying around, you can turn them into cute coasters that look way fancier than they are! Remove the lid, paint the can or coaster surface, then seal it with waterproof sealants for that cozy, rustic vibe.
- Slide in cut, smooth wine corks for charm.
- Follow smart cork placement tips so the design stays steady.
- Add pennies under the base for extra weight, then finish with Mod Podge.
You can swap colors, finishes, and layouts, so your set feels totally yours. Easy, cheap, and honestly, pretty brag-worthy!
Build Desk Organizers
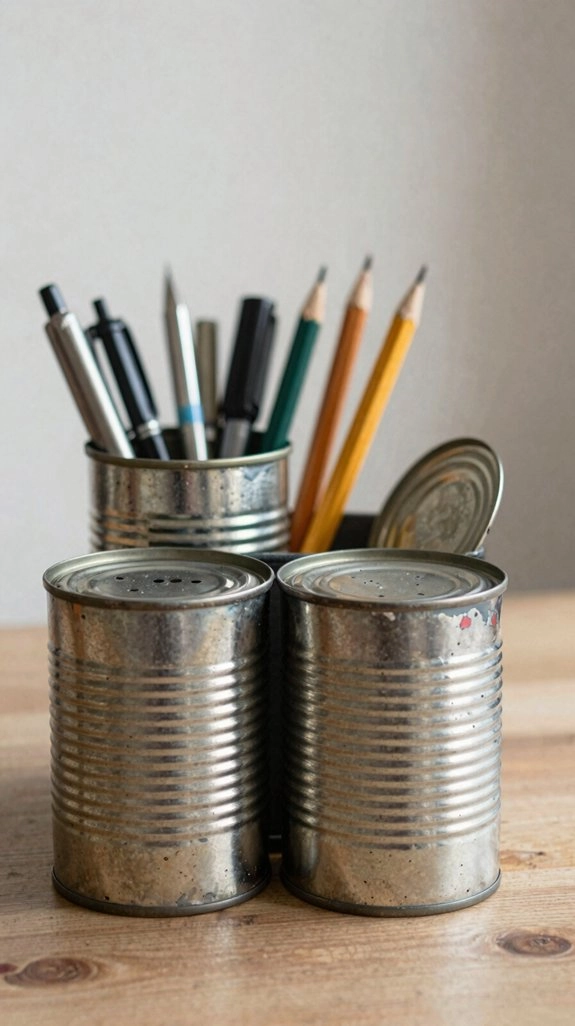
A few empty tin cans can work some serious magic on a cluttered desk, and they don’t need to look like lunch leftovers at all! You can turn tuna or coffee cans into matching desk organizers with paint, scrapbook paper, or Cricut labels, then seal them for a polished finish.
Need drawer storage? Add corkboard bottoms or floral foam so pens stay put, not do a tiny roller coaster trick.
For a craft corner, group small cans into tiered holders, or build a swing-out setup on a thin arm for grab-and-go access.
These organizer tips keep your space neat, stylish, and totally yours!
Create Wall Pockets

Turn one big tin can into a cute wall pocket, and suddenly your clutter has a place to live! You’ll love how easy it feels to join the crafty crowd.
- Flatten a coffee-can size can into a pocket shape.
- Sand the edges, then add paint or Mod Podge with scrapbook paper.
- Mount it with rustic wall mounting, twine, or hardware.
Tuck in a colorful pocket lining, then add faux florals or trim for charm. Seal it, let it dry, and hang it where you need a sweet catchall.
It’s cheap, beginner-friendly, and way cuter than a random pile of mail!
Turn Tin Cans Into Wind Chimes
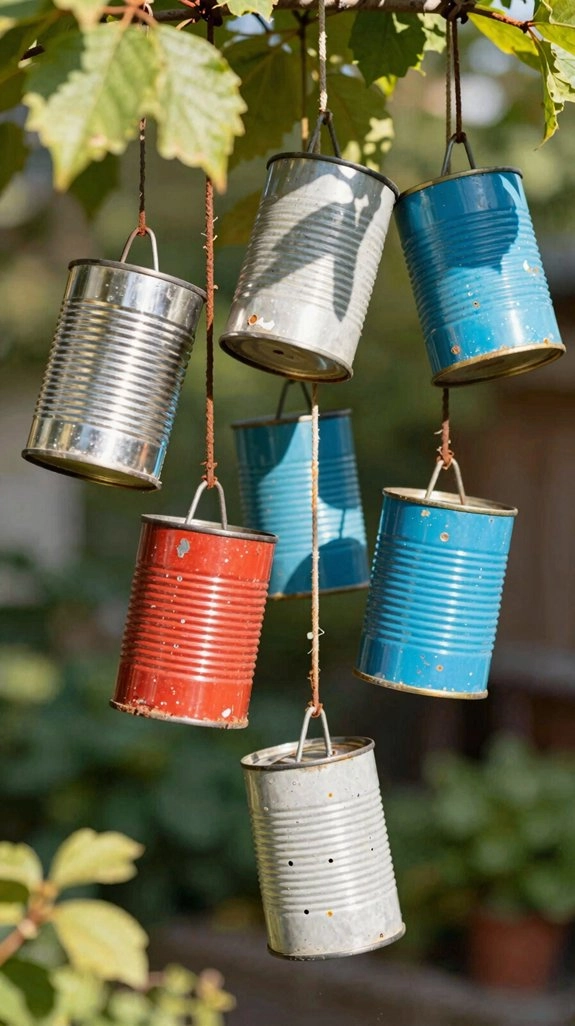
You’ll need clean, dry tin cans, thin metal scraps or punched strips, plus wire or strong hanging line, and honestly, that’s a pretty low-cost start!
Punch evenly spaced holes, smooth any sharp edges, then hang your chime pieces at different lengths so they can tap together in the breeze without sounding like a kitchen drawer full of forks.
For a fun twist, punch star or pattern holes in the can walls and add LED tea lights, so your wind chime can glow and sway at the same time—fancy, but still easy!
Tin Can Chime Materials
If you want your tin can wind chimes to look cute and actually make a little music, start with 2 or 3 cans in different sizes, like coffee cans and soup cans, because that mix gives you a nicer sound and a fun layered look. Great for your porch crew, too!
- Cut your cans into chime shapes, then flatten and smooth every sharp edge.
- Add bells or jingle bits inside, then use outdoor decoupage sealing so the design stays bright.
- Use reinforced can handles if you want extra strength for twine or cord.
Quick, cheap, and cheerful—your recycle stash just joined the neighborhood!
Assembly And Hanging Steps
Now that your tin cans are cleaned up, formed, and looking ready for their big comeback, it’s time to piece the whole thing together—this is where the scrap metal starts acting like actual music!
First, trim or square the edges safely, then punch even holes around the rim with an awl, so your drops line up nicely.
Next, thread twine or fishing line through top holes, or use a metal hook, and let the can swing freely.
Add bottle caps, beads, or metal bits below, using balanced spacing tips so nothing tangles.
Finish with a support line setup above, then seal sharp spots—easy, cheap, and delightfully noisy!
Make Tiered Tin Can Storage Caddies
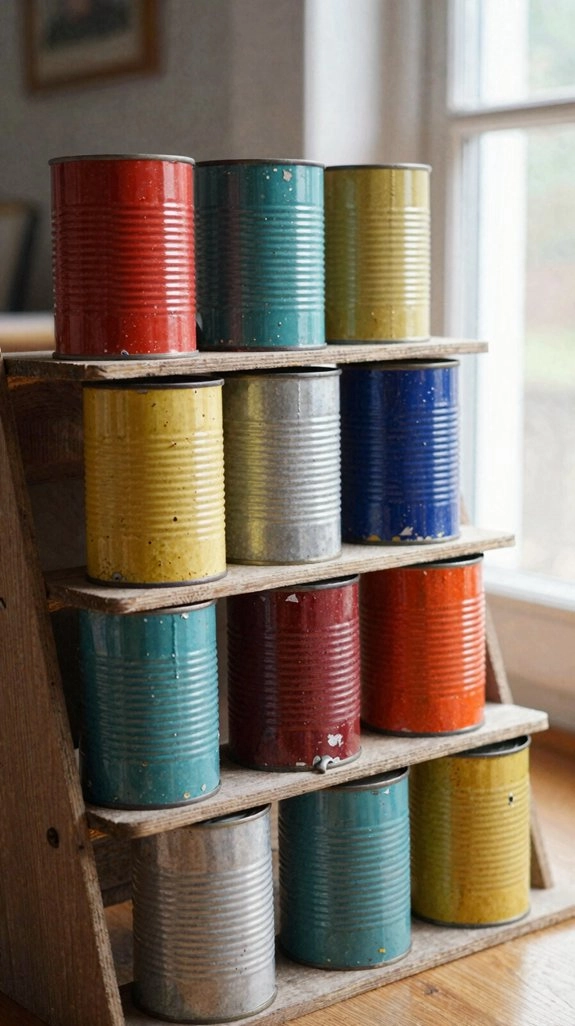
Stacking a few tin cans can turn a plain jumble of supplies into a neat little caddy that looks way more polished than it has any right to—pretty great for a recycled project, right? You’ll fit right in with other DIY fans when you make these tin can organizers for a quick workspace refresh.
- Stack two or three clean cans, side by side.
- Add lid or cardboard spacers so each tier sits level.
- Glue them, then let the base dry fully.
For pens, markers, or utensils, this build stays cheap and easy. If you’ll hold heavier tools, tuck pennies inside and reinforce joints while the glue sets.
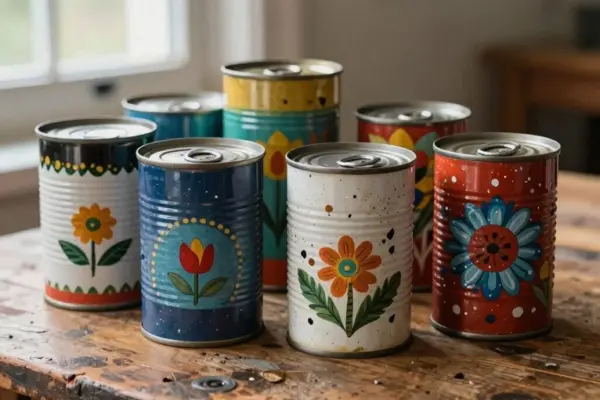
Decorate Tin Cans With Paint
Start by washing your tin can well, then give it a smooth coat of acrylic or spray paint, because that first layer sets the whole mood—bright, moody, or even faux silver metal!
If you’re after a rustic vibe, paint it first and add cute extras like cork bits or scrapbook paper after, then let everything dry fully so it doesn’t get clingy and mess up the finish.
Seal it with Mod Podge for a tougher top coat, and suddenly your plain can starts looking like a tiny store-bought treasure.
Paint Tin Can Finishes
With a little paint, an old tin can can go from “trash pile” to “wait, did you buy that?” in no time!
For a rustic look, remove labels and lids, paint, and let the first coat dry fully before layering.
- Mix acrylics for a silver metal look.
- Smooth joint compound on for faux-cement charm.
- Paint several cans the same color for a matching set.
Add twine, cork, or dowels only after the paint dries. For weatherproofing techniques, brush on Mod Podge as sealant protection, especially if you’ll display your can outdoors. It’s cheap, easy, and your crew will love the glow-up!
Creative Painted Can Designs
Tin cans can put on a pretty serious costume once you bring paint into the mix! First, peel off labels and lids, then prime the surface so your colors stick like they belong.
You can brush on acrylics for bold color blocking, or blend silver tones for a cool metal look that feels a little stylish.
Want rustic charm? Start with white or brown, then layer scrapbook paper, cork, or Mod Podge for texture decoupage.
For a cute seasonal twist, paint a white base, add polka-dot paper, and seal it all with Mod Podge. Cheap, easy, and surprisingly polished!
Use Decoupage on Tin Cans
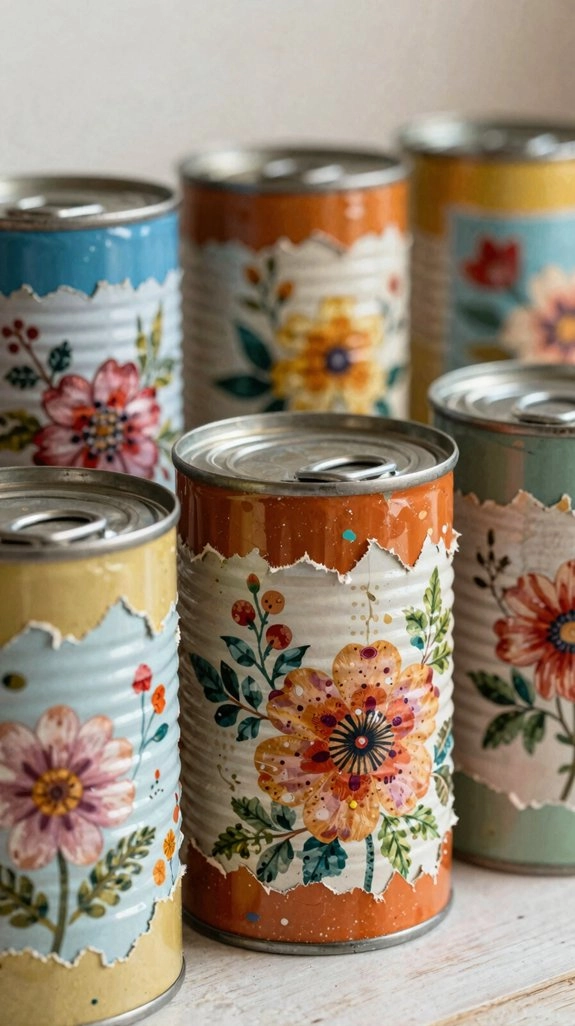
Once your empty can is clean, dry, and sanded smooth, you’re ready for the fun part—decoupage! You’ll fit right in with this cozy craft crowd, and it’s easier than it looks.
- Cut scrapbook paper, napkins, or map pages to size.
- Brush on a thin coat of Mod Podge, then press the paper down.
- Do bubble smoothing as you go, then add tin can sealing coats.
Let each layer tack up before the next one, so the edges stay put.
Finish with a final coat and full drying.
Inexpensive, beginner-friendly, and charming—hello, grandma-core magic!
Add Cork Feet and Handles
If you want your tin-can project to look polished and stay put, cork feet are a tiny upgrade that makes a big difference! Cut small cork pieces, glue them to the bottom with hot glue, and you’ve got scratch-free stability in minutes.
For a carry-friendly grip, add wine corks or drawer pull handles to opposite sides, and your can suddenly feels custom-made.
If you’re making a coaster, organizer, or planter, try corkboard on the base for that extra-fancy finish.
Weatherproofing tips? Seal the cork and glue with a clear topcoat so your creation lasts longer, indoors or out.
Make Rustic Farmhouse Tin Can Decor
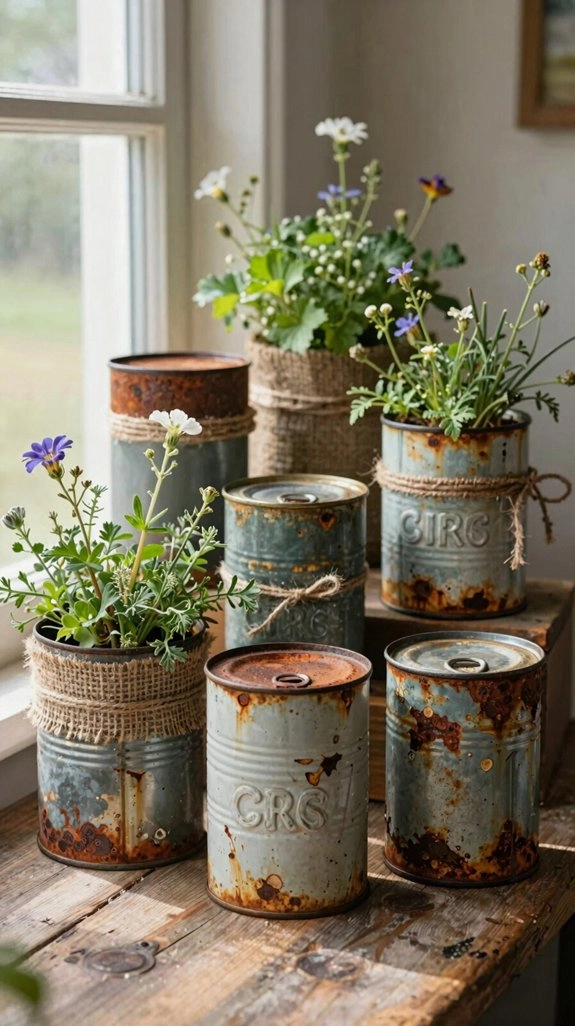
For a cozy farmhouse look, you don’t need stylish supplies—just a plain tin can and a little creativity! You can join the cozy crew with easy upcycling tips that feel friendly and fun.
- Wrap corrugated craft paper around the can, glue it, and get a weathered look fast.
- Add rustic colorways with scrapbook paper, then seal it with Mod Podge for a sturdy finish.
- For the wow factor, coat it with joint compound, smooth it, dry it, then paint it.
If you want a planter, drill drainage holes first. Even tiny cans can look charming!
Turn Tin Can Lids Into Projects
Once you pop off tin can lids, you can turn them into tiny décor accents or handy organizers, and yes, they’re great for quick plant markers and desk or craft-room storage!
Just smooth or cover the sharp edges first, then paint, decoupage, or dress them up with scrapbook paper, lace, or ribbon so they match your style.
If you want a fun little surprise, you can even glue lids onto bigger can crafts for a layered look that feels polished, quirky, and way more expensive than it is!
Lid Removal Basics
A tin can lid doesn’t have to end up in the trash, and that’s where the fun starts! When you begin customizing can lids, remove the lid first so you can work on the base cleanly. Watch safe sharp handling, because edges can surprise you.
- Make coasters with the can body, then drill holes later if you’re planting.
- Save the lid for a plant marker or mini organizer tag.
- Prep the surface now, so painting or Mod Podge sticks better.
Start simple, stay careful, and you’ll turn one can into a tiny decor win.
Safe Edge Finishing
Because tin can lids can come back as handy little project pieces, you’ll want to tame those sharp edges before you turn them into anything cute!
Start with Tool safety checks, then file or sand the rim until it feels smooth, and clean the lid so paint or Mod Podge sticks evenly.
For a coaster accent or organizer detail, this small prep keeps your hands happy and your finish neat.
Recycled material tips: if the metal allows, fold or crimp the edge back for extra safety.
Drill or punch holes? Deburr both sides.
Give it one last feel before use—snags don’t belong here!
Lid-Free Project Ideas
Ready to turn those lid-free tin cans into something fun? You can make cute pieces your crew will love, and they’re cheap, too! Try these:
- Upcycled storage: paint a can, add pennies for weight, then seal it for desk clutter.
- Spring planter: drill bottom holes, fill with soil, and enjoy fresh herbs.
- Rustic embellishments: cover a can with paper or joint compound, then smooth, paint, and top-coat.
Want a little wow? Punch twinkly patterns, drop in a light, and you’ve got a lantern. Finish with Mod Podge, and your can’s ready for shelf pride!
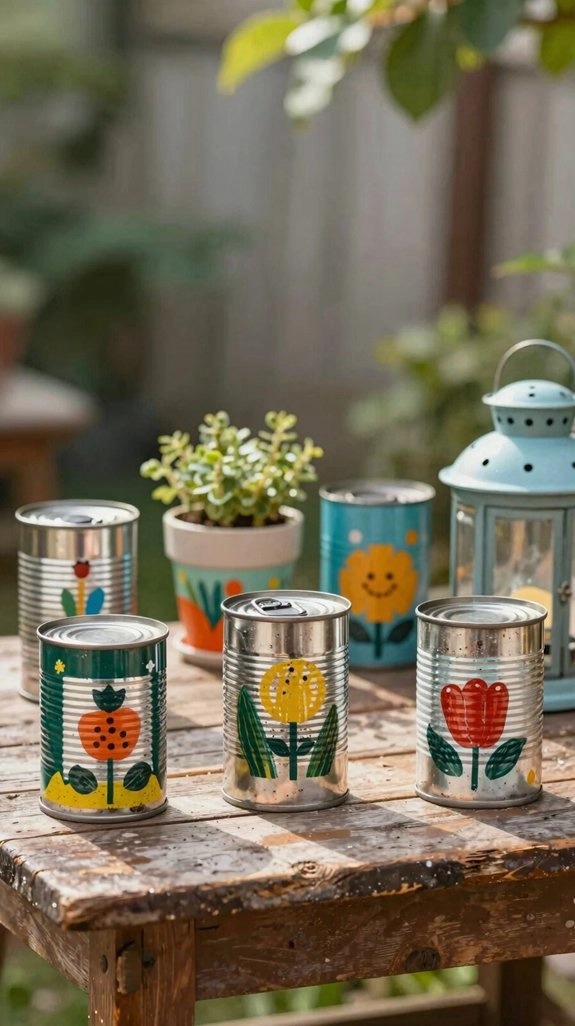
Create Garden Decor From Tin Cans
Once you start looking at tin cans as tiny garden helpers instead of trash, the ideas get fun fast!
With tin can reuse, you can make budget friendly crafts that fit right in with your plants and patio.
For live planters, poke drainage holes, then paint or wrap them for a cute finish.
Want a rustic vibe? Add corrugated craft paper for a faux metal look, or smooth on plaster for a cement-style pot.
For a taller accent, glue on dowels, then fill with foam.
Save the tiniest cans for LED tea lights, and wow, your garden glows!
Make Kid-Friendly Tin Can Crafts
Tin cans can do more than brighten up the garden, they can also turn into super fun crafts kids actually want to make! Safety first: you’ll want adult supervision for sharp lids and edge finishing, then grab kid safe tools and let the fun begin.
- Paint or decoupage clean cans into pencil cups—cheap, easy, and very “mine!”
- Make coaster stacks with pennies, cork bits, and Mod Podge, then seal them for school desks.
- Punch twinkly lantern patterns with an awl, or wrap cans in fabric and ribbon for art supply holders.
You’ll get cute results, and kids’ll feel proud creating them together!
What You’ll Need to Get Started
A little can-do kit makes these projects way easier, and it doesn’t take much to get started!
Your starter supply checklist should include clean, dry tin cans, paint, Mod Podge, hot glue, scissors, and whatever finish fits your vibe.
If you want planters, add a hammer or drill for drainage holes.
For cozy decor, gather corrugated craft paper, scrapbook pages, faux leather, or fabric strips.
Then wrap or decoupage the can.
Don’t skip surface prep tips: wipe cans well, then seal painted spots so they don’t chip.
Ribbon, twine, cork feet, or a few pennies can add charm, weight, and a polished wow!
Prep, Cut, and Clean Cans Safely
Start with a clean slate, and your can crafts will thank you! First, strip labels, scrub off sticky bits, and wash each can well, so paint and Mod Podge stick smoothly.
That’s smart Eco friendly sourcing, too—reuse what you’ve got!
- Set up a safe workspace setup with gloves and eye protection.
- Cut carefully, then smooth or cover sharp rims.
- If you use a lid, detach it early and file the edge.
Need drainage holes? Drill or hammer them, then deburr the bottom. Let cans dry fully before paint, wraps, or plaster, and your crew will love the neat finish!
More Recycling Bin Crafts to Try
Once you’ve got a few clean cans ready, the fun really starts, because these little leftovers can turn into surprisingly cute decor!
Try choosing cardstock wraps or geometric scrapbook paper, hot-gluing them on, then sealing with Mod Podge for a neat, durable finish.
Want a softer vibe? Use corrugated paper and paint it for a fake metal shine.
For a cozy faux-cement look, spread on joint compound, let it dry, then paint and seal it.
Need lights?
Punch tiny patterns for twinkle jars, and don’t forget adjusting can size, adding simple embellishments, and creating seasonal themes.
Keep drainage holes for plants!