13 Stepping Stone Walkway Ideas — Plus How to Lay Them Right
- 13 Stepping Stone Walkway Ideas — Plus How to Lay Them Right
- Key Takeaways
- What Stepping Stone Paths Do Better Than Any Other Walkway Type
- 13 Design Styles That Work in Any Yard
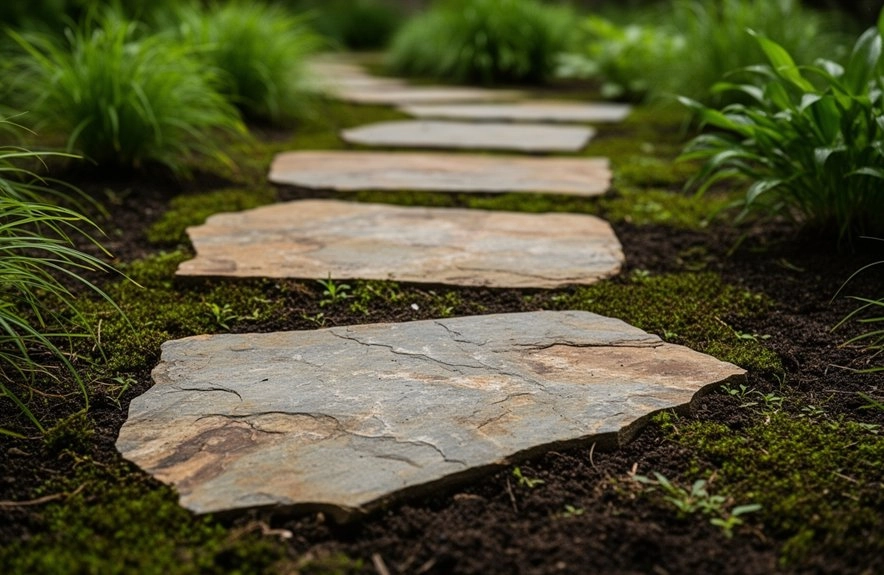
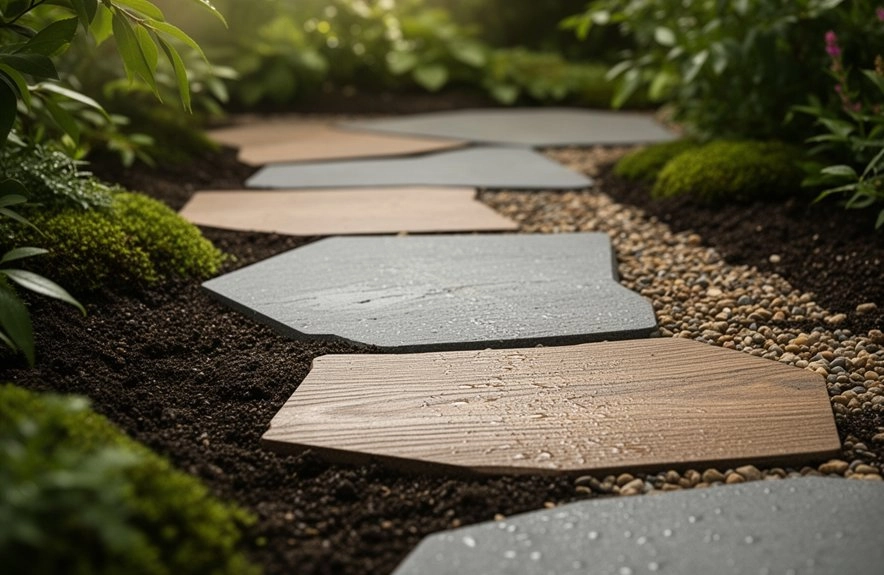
- Irregular flagstone path
- Concrete circle steppers
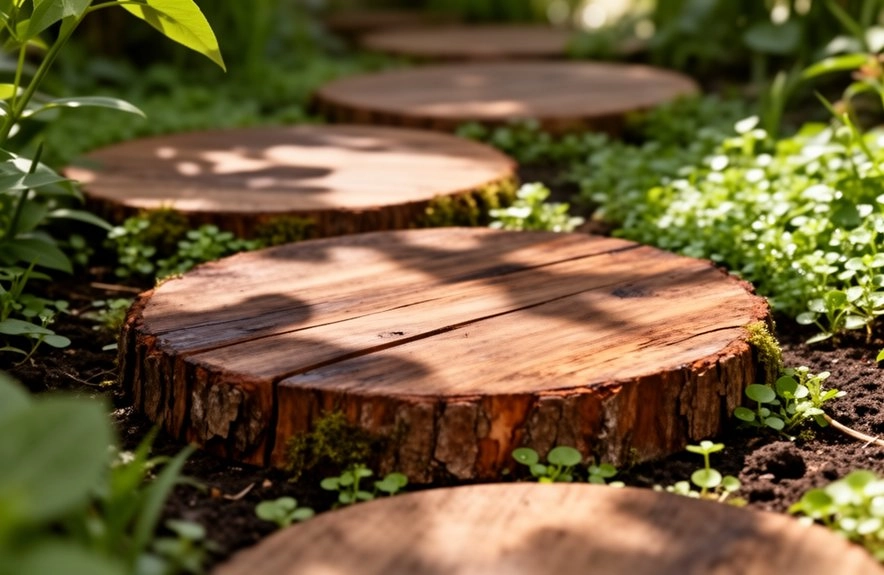
- Timber slice rounds
- Moss-filled stone joints
- Grass-set flat stones
- Pea gravel infill with pavers
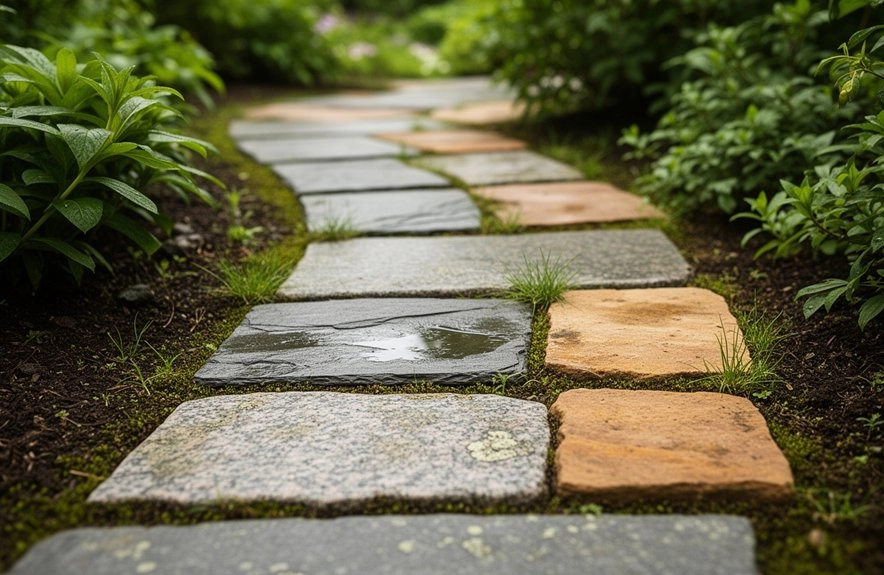
- Slate tile steppers
- Reclaimed brick steppers
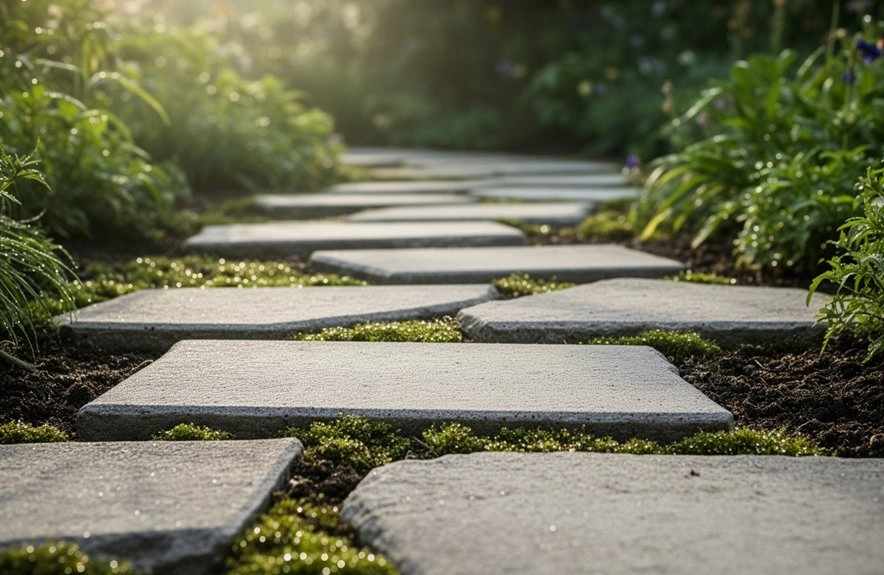
- Geometric concrete slabs
- River rock bordered path
- Mixed stone and gravel
- Raised stepping stones
- Illuminated night-path stones
- Choosing Your Material — How Each One Holds Up Over Time
- Natural stone
- Concrete pavers and cast stone
- Timber and wood rounds
- Recycled and composite options
- Spacing, Sizing, and Path Layout Before You Touch the Ground
- How to Install a Stepping Stone Walkway That Won't Shift or Sink
- Site prep and excavation
- Base layer and compaction
- Setting depth and leveling
- Infill and edge finishing
I love how stepping stones give you a path without turning the yard into a construction site. You can use 2-inch concrete pavers, 2-inch flagstone, timber rounds, or reclaimed brick, then set them on packed sand or 2–4 inches of gravel. Keep tops just proud, tilt for drainage, and leave 18–24 inches between adults’ steps. I’ve fixed enough wobbly stones with my family to know the details matter, and the next bit gets into the fun part.
Key Takeaways
- Choose durable materials like 2-inch concrete pavers, natural stone, slate, timber rounds, or reclaimed brick for the look you want.
- Mark the route first, then excavate to stone thickness plus 1–2 inches and compact a sand or gravel base.
- Space stones about 18–24 inches apart for adults, 12–18 inches for kids, and keep paths 36–48 inches wide.
- Set stones slightly proud of grade, tap level, and maintain a gentle slope for drainage to prevent puddles.
- Finish with sand, gravel, moss, or groundcover between stones, and reset or reseal them as they settle.
What Stepping Stone Paths Do Better Than Any Other Walkway Type
I’ve always liked how stepping stone paths do a few big jobs better than almost any other walkway. You get low impact routing, so you can guide feet where you want without ripping up the whole yard. That means less digging, less material, and real maintenance benefits.
The spaced stones let grass, gravel, or groundcover fill the gaps, so your yard still feels open and friendly. I’ve seen a simple 1/4-inch slope keep puddles away after rain, and my family loved how the path felt cozy, not bossy. You can reset each stone as it settles.
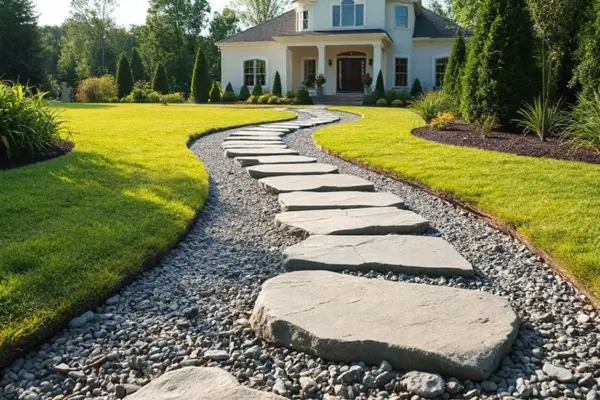
13 Design Styles That Work in Any Yard
Once you know how stepping stones can guide traffic without taking over the yard, the fun part is choosing a style that fits your space. I’ve seen every yard glow a little brighter when the path feels like it belongs.
- Curved, meandering stones suit organic curves and soft planting beds.
- Straight 12×24 pavers feel crisp and orderly.
- Mixed slabs with gravel save money and drain well.
- Grass-infill or moss looks cozy, almost storybook.
- Wide concrete slabs show modern minimalism with calm, clean lines.
My family likes the style that matches the house, because no one wants a path that acts like it’s the boss.
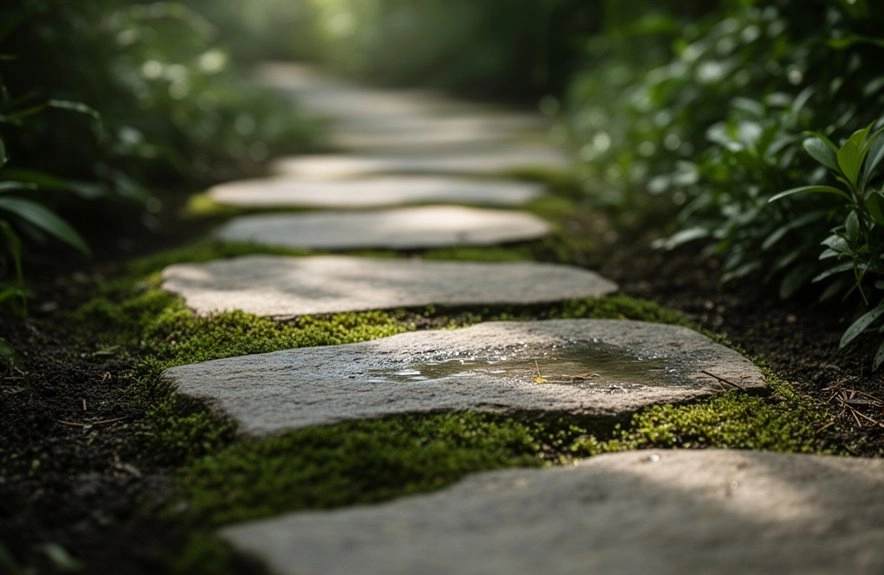
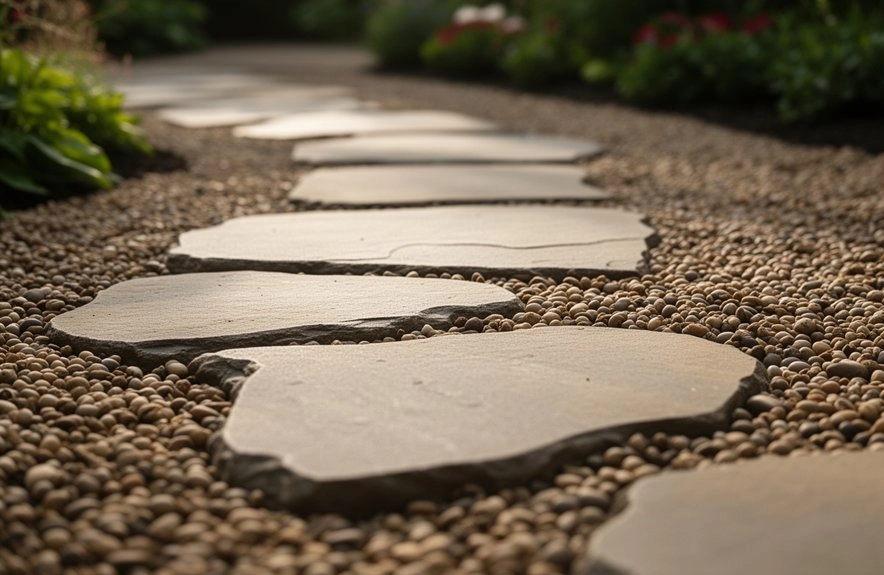
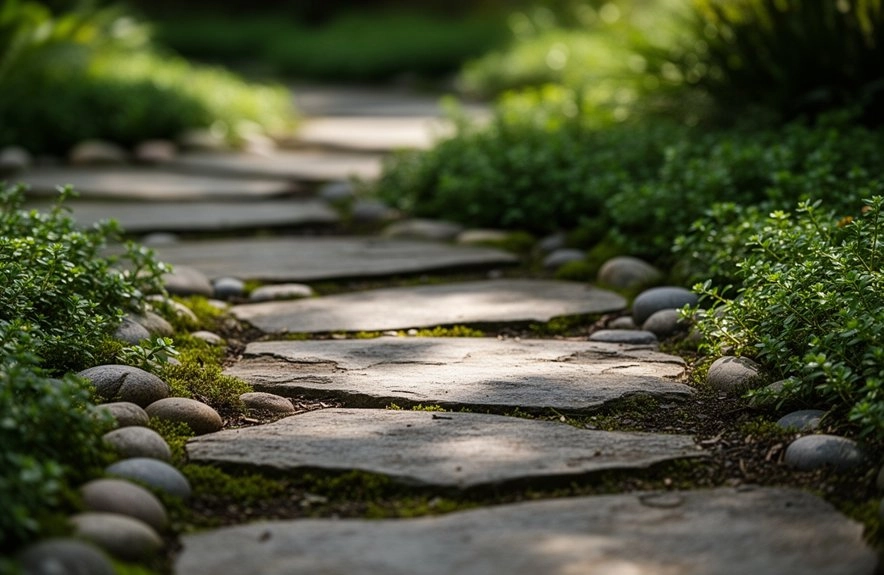
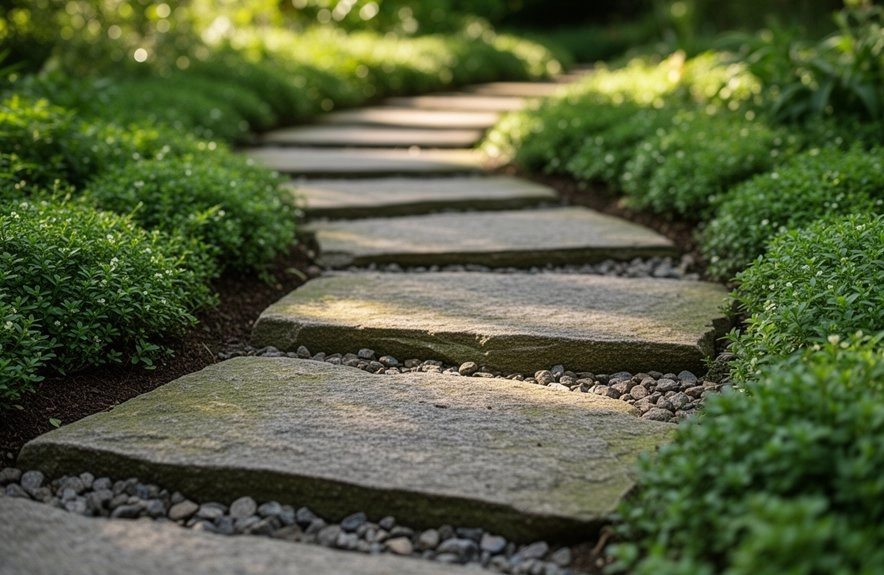
Irregular flagstone path
An irregular flagstone path has a charm that straight lines just can’t fake. You’ll fit 1.5- to 3-inch stones in a freeform sweep, and it feels like you belong in the garden, not just passing through.
I’ve seen family feet find the 12-to-24-inch spacing easy, with 12 to 18 inches working better for kids and their tiny thundersteps. Dig 2 to 4 inches, add a packed inch of sand or crushed gravel, then set each stone a hair proud.
I like jointing sand, moss, or low groundcover for natural mulching and seasonal color. Keep a gentle slope for drainage.
Concrete circle steppers
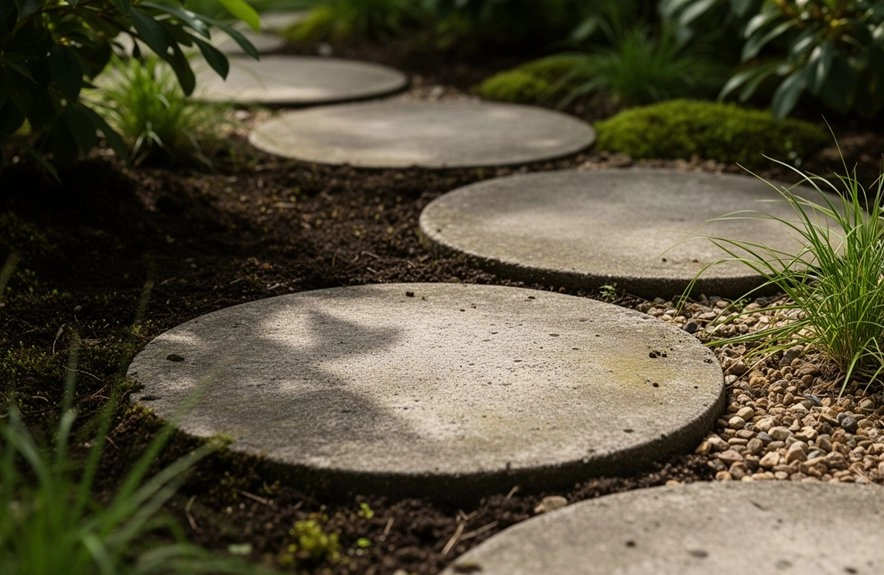
- Set 18–24 inches apart for adults.
- Use 12–18 inches for kids.
- Test the curve with a garden hose first.
- Dig to stone depth plus 1 inch.
- Bed each slab on compacted sand or gravel.
I’ve done this with my family, and it’s oddly satisfying. Keep up concrete maintenance, check level, and leave gaps for grass or gravel.
Timber slice rounds
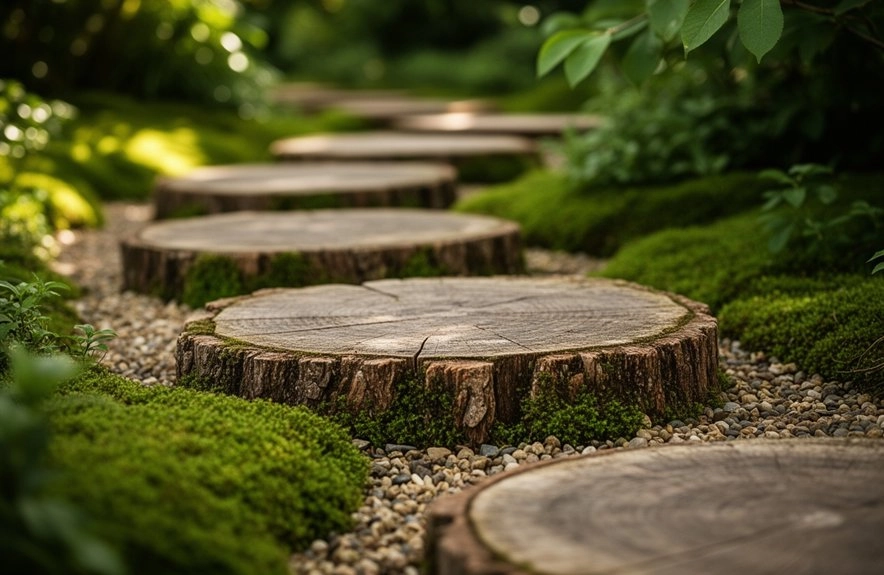
Pick rounds 6 to 24 inches wide and at least 1.5 inches thick. I set mine on compacted sand or crushed gravel, or on two concrete pavers for bigger pieces. Space them 18 to 24 inches apart, and tilt them slightly so rain slips off.
For preserving techniques, seal faces and edges with a penetrating exterior wood preservative. Do seasonal maintenance yearly; my family thanks me later.
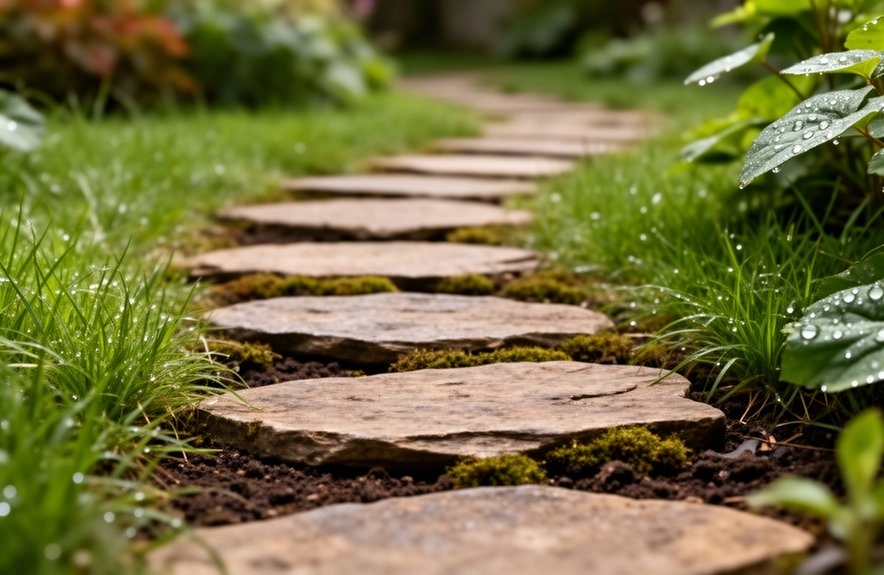
Moss-filled stone joints
Tucking moss into stone joints can turn a hard walkway into something soft and a little magical, and I’m honestly a fan. You can make it feel like your own little secret path.
I’ve had the best luck in shade, with damp, slightly acidic substrate and joints under 2 inches. Try moss transplantation with Irish moss or Bryum plugs.
- Rake out loose grit
- Add 1/4 inch sand or fine soil
- Mix in a touch of peat
- Mist daily for 4–6 weeks
- Keep traffic light until rooted
My family calls it “tiny forest mode.”
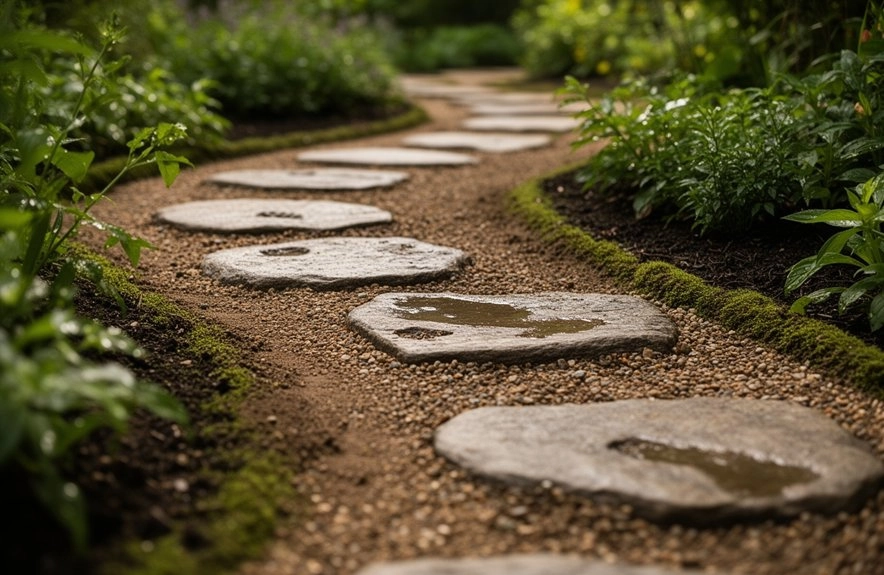
Grass-set flat stones
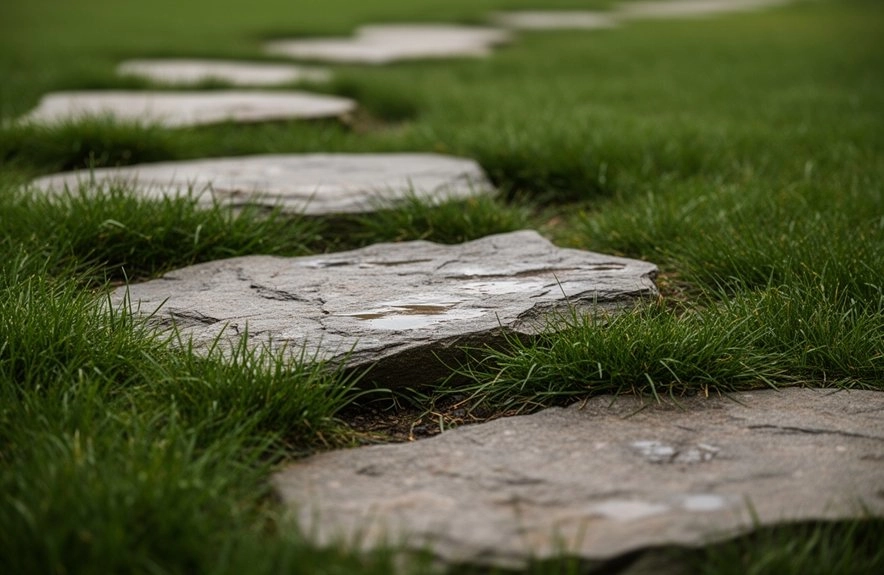
Stepping stones in grass can feel like a little invitation to wander, and I’ve always liked that kind of path. I pick 2-inch-thick slabs, or I set thinner ones on 12×12 concrete pavers so they don’t crack when my family barrels across them.
I lay stones 18 to 24 inches apart, then test the stride with my own boots. After cutting the turf, I dig a sand bed, set each stone a hair proud, and keep the slope gentle. Then I tuck in saved sod, use grass friendly edging, and stay on top of seasonal maintenance.
Pea gravel infill with pavers
If you like the grounded look of flat stones in grass, pea gravel can give your pavers a crisp, easygoing finish that feels a little more polished but still friendly underfoot.
I’ve found 1/4–3/8-inch gravel works best, especially when you set pavers on a compacted 1–2 inch base. My family likes the tidy look, and I like the drainage management.
- Lay groundcover fabric first
- Set pavers a bit high
- Sweep in gravel joints
- Keep a 1/8–1/4-inch slope
- Plan seasonal maintenance and top-ups
Skip polymeric sand; it’ll gossip with the gravel.
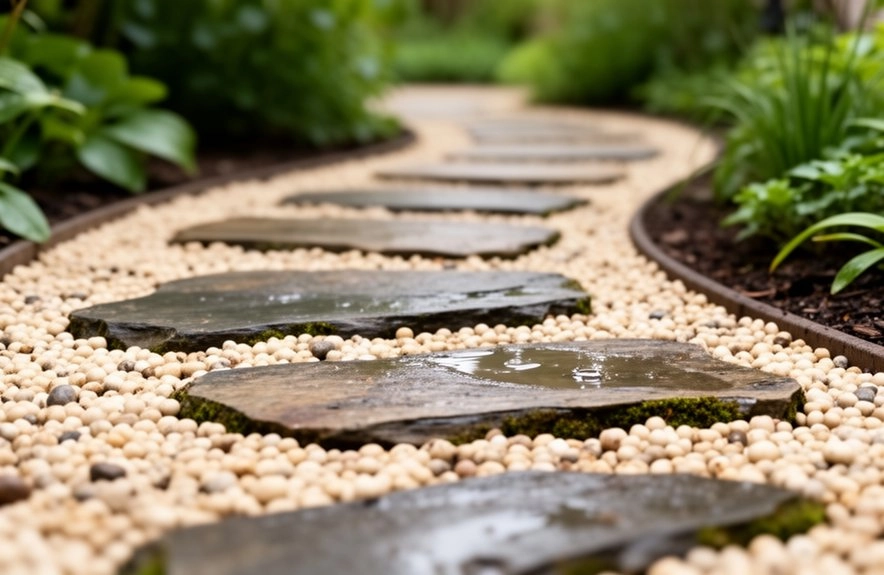
Slate tile steppers
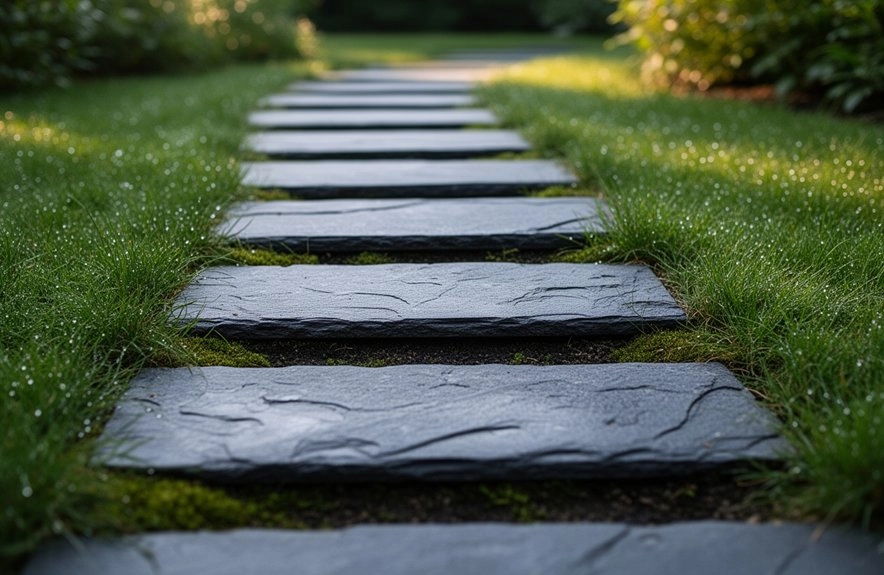
I set mine 18–24 inches apart so my family can walk easily, though my youngest still does the hopscotch thing. Use polished or cleft textures, custom edging, and a 1-inch sand bed in a shallow dig.
Tilt each tile slightly for drainage, tap with a rubber mallet, and seal if the supplier says so.
Reclaimed brick steppers
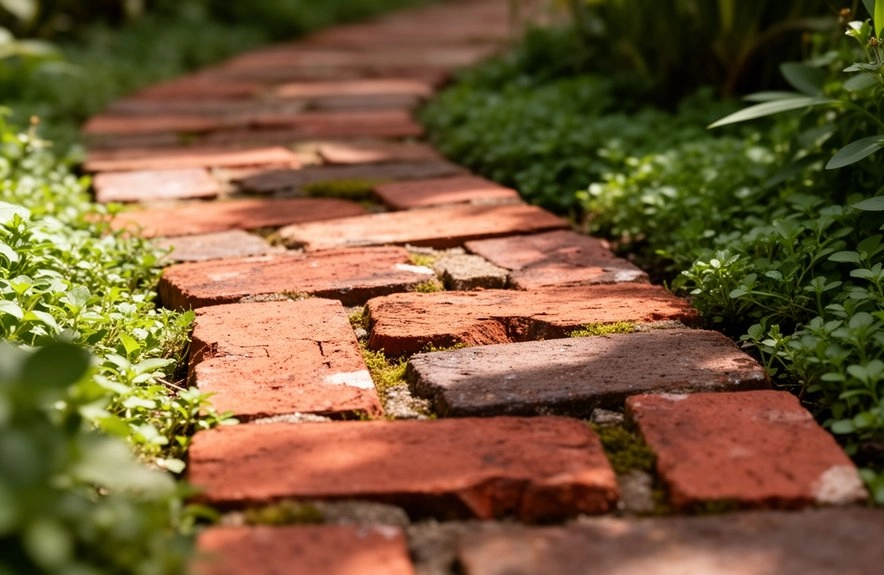
When you choose historic sourcing, you get reclaimed texture that makes your yard feel like the friendly house on the block.
I like to set thin bricks on compacted sand or over two stacked 12×12 pavers. Try this:
- 18–24 inches apart
- running bond or herringbone
- 2–3 inches dug out
- sand or gravel underfoot
- moss, mulch, and lights
My kids call it “the cozy trail.”
Geometric concrete slabs
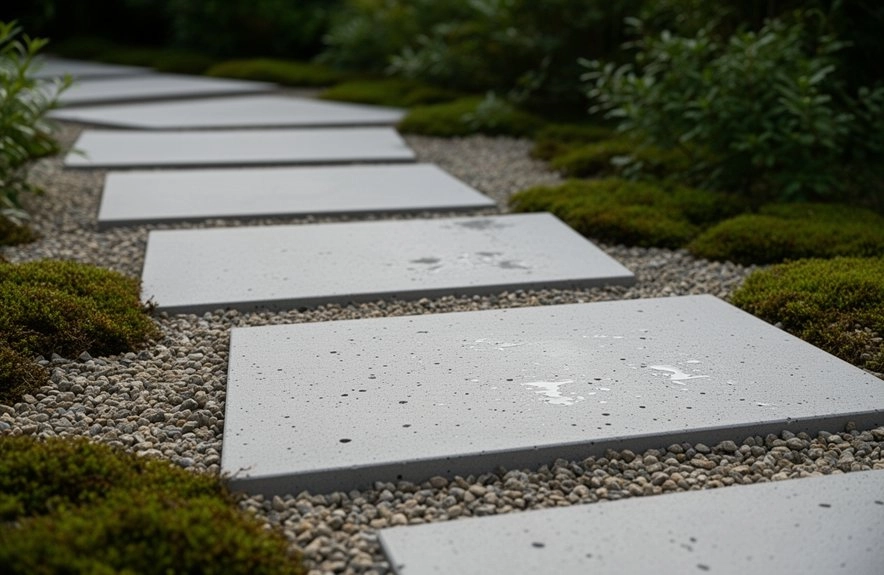
I like 18 to 24 inches on center for adult steps; kids do better at 12 to 18. Set precast pieces 1½ to 2 inches thick on sand, or thicker slabs on 2 to 4 inches of #57 gravel. Keep them flush, leave narrow joints, and watch for seasonal staining like a hawk.
River rock bordered path
If you like the crisp look of those slab walks, river rock can make the whole path feel finished instead of just placed. I’ve watched my family’s path go from “nice idea” to “wow, this belongs here.” Use 2–4 inches of 1–3 inch rounded stone, set a little back from the edges, so feet and mowers don’t kick it loose.
- Add terrain fabric
- Use #57 crushed gravel if drainage’s tricky
- Match colors to your stones
- Keep spacing at 18–24 inches
- Rake and weed for border maintenance
That edge even helps waterwise planting look neat, not thirsty.
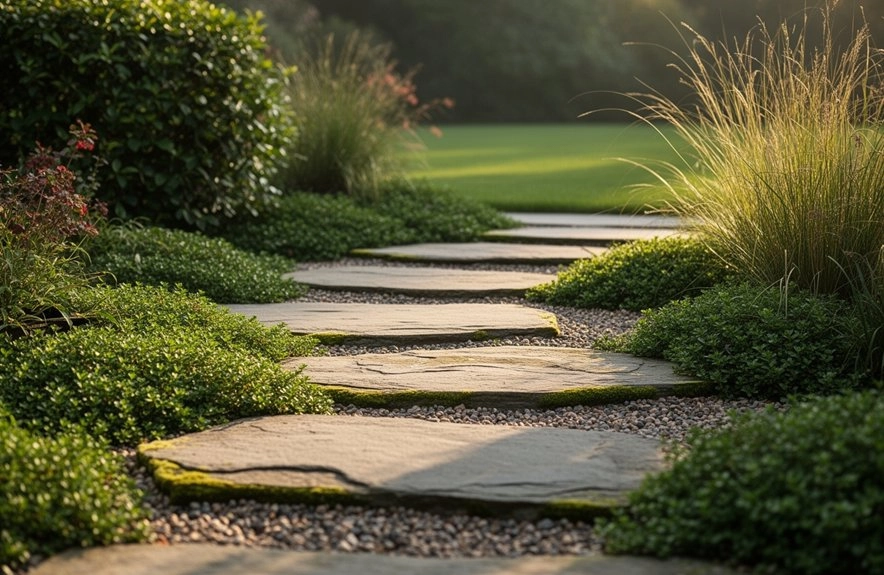
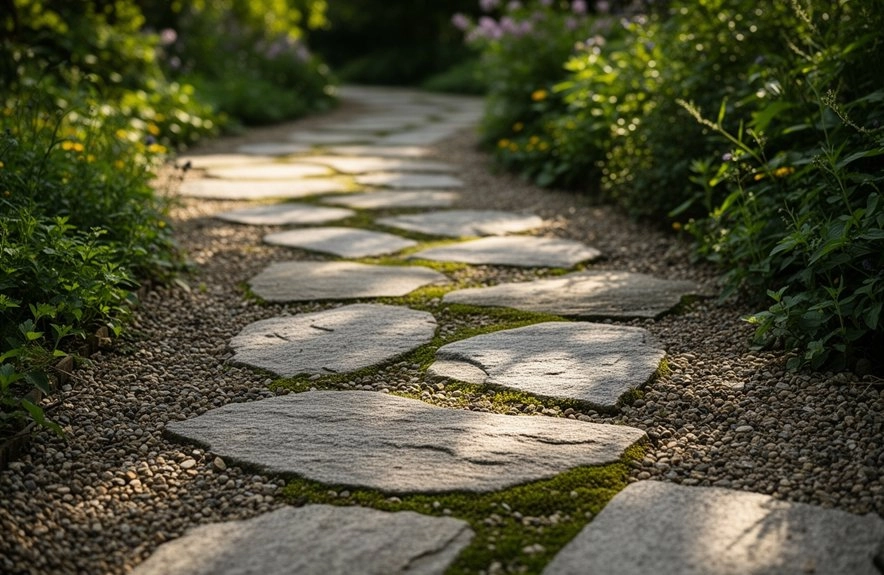
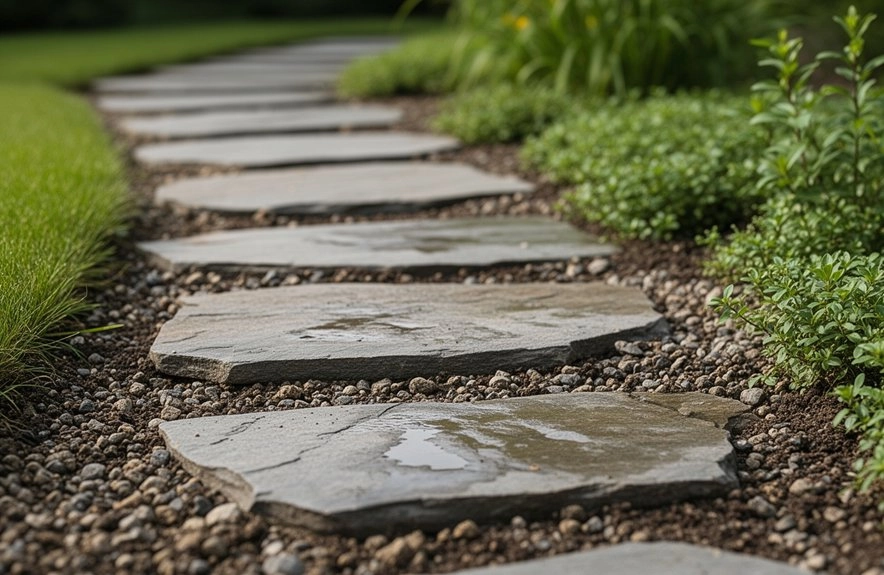
Mixed stone and gravel
Mixing stone and gravel gives you that polished, easy-to-walk path without making the whole thing feel stiff.
I’ve set 18–24-inch-spaced stones with 1–3 inches of 3/8–3/4-inch decorative gravel, and it works.
You dig each spot for the stone, plus 1 inch of compacted sand over crushed stone or tamped #57 gravel, so the tops settle flush.
I always add groundcover fabric, then use stabilizing gravel and permeable edging to keep everything tidy.
A 2–3 inch gravel band helps stop grass creep.
My family likes the “fancy but not fussy” vibe, which honestly feels like a win.
Raised stepping stones
When I want stepping stones to feel a little more special, I raise them just enough to give the path some presence without making it awkward to walk on.
I’ve found these tricks help you fit right in with a tidy, welcoming yard:
- Use two 12×12 pavers under thin slabs.
- Tuck hidden supports back from the rim.
- Dig down so tops sit flush or a hair high.
- Keep a 1/4-inch-per-foot slope for drainage.
- For thick stone, add small blocks for airflow drainage.
I wait before gluing, because rocks have opinions.
Illuminated night-path stones
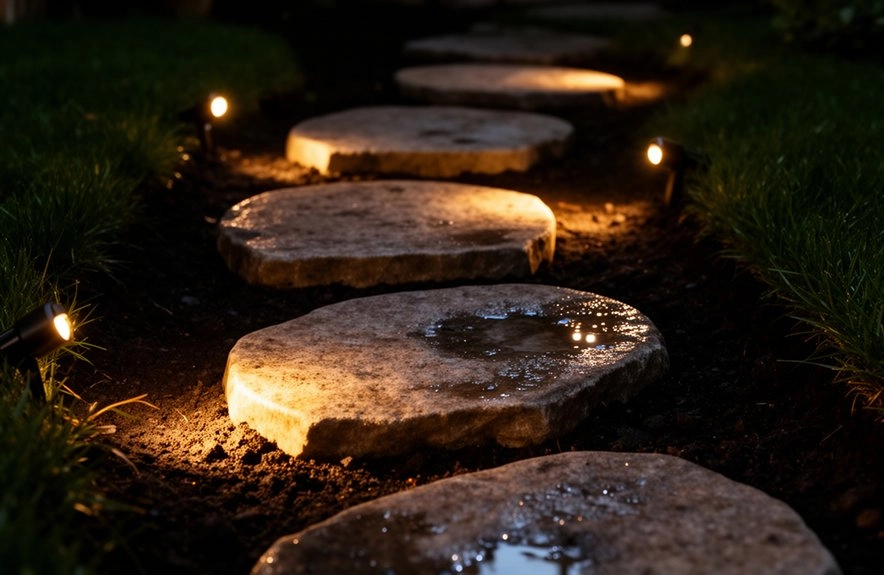
At night, I like stepping stones that do more than just sit there looking noble—they actually help you find your way.
You can tuck IP67-rated LED pucks into a 1/2- to 3/4-inch pocket under each stone, then run the wire through PVC to a 12V transformer.
I keep lights 6 to 10 feet apart, or alternate lit and unlit stones, so my family sees the path without feeling like we live on a runway.
Warm-white 2700–3000K LEDs, about 100–300 lumens, feel cozy.
Solar modules work too, and waterproof connectors plus silicone keep everything dry.
Choosing Your Material — How Each One Holds Up Over Time
I always start with the material, because a stepping stone path can look charming on day one and then get cranky after the first hard winter. When you and your crew choose concrete, expect tidy shapes and lower cost, but give them smart maintenance schedules.
- Seal cast concrete every 3–5 years
- Use 2-inch slabs or support them well
- Pick gravel or sand joints for drainage
- Set turf joints slightly proud
- Watch weathering patterns after freezes
My family’s favorite rule? If a stone wiggles, it’s voting for trouble. That little check saves you from bigger repairs later.
Natural stone
Natural stone is where a lot of my favorite paths start to feel timeless, because sandstone, limestone, slate, and granite bring real weight and character to a yard.
You’ll get years of use if you choose slabs at least 2 inches thick; thin ones can crack faster than a cookie at snack time. I like fairly smooth, flat pieces, since the stone textures feel steady underfoot.
Set them 18 to 24 inches apart, or 12 to 18 for kids. I excavate, add tamped sand or #57 gravel, and check each stone with a torpedo level. Good finishing techniques matter.
Concrete pavers and cast stone
I use 2-inch pieces for busy feet, because flimsy slabs crack faster than my patience on laundry day. Choose 12×12, 16×16, or 12×24 sizes.
- Set them 18–24 inches apart
- Dig out thickness plus 1 inch
- Use compacted sand or fine gravel
- Tap them level with a mallet
- Hide supports under thin slabs
You can also wet-mortar with durable finishes and hidden supports.
Timber and wood rounds
If you liked the tidy, repeatable look of pavers and cast stone, timber rounds give you a warmer, softer version of that same idea.
You can use cedar, redwood, black locust, or treated pine, because rot resistant species hold up better in the ground.
I set mine 18–24 inches apart for adults, a little closer for kids, and my family always notices the cozy feel.
Remove sod, add 1–2 inches of sand or crushed stone, and tamp it firm.
Set each round slightly high, seal the faces, and add drainage holes in larger pieces.
Recycled and composite options
Reuse has a nice rhythm to it. I’ve seen urbanite patterns turn broken concrete into sturdy, low-cost steps that feel right at home. Your family can love the mix of thrift and charm.
- Pick urbanite pieces 12–24 inches wide
- Aim for 1.5–3 inches thick, or support thinner slabs
- Try composite textures in 12×12 or 16×16 sizes
- Use recycled brick on compacted sand for a mosaic look
- Choose sealed deck boards for a warm, slip-resistant path
I like 2-inch usable thickness, and I keep drainage gentle. Your backyard crew gets style, savings, and fewer grumbles.
Spacing, Sizing, and Path Layout Before You Touch the Ground
After picking your recycled or composite stones, I always tell my family that the real magic starts before the first shovel hits dirt. Walk the route first, and use a hose or temp stones to follow your stride rhythm. Aim for 18–24 inches between centers, or 12–18 for kids who bounce like squirrels.
Keep the path 36 inches wide for one person, 48 for two. I mark spots with spray paint and mason line, then check visual sightlines from the porch and yard.
Choose large 16×24 stones for bold paths, smaller 12×12 pavers for neat edges, and keep spacing steady.
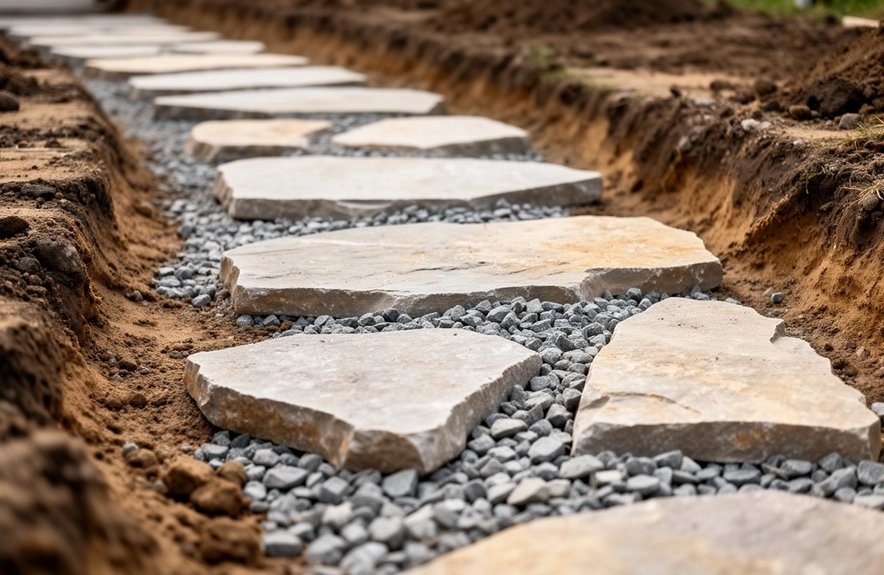
How to Install a Stepping Stone Walkway That Won’t Shift or Sink
Once the layout looks right, I dig each stone site to match the stone’s thickness plus 1 to 2 extra inches, which usually means a hole about 2 to 4 inches deep, and I pack the subsoil down hard so the ground doesn’t get any bright ideas later.
Then I:
- add 1 inch of coarse sand or #57 gravel
- set each stone a touch above grade
- check level with a torpedo level
- fill edges with compactible material
- use hidden pavers for thin slabs
These drainage strategies help my family’s path stay steady. With seasonal maintenance, yours can too.
Site prep and excavation
Before I ever move a shovel, I walk the route my family actually uses and mark the path with mason line or even a garden hose, because that’s how I keep the spacing comfortable and the curves from looking like a drunken snake. Call 811 first. Then cut around each stone with a sharp spade, lift sod onto a tarp, and keep it watered if you’ll reuse it.
Dig each hole 2–4 inches deeper than the stone. Add root barriers where roots wander, and use erosion control on slopes. Wear boots, gloves, and knee pads; your knees will thank you.
Base layer and compaction
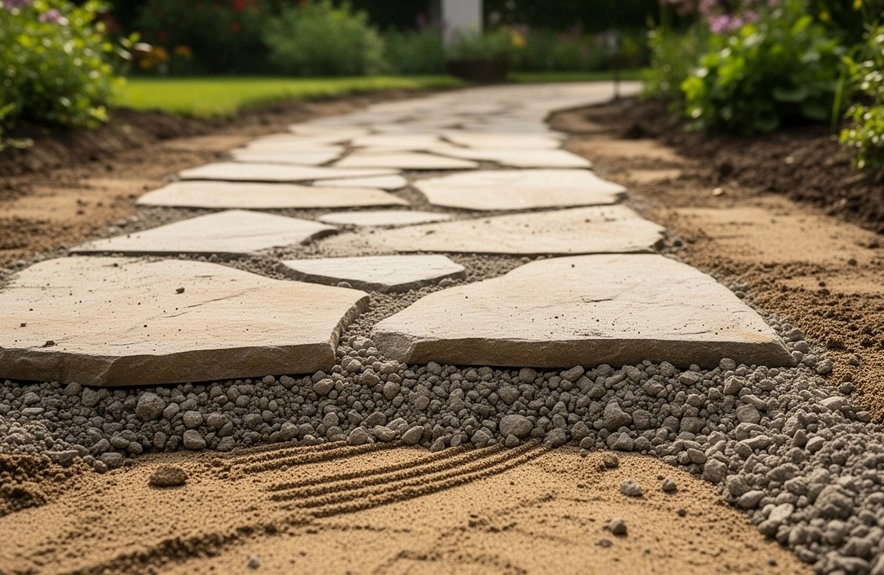
Now comes the part that makes the whole walkway feel solid: the base. I like to dig each spot to stone thickness plus 1–2 inches, then add a 1-inch bed of coarse sand or #57 gravel. My family jokes I’m making tiny stone nests, but the payoff is real.
- Tamp the base hard with a hand tamper.
- Use a flat board for tight corners.
- Set stones a touch high for drainage improvement.
- Pack sand around edges to stop wobble.
- Recheck with a torpedo level.
These compaction techniques help your path stay friendly underfoot, even after rain.
Setting depth and leveling
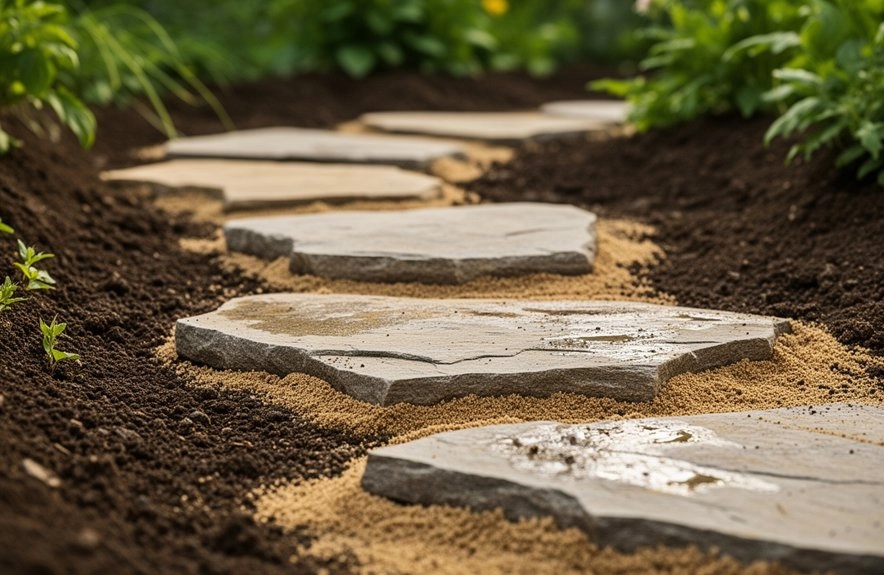
With the base packed tight, I move on to setting the depth and getting each stone level.
I dig each pocket stone-thickness plus 1 inch, then add a 1-inch stone bedding of coarse sand or #57 gravel. That little cushion keeps the slab from wobbling like a tired camp chair.
I use a torpedo level and make a gentle grade adjustment, about 1/4 inch per foot away from the house.
I set each stone 1/8 to 1/4 inch proud, then I tap, check, and smile.
In my yard, that’s the sweet spot, and my kids can see it too.
Infill and edge finishing
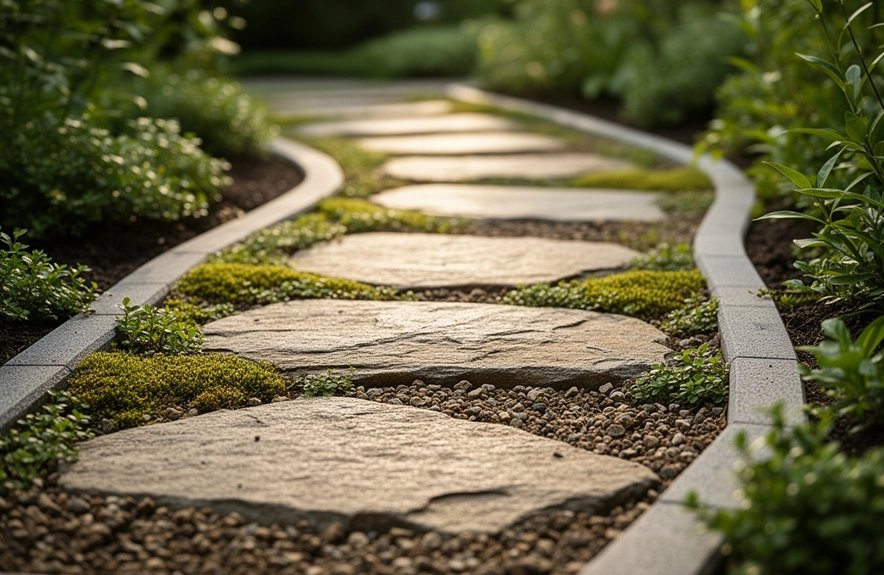
Once the stones are set and level, I move on to the part that makes the whole walkway feel finished: the infill and edge work. I tuck 1/4–3/8-inch crushed stone or coarse sand between stones, and it helps lock them, drain water, and slow weeds. My family likes these details; they make the path feel like home.
- Use topsoil and seed for grassy infill.
- Keep soil level with stone edges.
- Try polymeric sand for firmer joints.
- Install 4–6-inch edging, buried 2–3 inches.
- Finish with mulch, groundcover, or decorative rock.
That’s how rustic borders and seasonal plantings shine.